
A patch either disappears into the room or it announces itself forever. The failures homeowners call us about are always the same short list: ridges and tool marks that catch the light, cracks that reopen in the same line, patches that flash dull through fresh paint, tape that bubbles along a seam, and water stains that bleed back through in a month.
Every one of those means paying twice. The first payment buys the compound, the sanding and the paint day. The second buys all of it again, plus the labor to undo the first attempt. Here is what goes wrong, why it happens, and what the right move looks like before you start or before you sign.
Why plaster and drywall repairs fail the same ways over and over
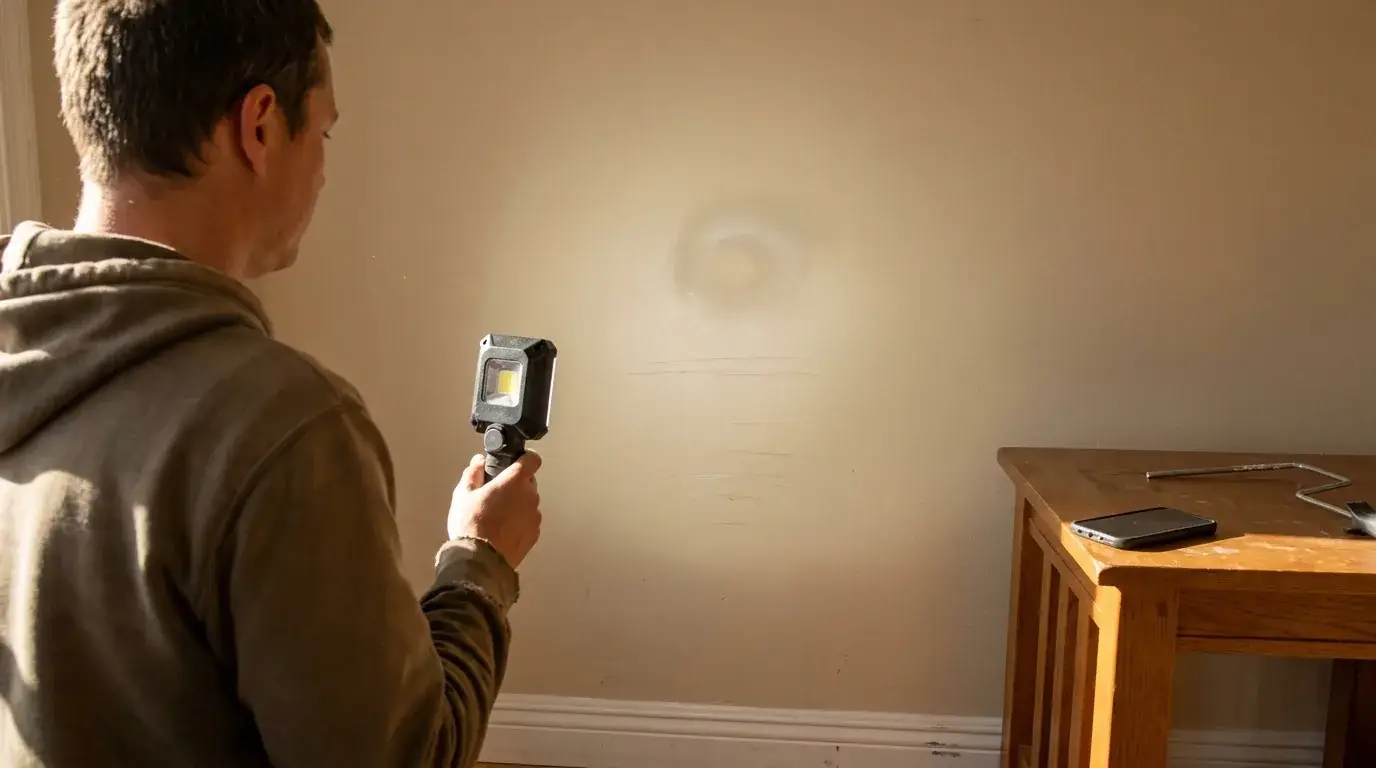
Repairs fail after painting because paint is the first coat that tells the truth. Compound dries dull and forgiving. Primer and paint even out the sheen, and suddenly every hump, sanding scratch and knife edge shows under a lamp at a low angle.
Underneath that, the pattern is short. People rush prep and bond new material to loose material. They reach for the wrong compound for the job. They patch a symptom while moisture or framing movement keeps working behind the wall. Then they overwork the repair with heavy mud and hard sanding to make up for it.
The visible problem is rarely the actual problem. Treat the wall as evidence, figure out the cause, and the finish takes care of itself.
Using too much compound at once
Bulging seams and raised humps under paint almost always start as one thick coat someone hoped would fill everything in a single pass. Thick mud shrinks unevenly as it dries, cracks in the center, and leaves a ridge that no amount of sanding flattens without cutting into the tape.
People do it because a wider, thinner coat feels like it is not doing anything. The fix is not more mud. It is more passes with less mud on each one.
- Pre-fill deep voids first. Setting-type compound is ideal here because it hardens quickly and shrinks less than regular joint compound. Family Handyman says that.
- First coat, 6 inch knife. Mix to a pudding consistency, and a little thicker for the final coats.
- Second coat, 10 inch knife, once the first is fully dry.
- Third coat, 12 inch knife, feathered well past the repair.
- Light sanding between coats only, enough to knock down ridges and tool marks.
At Precision Patch Pros the patch is feathered 8 to 12 inches out, two to three coats with sanding between, then primed and blended. That width is what makes the transition invisible to a side light. Tool marks left inside the feather zone are one of the most common reasons a finished wall still reads as repaired.
Over-sanding until the paper or tape is exposed
Sand too aggressively and you stop fixing the old defect and start making a new one. Under normal room lighting it shows up as a dished spot, a fuzzy halo around the patch, or a thin gray line where the tape edge is now sitting proud of everything around it.
It happens for one reason: people try to grind a heavy coat flat instead of recoating it. Coarse paper and a hard block cut through dried compound fast, then straight through the drywall face paper. Once that paper is fuzzed, it swells under primer and the patch flashes no matter how good the paint is.
The rework is real. Exposed tape means re-embedding tape. Fuzzed paper means sealing it, then two more skim coats and another sanding cycle, which is often a second day.
The right move: stop the moment the compound feels smooth to a bare hand. Not when it looks smooth. Sand with fine grit and a pole sander, keep pressure light near the edges. If you find a low spot, fill it rather than sanding everything around it down to meet it.
Skipping prep and patching over loose or damaged material
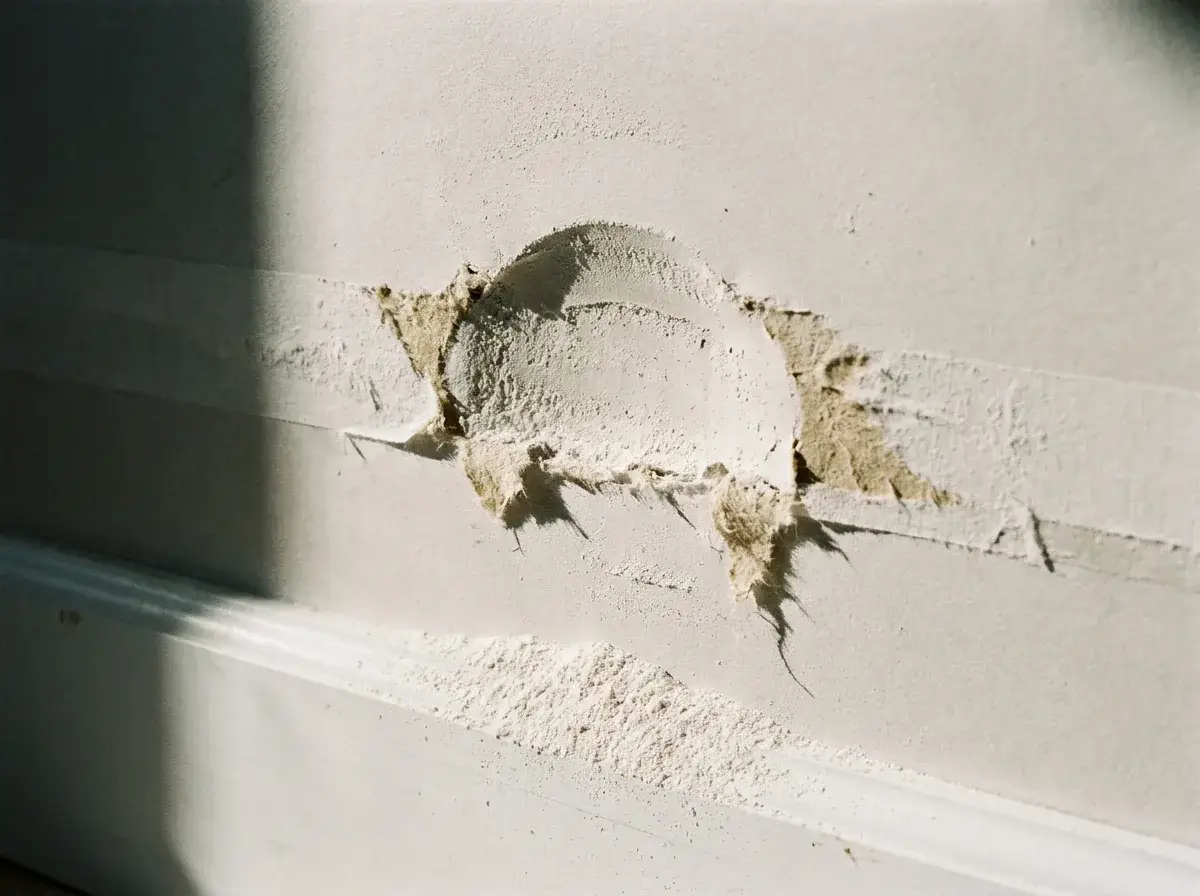
Stop patching and start cutting when the board itself is no longer solid. Mud only bonds as well as what it sits on, so a perfect finish coat over crushed gypsum is a repair with a countdown on it.
Cut back to solid material when you find any of these:
- Crushed or powdery gypsum core around a doorknob hit or a dented corner
- Loose or torn face paper that peels when you run a knife under it
- A hollow sound when you tap next to the damage, meaning the board has separated from the framing
- A crack that has been repaired before and returned in the same line
- Holes larger than 2 to 3 inches, where mud alone has nothing to bridge
Square the opening to straight edges and cut to sound material. Backer boards and a pre-fill are enough when the surrounding board is firm, the edges are clean, and the opening is small. That covers most plumber and electrician access cuts. They are not enough when the board around the hole crumbles under thumb pressure. Working around damage instead of removing it is how a two inch problem becomes an eight inch one six months later.
If you would rather hand off the diagnosis, you can send 2 or 3 pictures for a quote and get an answer back in 10 minutes, whether you are in Bakersfield, the Antelope Valley, Santa Clarita or the San Fernando Valley.
Ignoring leaks, stains, or soft spots before repair
Patch and paint over water-damaged drywall without stopping the source and the stain comes back. Usually within a few weeks, often with sagging and mold behind it. Stain-blocking primer hides the evidence. It does nothing to the water.
Paint first: the ceiling looks clean for a month. Then a ring returns, the patch softens, the tape lets go, and the repair zone is now larger than the original damage.
Fix the source first: the repair stays put and the ceiling stops being a topic of conversation.
The professional sequence is fixed. Stop the leak. Dry the area completely and confirm it with a moisture meter, then apply an antimicrobial solution before new drywall goes in. Remove the compromised board rather than trying to dry it in place. Then patch, texture match and paint. In one recent kitchen ceiling leak, the crew cut out the water-damaged section, hung fresh drywall, taped and floated the whole area and repainted the kitchen so no sign of the leak remained. Note that Precision Patch Pros does not offer leak detection, water extraction or mold remediation, so the plumbing or roofing fix comes first, from the right trade.
Getting tape, fasteners, or board thickness wrong
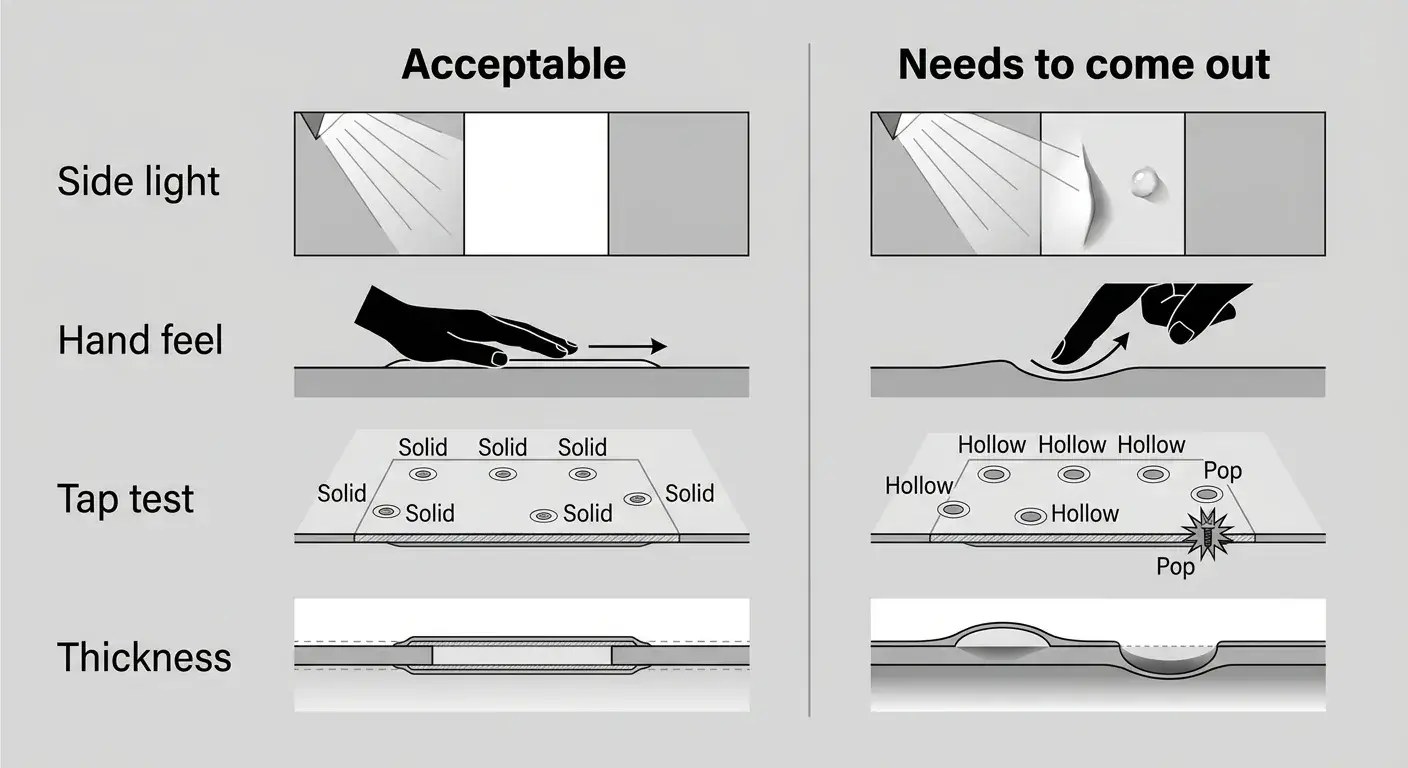
Three separate failures produce the same complaint (a seam or patch that bulges or pops after painting), and each needs a different answer. Sorting them takes about a minute with a light and your hand.
Tape failure shows as blisters or lifted edges along a seam. It comes from too little compound under the tape or tape pressed into mud that had already started to skin over. When embedding paper tape, the compound underneath should be smoothed to a consistent thickness of about 1/8 inch, enough that it squeezes slightly from the edges. Family Handyman states that.
Fastener movement shows as round bulges or small cracks at screw and nail locations. Mudding over a pop only buys a season. The board has to be pulled tight to framing with a new screw set an inch or two away, driven just below the surface without breaking the face paper.
Thickness mismatch shows as a patch that sits proud or recessed no matter how many coats go on. Measure the existing board before cutting the patch, with a caliper if you have one, because 1/2 inch and 5/8 inch look identical in a hole.
| Check | Acceptable | Needs to come out |
|---|---|---|
| Seam under a side light | Flat, no ridge or tool mark | Visible hump, tape line or blister |
| Hand over the patch edge | No step you can feel | A lip or a dished spot you can feel |
| Tap test around fasteners | Solid | Hollow, or a pop that reappeared |
| Patch vs wall thickness | Flush within a paper thickness | Proud or recessed enough to shadow |
If a patch fails two of those checks, another skim coat will not save it.
Why bad plaster repairs keep cracking or delaminating
Plaster fails at the bond, not at the surface. Remove only the plaster that is truly loose or delaminated from the lath, then reattach hollow but otherwise intact areas mechanically with plaster washers and screws before any cosmetic patching starts. Chiseling past the damage into sound plaster is how a hairline crack turns into a four foot demolition zone with new cracks radiating from every cut line.
Test by tapping. A dull hollow tone means the plaster has separated from the lath even if the face looks fine. If the lath itself is broken or rotted, that section gets replaced rather than re-bonded, because nothing holds to a substrate that moves.
Stabilize first, then rebuild in compatible layers with a bonding agent where new meets old. Joint compound alone over a moving plaster field will crack again on the same line, on schedule.
Common mistakes box
- Filling a deep void in one heavy coat instead of pre-filling
- Sanding through face paper to correct a hump
- Patching over crushed gypsum or a hollow-sounding area
- Painting over a stain before the source is fixed and the area is verified dry
- Mudding a nail pop without re-securing the board
- Texturing only the patch instead of feathering out past it
- Skipping primer and letting the repair flash through the paint
How to get plaster and drywall repair right the first time
The short version: identify the substrate, fix moisture and movement before anything cosmetic, choose the compound or plaster that matches the job, then feather wide, prime the repair, and match the existing texture past the patch boundary so the finish reads as one surface. A repair is finished when a person standing in the room cannot tell where it happened.
For the full step by step with joint compound, see “How Do I Repair Drywall with Joint Compound? A Beginner’s Step-by-Step Patch Guide.” For hiring decisions and what jobs run, most doorknob and punch hole repairs run between $80 and $250 at Precision Patch Pros, and the full breakdown lives in “Drywall Repair Guide: Costs, Options and When to Hire.”
If you would rather it be right once, get a drywall repair quote in 10 minutes. Patch, texture match and paint touch-up happen in one visit, licensed and insured under CSLB License #830875, backed by a 5-year workmanship guarantee.
Frequently Asked Questions
Why is plaster not used anymore?
Plaster over wood or metal lath takes days of skilled labor and multiple cure stages, while drywall goes up in hours and finishes in coats. Cost and schedule pushed it out of new construction decades ago. Plenty of older homes across Southern California still have it, which is why repairs there need bonding agents and plaster washers rather than a tub of joint compound.
How do I fix bubbling joint tape without replacing the whole seam?
For a single blister, slice the bubble lengthwise with a utility knife, work fresh compound underneath, then press the tape flat and squeeze out the air and excess. Coat and feather it once dry. If the tape lifts along more than a foot, or peels back with light pressure, cut that section out entirely, re-bed new paper tape, and rebuild the joint.
Why do patched areas flash through paint?
Bare compound is far more porous than painted wall, so it drinks in paint and dries to a duller sheen. Primer over the whole repair, feathered past the compound, evens the porosity. Texture matters just as much: an untextured patch inside an orange peel wall will flash as a smooth halo even with perfect paint.
Why does my repair still look dished after several coats?
You are sanding the low spot instead of filling it. Run your bare hand across the area, then hold a light nearly flat against the wall to confirm the depression. Fill it with a skim coat that extends 8 to 12 inches past the low point, let it dry fully, and sand with fine grit only.
Can I fix a bad drywall repair that is already painted?
Yes, in most cases. Sand the ridges and tool marks down with 120 grit, then skim the area with two thin coats and a wide knife, prime, and re-texture before painting. Tape that is bubbling, cracking or standing proud has to come out first, because skimming over failed tape only buries the problem.
What quality standard should I expect before paying a contractor?
Under normal room lighting, no visible ridges, tool marks, sanding scratches, pinholes or tape lines, and no step you can feel with a bare hand at the patch edge. Texture should match the surrounding surface in both pattern and coarseness, not just approximately. Walk the wall with a lamp held at a low angle before you sign off.
Do cracks at the ceiling and wall corner mean a structural problem?
Often they are movement, not bad taping. Cracks that open in winter and close in summer, run along the same corner line, and return after every repair usually point to framing or truss movement with seasonal humidity. Retaping alone will reopen. Those joints need a flexible detail or a trim solution, and a structural opinion if the gap keeps growing.