
Yes, damaged drywall can be repaired. Almost every hole, dent and crack in a wall or ceiling gets fixed in place with joint compound, a knife and some patience. The part beginners get wrong? Picking the right method for the size of the damage, then rushing the coats. This guide walks through the whole sequence, from a nail hole to a fist-sized crater, so the finished repair disappears instead of announcing itself under the hallway light.
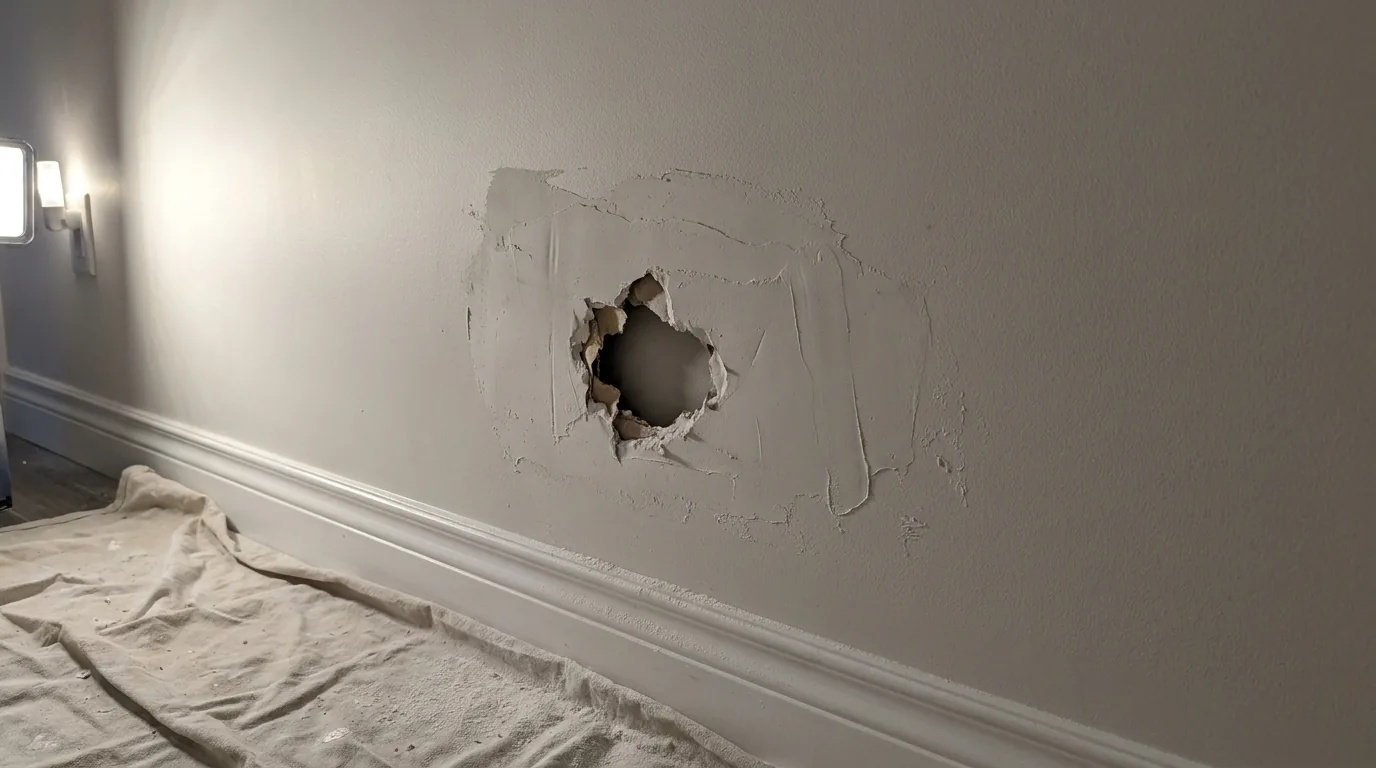
What is the easiest way to patch drywall?
The easiest path is to match the fix to the damage, then use the fewest coats that will do the job. For anything under a quarter inch, press lightweight spackle in with a flexible putty knife, let it dry, sand it flat. Done in ten minutes.
Joint compound takes over once the hole is big enough to need reinforcement. Compound spreads thinner, feathers wider and sands smoother than spackle. That is why every pro patch starts with it. For a medium hole, a self-adhesive mesh patch bedded in three widening coats of compound is the simplest method that actually holds. For big holes, you cut in a new piece of drywall with backing behind it. Same compound, more prep.
What size drywall damage can I fix with joint compound alone?
Compound alone works up to about a half inch across. Past that, the mud has nothing to bridge and it will crack or sink as it dries.
Use these cutoffs:
- Nail holes, screw holes and dings under 1/4 inch: lightweight spackle or compound, one or two coats, no tape.
- Dents and gouges up to 1/2 inch: all-purpose joint compound, two thin coats. Fill the recess, do not mound it.
- Holes around 1 to 2 inches in diameter: this is the medium range, and it needs a self-adhesive mesh patch bedded in compound. Bob Vila covers 1 to 2 inch holes.
- Holes 3 to 6 inches: peel-and-stick patches start failing here. The center flexes, the edges telegraph, and you get the hump people post photos of a month later.
- Holes over 6 inches: cut out a square, add backing, screw in a new piece of board.
The failure modes are predictable. Spackle packed into a wide crack shrinks and reopens. Compound spread over open air sags and cracks in a week. Skipping tape on anything wider than a hairline gives you a repair that reappears the first time the house moves.
How do I repair small holes in drywall step by step?
For a small hole using joint compound instead of spackle, the sequence is prep, fill, dry, second coat, sand, prime. Here is the order that works for a first timer:
- Clean and trim the opening. Cut away torn paper and crumbling gypsum with a utility knife until the edges are sound.
- Cover the hole if it is over an inch. Center a self-adhesive mesh patch so it extends at least an inch onto solid wall on every side.
- Bed the first coat. Load a 4 or 6 inch knife and pull compound across the patch at a low angle. Fill the weave, do not build a mound.
- Let it dry fully. Wet compound is dark gray. Dry compound is uniform bright white.
- Second coat, wider. Switch to a 10 inch knife and extend the mud several inches past the first coat in every direction.
- Third coat if needed, then sand, prime and paint.
Two coats close a small hole. Three make it completely disappear.
How do I prep the hole so the compound sticks?
Most patch failures start before any mud goes on. Compound bonds to clean, solid paper and gypsum, not to dust, loose fibers or glossy paint.
Run a utility knife around the opening and shave off any lifted paper tags. If the face paper has torn and fuzzed up, seal that area with a stain-blocking or shellac primer before mudding, or the damp compound will soften the paper and bubble. Vacuum the hole and wipe the surrounding wall. On semi-gloss trim walls, scuff a few inches around the damage with 150 grit so the mud has some tooth. The goal is a slightly recessed, clean edge that lets the compound sit below the wall plane instead of on top of it.
How many coats of joint compound do I need?
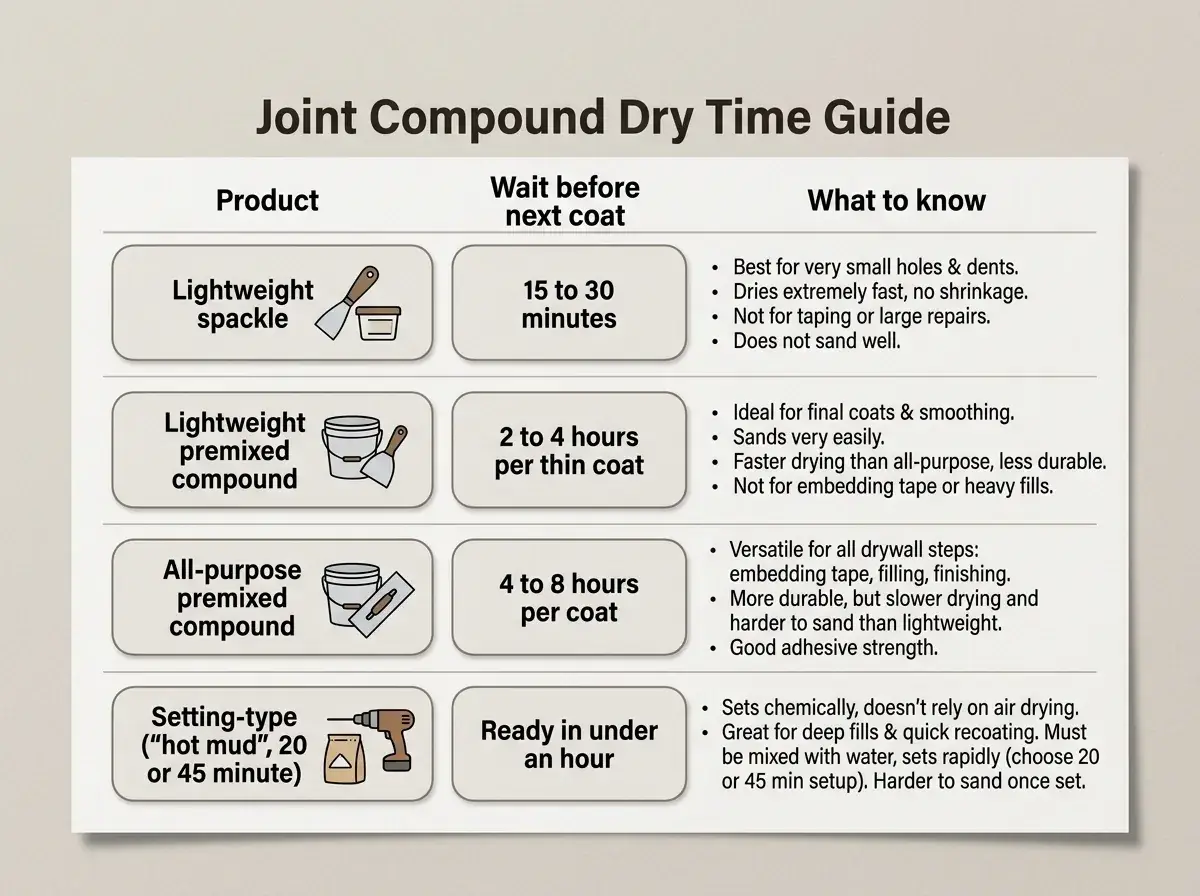
Two to three thin coats for a small patch, three for anything taped, and each one has to dry completely before the next. Rushing is the single most common beginner mistake. A coat that goes on over damp mud traps moisture, shrinks unevenly, and cracks along the edge days later.
| Product | Wait before the next coat | What to know |
|---|---|---|
| Lightweight spackle | 15 to 30 minutes | Small holes only, sands easily, shrinks in deep fills |
| Lightweight premixed compound | 2 to 4 hours per thin coat | Easiest to sand, low strength, good for finish coats |
| All-purpose premixed compound | 4 to 8 hours per coat | The workhorse for bedding tape and patches |
| Setting-type (“hot mud”, 20 or 45 minute) | Hardens on schedule, ready in under an hour | Chemical set, barely shrinks, unforgiving for beginners |
If the room is cold or the humidity is above about 60 percent, add several hours to every window listed. If compound still shows a dark gray shadow in the center, it is not dry, no matter what the clock says. For a medium-size repair, expect roughly 8 hours of drying before you sand and repaint. Bob Vila recommends about 8 hours. A box fan aimed across the wall helps air movement. It will not dry a coat you applied too thick.
How do I fix a drywall crack so it does not come back?
Filling a crack with compound and painting over it almost guarantees a repeat. The fix is to open the crack slightly with a utility knife into a shallow V, dust it out, then embed tape in the first coat so the repair spans the moving joint instead of floating on it.
Use paper tape for straight seam cracks and corners, since it is stronger in tension and folds cleanly. Use self-adhesive fiberglass mesh for cracks wider than about half an inch or over a patched area. Bed the tape, let it dry, then two widening coats.
Before you tape anything, run this quick check:
- Stain, softness or sag near the crack means water first, drywall second.
- Stair-step or diagonal cracks running off door and window corners suggest framing or foundation movement.
- Doors and windows that stick as the seasons change point to the same thing.
- A crack that reopens in the same line after two proper repairs is telling you the cause is behind the wall.
Simple rule: if the crack moves, tape alone will not hold it. Find the source, fix it, then patch.
If you would rather hand the wall to someone who does this every day, you can send a few photos for a repair quote instead of buying a kit you use once.
How do I repair a large drywall hole with backing and joint compound?
Large holes get cut back to a clean square, then backed with wood so the new piece has something to screw into. Compound is the finish, never the structure.
Mark a square or rectangle around the damage with a level, then score the cut lines with a utility knife before sawing so the face paper does not tear beyond your line. Cut the square out. Now look inside. If a stud sits near the opening, widen the cut to center on it. If not, expose one of the wall studs or run a wooden member horizontally between the two closest studs. Bob Vila advises exposing a wall stud or adding a horizontal member.
Backing specifics matter.
Use scrap 1×3, 1×4 or 2×4 at least 4 inches longer than the opening so several inches of wood land on solid drywall at each end. Slide it in, hold it tight to the back of the board, and drive drywall screws through the existing wall into the wood about 1/2 inch in from the cut edge, spaced every 4 to 6 inches. Set the heads just below the surface without breaking the paper.
Cut the patch from drywall of the same thickness, leaving about 1/8 inch of gap around it. Screw it to the backing on all four sides. Fill the gap with all-purpose compound, bed paper tape over every joint, then finish with a 6 inch knife for the bedding coat, a 10 inch for the second and a 12 inch for the third, each strip wider than the last.
How do I sand, prime, and paint so the patch disappears?
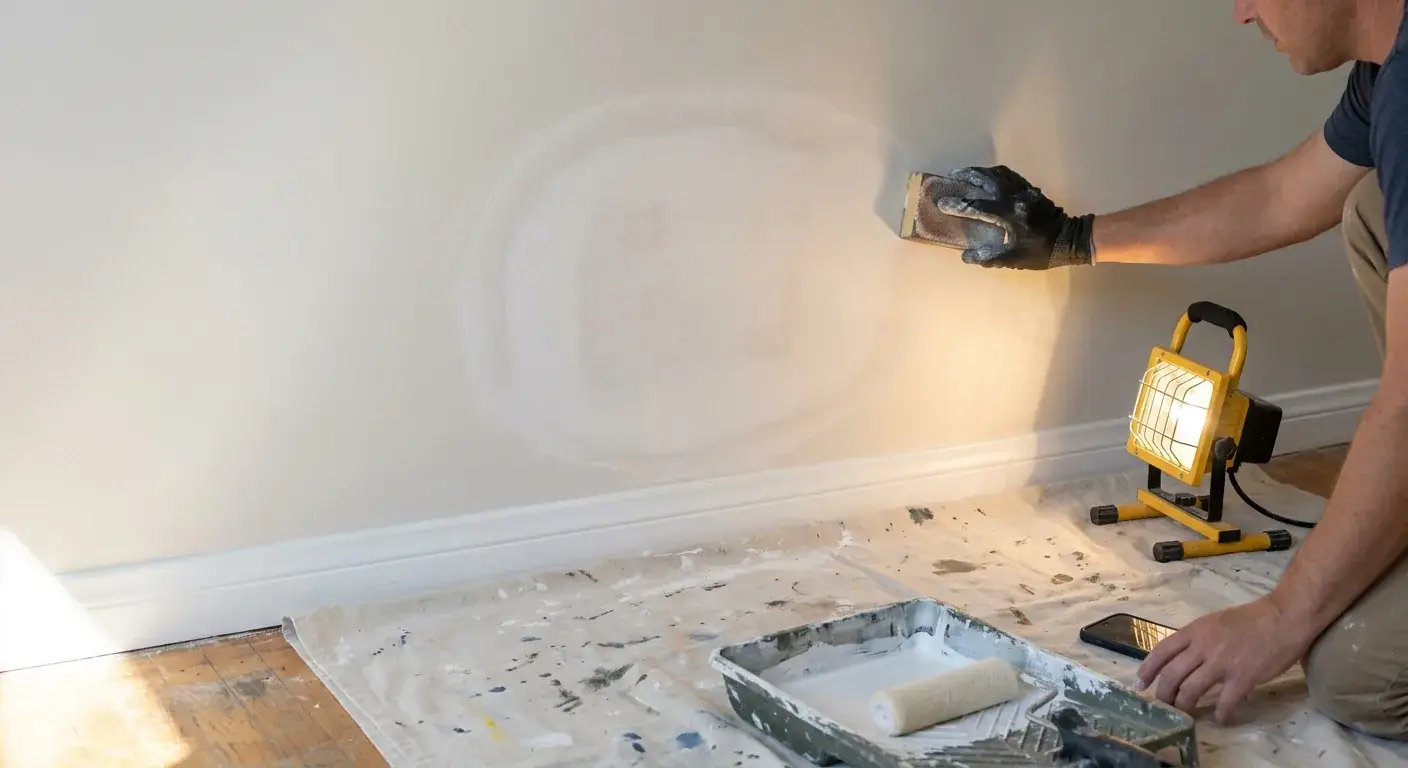
Finish work decides whether the repair shows. Sand with a 120 to 150 grit sanding sponge using light circles, never 80 grit on a final coat, and stop the moment the surface is flat. Run your bare palm over it with the lights off and a work light raking sideways. Your hand finds ridges your eye misses.
Feather the outer edge of the last coat 8 to 12 inches beyond the damage. Then prime. Bare compound is porous and drinks paint, so one full coat of drywall primer is the minimum and two are better over a large taped area. Skip it and you get flashing, a dull halo around the patch that shows through two coats of color.
Spot painting works on flat ceiling and wall paint that is reasonably fresh. On satin, eggshell or semi-gloss, the sheen difference will show no matter how well you blended, so roll the entire wall corner to corner using the same nap roller as the original.
Pro tip: Feather the final coat wider than you think you need. The patch that disappears under bright light is usually the one blended far beyond the repair edge.
When should I stop DIY and hire a drywall repair pro?
Stop when the job needs skills you cannot practice on scrap, which usually means texture, ceilings or deadlines. Materials for a small patch run under $50, but the learning curve, the drying cycles and the redo risk are the real cost. A two-coat patch spans two days of waiting whether you are experienced or not.
Call a pro when:
- The damage is larger than about 12 inches or there are several holes in one room.
- It is a ceiling. Gravity, overhead knife work and popcorn or knockdown texture make ceilings a different job than walls.
- The existing texture is orange peel, knockdown or popcorn. Matching spray texture is the step most DIY patches fail.
- Water was involved. At Precision Patch Pros, a water-damaged drywall repair typically totals $500 to $750, and the ceiling has to be dry before anyone patches it.
- There is a deadline, like a move-out inspection or a listing photo date.
- The same crack has come back twice.
For comparison, the company notes that most doorknob and punch hole repairs run between $80 and $250, which is often less than a weekend of your time plus a knife set you will not use again. Precision Patch Pros is licensed and insured under CSLB License #830875, has served Kern County, the Antelope Valley, the High Desert and the northeast LA County area since 2020, and backs its work with a 5-year guarantee.
Send 2 to 3 pictures with your ZIP code and get a drywall repair quote within 10 minutes, including patch, texture match and paint touch-up.
Frequently Asked Questions
Can I repair drywall without replacing it?
Yes, for most damage. Holes up to a couple of inches, cracks, popped nails and damaged tape are all repaired in place with compound and tape. Replacement only enters the picture when the board is water-soaked, crumbling or sagging, and even then only the affected section gets cut out.
What is considered minor drywall repair?
Minor repair generally means a single hole under about 6 inches, hairline cracks, nail pops, anchor holes or scuffs that need filling and paint. These are one-visit repairs and typically priced per hole or per visit rather than by square foot. Anything involving backing, multiple sheets or texture spraying moves out of the minor category.
How do I match orange peel, knockdown, popcorn or smooth texture on a patch?
Smooth walls need the most careful sanding, since there is no texture to hide a ridge. Orange peel and knockdown are sprayed from a hopper or aerosol can held about 18 inches away, in light passes, then knockdown gets flattened with a wide knife once it loses its shine. Popcorn is sprayed or hand-applied and is the hardest to blend, which is why texture matching across orange peel, knockdown, smooth and popcorn is a standard part of professional patch work.
How do I control drywall dust in a lived-in home?
Tape plastic over doorways, shut the HVAC off, and lay a drop cloth that you fold inward when you are done. A sanding sponge dampened with water creates almost no airborne dust and works well on small patches, though it is slower and can soften the compound edge. For dry sanding, use a pole sander with a vacuum attachment and a respirator, then wipe walls before vacuuming the floor.
What is the difference between lightweight, all-purpose and setting-type joint compound?
All-purpose is the strongest premixed option and the right choice for bedding tape. Lightweight sands with almost no effort but has less bonding strength, so it belongs on finish coats. Setting-type powder hardens chemically on a fixed schedule, shrinks very little and is great for deep fills, but it will set up in your pan and cannot be resoftened, which frustrates beginners.
When should I use mesh tape versus paper tape?
Paper tape is stronger and is the standard for flat seams and inside corners, but it must be fully embedded in a wet bed of compound or it bubbles. Mesh tape is self-adhesive and faster, and it suits cracks over half an inch and patch perimeters. Mesh works best with a setting-type compound for its first coat because that mud is more rigid.
How do I repair a drywall ceiling?
The steps are the same as a wall, with two differences. Overhead compound sags, so coats must be thinner and drying takes longer, and most ceilings carry texture that has to be reproduced. In one recent job, a kitchen ceiling with water damage around an old fluorescent fixture was repaired, the light well framed out, new drywall hung, LED recessed lights installed, and the ceiling left flush and seamless.
Can a handyman handle drywall repairs?
A handyman can fill small holes. The difference shows up in texture matching and blending, which is where a lot of homeowners end up paying twice to have work redone. A drywall specialist patches, matches the texture and touches up the paint in one visit.
What do you call a person who fixes drywall?
A drywall finisher or taper does the mud and tape work, while a drywall contractor covers installation and repair. For patch work specifically, people usually search for a drywall repair specialist. Precision Patch Pros holds a General Building (B) classification under CSLB #830875.
How much should a drywall repair cost?
Pricing depends on hole size, texture type and whether the surface is a wall or a ceiling, and ceilings cost more because of the added labor and texture work. DIY materials for one patch stay under $50, but that excludes the tools and the two days of drying. The fastest way to compare is to text photos and get a written quote rather than guessing from a national average.