
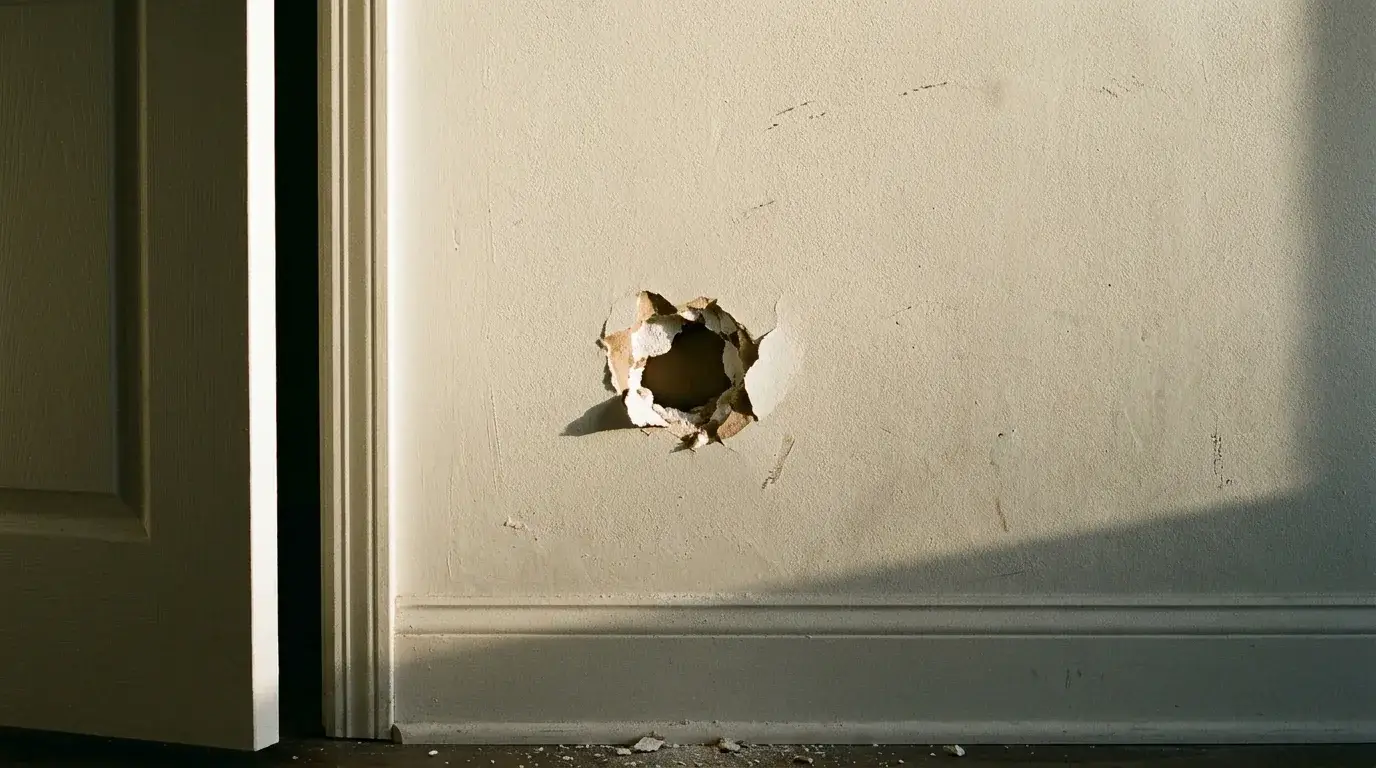
A doorknob hole behind a door. A nail pop over the couch. A rectangle cut open by a plumber. Most drywall damage in a home is small. Most of it can be gone before dinner if you pick the right method on the first try. Pick wrong and you get a patch that sinks, cracks in a ring, or glows through fresh paint. Here’s the size-to-method decision, the real drying clocks, how much product to buy, and the point where handing it off is simply faster.
Choose the right repair method before you start
Anything wider than about 1/2 inch or deeper than about 1/4 inch needs a patch behind it. Filler on its own won’t cut it. Spackle has nothing to grip once the hole gets bigger than that. It shrinks back, sinks, and telegraphs a dimple through paint. Match the damage to the method before you open a container:
- Up to 1/2 in wide, 1/4 in deep (nail holes, anchor holes, dings): lightweight spackle, one or two passes.
- 1/2 in to 2 in (small punch, screw blowout): spackle or setting compound over something solid in the cavity, like crumpled mesh tape or a bit of backer rod.
- 2 in to 6 in (doorknob hole, TV mount tear-out): self-adhesive mesh patch and three thin coats of compound.
- 6 in and up, or any utility cut-out: a California patch or a cut-in piece with wood backing.
Depth decides as much as diameter. A shallow 1 in scuff is easier than a 3/4 in hole that punched clean through.
When spackle is enough
Spackle is the right call when the hole is no wider than a pencil eraser and the drywall face around it is still firm. Think nail holes, picture hanger holes, small anchor holes, and dents where the paper is dished but not torn.
Work in passes no thicker than 1/8 inch. Thick globs shrink as they dry and leave a crater you’ll only notice after the paint goes on. Press the compound in, scrape flush with a 4 in knife, and let it crown slightly so a light sanding brings it level. Once you cross about 1/2 inch of open air, stop. Spackle spanning a void is the number one reason a “finished” repair reappears three weeks later.
When to switch to a mesh patch
Self-adhesive mesh patches cover 2 in to 6 in holes in minutes. That’s why they sit in every hardware store repair aisle. You stick the patch over the hole, skim three thin coats of joint compound across it, and feather the edges out well past the mesh.
The tradeoff is durability. Kit reviews are full of the same complaints: cracked after a few months, mesh outline visible, metal-backed patches rusting through the paint. The mesh only bridges the hole, so any flex in the wall works the edges loose. Use mesh on a low-traffic wall. On a hallway, a stairwell, or anywhere a door slams nearby, spend the extra twenty minutes and cut in a real drywall plug.
How to do a quick drywall repair step by step
Work in this order and don’t skip the prep. Most bad patches are decided in the first two minutes.
- Square up the damage. Cut the ragged hole into a clean rectangle with a utility knife or drywall saw. Straight edges are easier to fit and easier to feather.
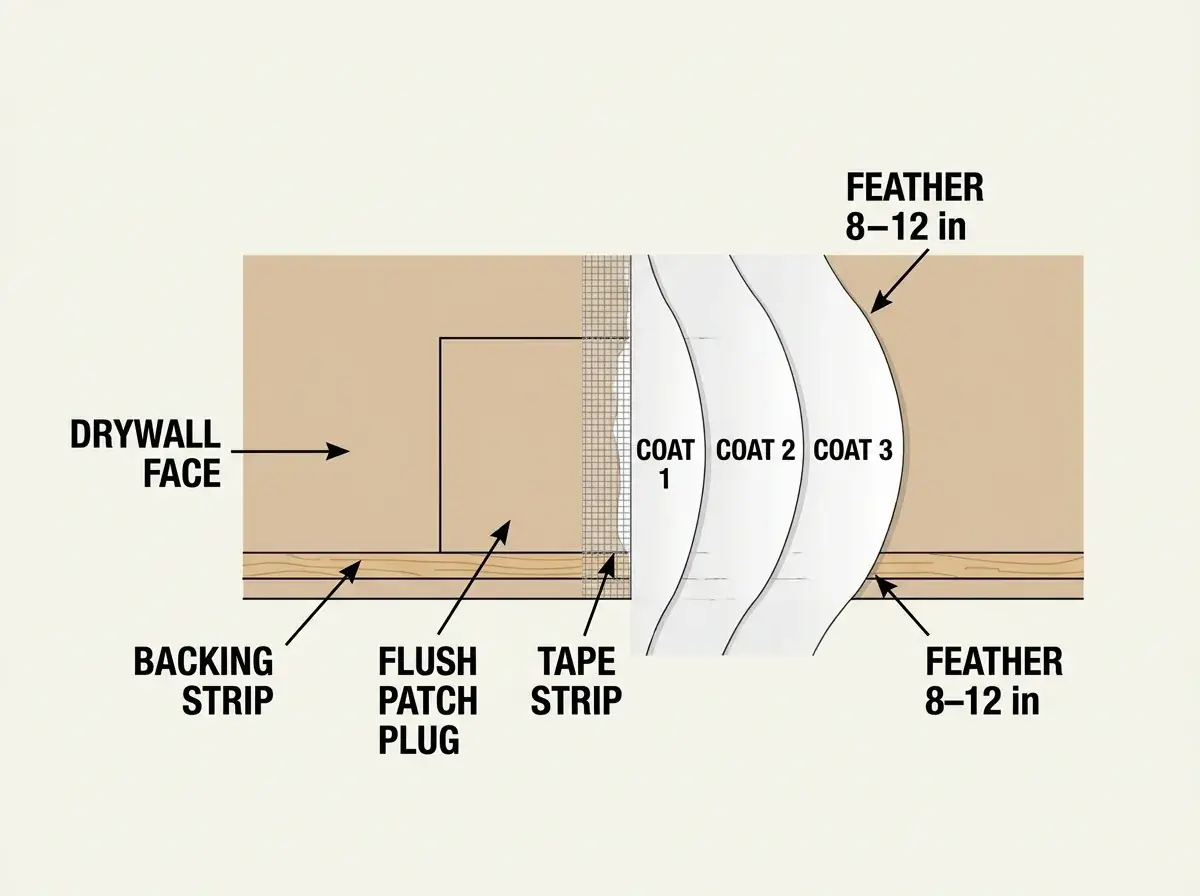
- Add backing. For cut-in patches, slip a 1×3 or a strip of plywood behind the opening so it overlaps the hole by about 1 in on two sides. Fasten it with drywall screws roughly 1 in in from the edge, two per side, and set the heads just below the surface without breaking the paper.
- Fit the plug. Cut a scrap of the same thickness (usually 1/2 in), leaving about a 1/8 in gap all around. Screw it to the backing. For a California patch, cut the scrap 2 in larger than the hole, score and snap off the back gypsum, and leave the paper flange as a built-in tape.
- Tape the joints. Paper tape bedded in compound is stronger on a cut-in patch because it resists movement along the seam. Mesh is faster but flexes, so save it for surface patches. Either way, the tape plus three coats of mud is what keeps the outline from returning.
- Mud in three coats. First coat embeds the tape. Second coat covers with a 6 in knife. Third coat feathers wide with a 10 in or 12 in knife.
- Sand light. 120 grit to knock down ridges, 150 grit to blend. Two passes is plenty. Hold a damp sponge nearby for edges in a lived-in room to keep dust down.
- Texture, prime, paint. Match the existing finish before you touch color.
Odd spots deserve their own plan. Near an outlet, kill the breaker first and keep your cut back about 1/4 in from the box so you still have room to mud. Along baseboard and door casing, switch to a stiff 6 in knife so it doesn’t dive into the caulk line. Run the compound up onto the wall rather than into the trim joint. Inside corners want a corner knife and one side at a time, letting the first side firm up before you cut in the second.
Not the kind of afternoon you were hoping for? You can send photos and get a repair quote in about 10 minutes instead.
How long each quick repair really takes
A small repair can go from open hole to dry paint in one day, but only if you choose your compound around the clock you have. Spackle usually needs 1 to 2 hours to dry and about 24 hours to fully cure. That figure comes from Bob Vila. A premixed quick-dry spackle typically dries in about 30 minutes.
| Product | Dry time per coat | Coats | Realistic paint window |
|---|---|---|---|
| Lightweight spackle (nail holes) | 1 to 2 hours | 1 to 2 | Same evening |
| Quick-dry premix spackle | about 30 minutes | 1 to 2 | Under 2 hours |
| All-purpose premix joint compound | 4 to 24 hours | 2 to 3 | Day two or three |
| 20-minute setting compound | 20 to 30 minutes | 3 | Same afternoon |
A 20-minute setting compound hole, hour by hour: 0:00 tape and first coat. 0:30 second coat with a 6 in knife. 1:00 third coat feathered wide. 1:45 sand. 2:00 spot prime. 2:30 first color coat, second coat by 3:15.
The same hole in all-purpose premix: Tuesday 6 p.m. tape and coat one. Wednesday 6 p.m. coat two. Thursday 6 p.m. coat three. Sand and paint Saturday morning. Cold or humid rooms stretch every one of those numbers. Repairs go best in temperatures between about 50 and 90 degrees Fahrenheit. That range is published by Bob Vila.
Pro tip: Use fast-set compound when same-day painting matters. It hardens by chemical reaction instead of evaporation, so it barely shrinks and stacks coats in minutes. The catch for beginners is the clock. Mix only a cup at a time, keep the knife moving, and accept that anything left in the pan past the set time is trash. Ridges in set compound sand hard, so lay it flat the first time.
How much product do you really need to buy for a few small repairs?
Far less than the aisle suggests. A 4 oz tub of spackle handles roughly 50 nail holes. A pint covers a doorknob hole plus touch-ups. A quart of all-purpose joint compound is enough for several 6 in patches with feathering to spare. Whole DIY material sets for small to medium repairs land around $10 to $35 for a patch kit, or $20 to $60 if you’re buying knives, sanding sponge, primer and compound from scratch.
The waste problem is real. A 4.5 gallon bucket costs less per pound and then skins over, grows lumps, and gets tossed after two nail holes. Once you open premix, wipe the rim clean, smooth the surface flat, lay plastic wrap right on the mud, and seal the lid. Stored that way it stays usable for a few months. If it smells sour or has hard lumps, throw it out. Lumps leave ridges that no amount of sanding flattens.
Buy small, buy dry. Powdered setting compound in a resealable bag keeps far longer than wet mud and lets you mix exactly what one patch needs. Two containers cover almost every household repair: a small tub of lightweight spackle for holes and a bag of setting compound for anything that needs body.
Why quick repairs flash through paint and how to avoid it
Flashing is a texture and sheen mismatch. Not a coverage problem. Bare joint compound is thirsty and dead flat. Paint rolled straight onto it soaks in, dries duller than the wall around it, and the patch reads as a dull halo even after three coats.
Compare two identical doorknob patches in an eggshell hallway. Unprimed, coat one looks fine wet and shows a matte square once dry. Coat three still shows it. Spot primed with a drywall or PVA primer first, then rolled with the same nap as the original wall, the patch disappears in one coat.
Two more numbers matter. Feather your final coat 8 to 12 in past the hole edge so there’s no hard ridge catching side light. And respect sheen: flat paint hides a lot, while satin and semi-gloss reflect every ripple. That’s why glossy walls usually need painting corner to corner rather than spot touch-up.
When to DIY and when to hire a pro
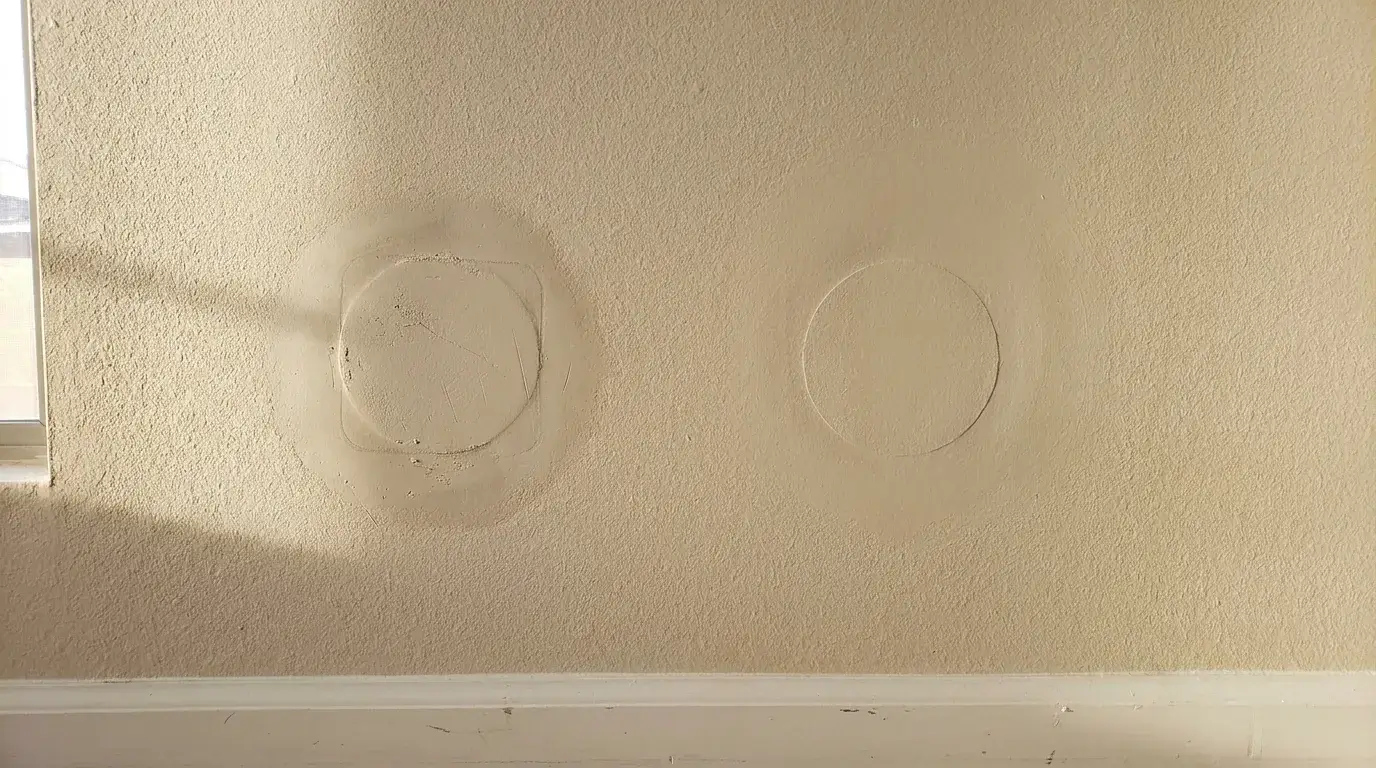
One or two holes under 4 in on a flat, smooth, flat-painted wall is a good first project. Beyond that, the math turns. First patches almost always show. Most people need three or four before their feathering stops being visible in raking light.
Call a specialist when you hit these:
- Texture. Orange peel, knockdown and popcorn are spray-and-timing skills. A mismatch is permanent until someone re-does the wall.
- Ceilings. Overhead mud, gravity and a stepladder make a 20-minute wall patch a two-hour job.
- Water damage. Stained or sagging drywall has to come out, not get covered.
- More than three or four holes, or a deadline. Move-out and showing dates leave no room for a second attempt.
- Satin or semi-gloss walls, where flashing is nearly unavoidable without full-wall repainting.
On price, drywall repair at Precision Patch Pros runs $75 to $95 per square foot with a minimum service charge of $150 to $250. That’s why one tiny hole is the worst value and a bundle of five in one visit is the best. The specialist advantage is the finish sequence in a single trip: patching, texture matching and paint touch-ups, backed by a 5-year guarantee from a licensed and insured crew (CSLB License #830875). In one recent job, a kitchen ceiling with water damage around an old fluorescent fixture was repaired section by section. The light well framed out, new drywall hung and LED recessed lights installed. The ceiling came out flush and the repair disappeared.
Wrap-up: the fastest path to a clean repair
Size and depth pick the method: spackle under 1/2 in, mesh from 2 in to 6 in, a cut-in or California patch above that. Then respect the four steps people rush: drying, sanding, priming and paint touch-ups. That’s where a repair becomes invisible or becomes obvious.
If the hole is bigger than your patience, or the wall has texture you’d rather not gamble on, send us 2-3 pictures and get a quote within 10 minutes. Most jobs are done in one visit across Bakersfield, the Antelope Valley, Santa Clarita and the San Fernando Valley.
Frequently Asked Questions
How fast can I truly finish a drywall repair start to paint if I only have an evening or weekend?
With a 20-minute setting compound, a 3 in hole can go from cut to second coat of paint in about three hours, sanding included. With all-purpose premix you need two or three evenings for the mud coats plus a weekend morning for sanding and paint. A box fan pointed at the patch helps premix, but it will not make a 24-hour cure happen in two hours.
How much product do I really need to buy for a few small repairs, and which size avoids waste and drying out?
For under a dozen nail holes, a 4 oz tub of lightweight spackle is enough and costs a few dollars. For one or two real holes, buy a pint or quart of compound. Never a gallon or a bucket. Powdered setting compound in a sealed bag is the best hedge against waste, since you mix only the cup you need.
Do peel-and-stick or metal patch kits actually last, or will they crack in a year?
On a quiet, flat wall they often hold fine. In high-movement spots, the common failure window is 6 to 12 months. It shows up as hairline cracks tracing the patch edges or a rust shadow telegraphing through paint from a metal-backed patch. Holes over about 6 in, or any hole near a slamming door, should get a cut-in drywall plug on wood backing instead.
Why does my patch keep cracking around the edges?
Two causes: movement and shrinkage. Compound shrinks as it dries. Spackle shrinks more than setting compound, so overfilled edges pull and split. Bed paper tape in mud on any cut-in seam, cut back loose paper and crumbling edges before you fill, and build three thin coats rather than one thick one.
What can I use instead of a drywall patch?
A scrap of drywall is the better substitute. The California patch method uses a piece cut 2 in larger than the hole with the back gypsum snapped away. Leave the paper flange, and it acts as its own tape. It needs no backing board on holes up to roughly 6 in. In a pinch, mesh tape layered over the opening and skimmed with setting compound works for holes under 2 in.
What is a quick fix for drywall cracks?
Open the crack slightly with a utility knife into a shallow V, dust it out, then bed paper tape or a flexible crack-repair tape over it and cover with two thin coats of compound. Filling a crack with spackle alone almost guarantees it comes back. Nothing is spanning the movement. Cracks over doors and windows repeat most often, so tape is not optional there.
How much should a drywall repair cost?
Regional pro pricing tables commonly put a hole under 4 in around $120 to $175 and a 4 in to 12 in hole around $150 to $225, with larger or texture-heavy repairs running higher. Hourly handyman rates generally land in the $60 to $90 range. DIY materials for the same small hole are usually $5 to $35. The difference you’re paying for is the finish job.
What is considered minor drywall repair?
Generally cosmetic damage under roughly 12 in across that does not involve framing, plumbing, electrical or water intrusion: nail pops, doorknob holes, dents, anchor holes, hairline seam cracks and small utility cut-outs. Once drywall is sagging, stained or soft, it moves out of the minor category because the damaged board has to be removed.
Can a handyman handle drywall repairs?
A handyman can close a hole. Many do it well. What tends to fall short is the finish stage, specifically texture matching and blending the paint so nothing flashes. That’s the part homeowners end up paying to have redone. If your wall has orange peel, knockdown or popcorn texture, choose whoever can show you matched work.