
A hole in the ceiling feels worse than the same hole in a wall, and it should. Gravity is working against you, the light rakes across every ridge, and a patch with no support behind it will crack or drop out. The good news: the sequence a pro follows is short, and most of it is waiting for compound to dry.
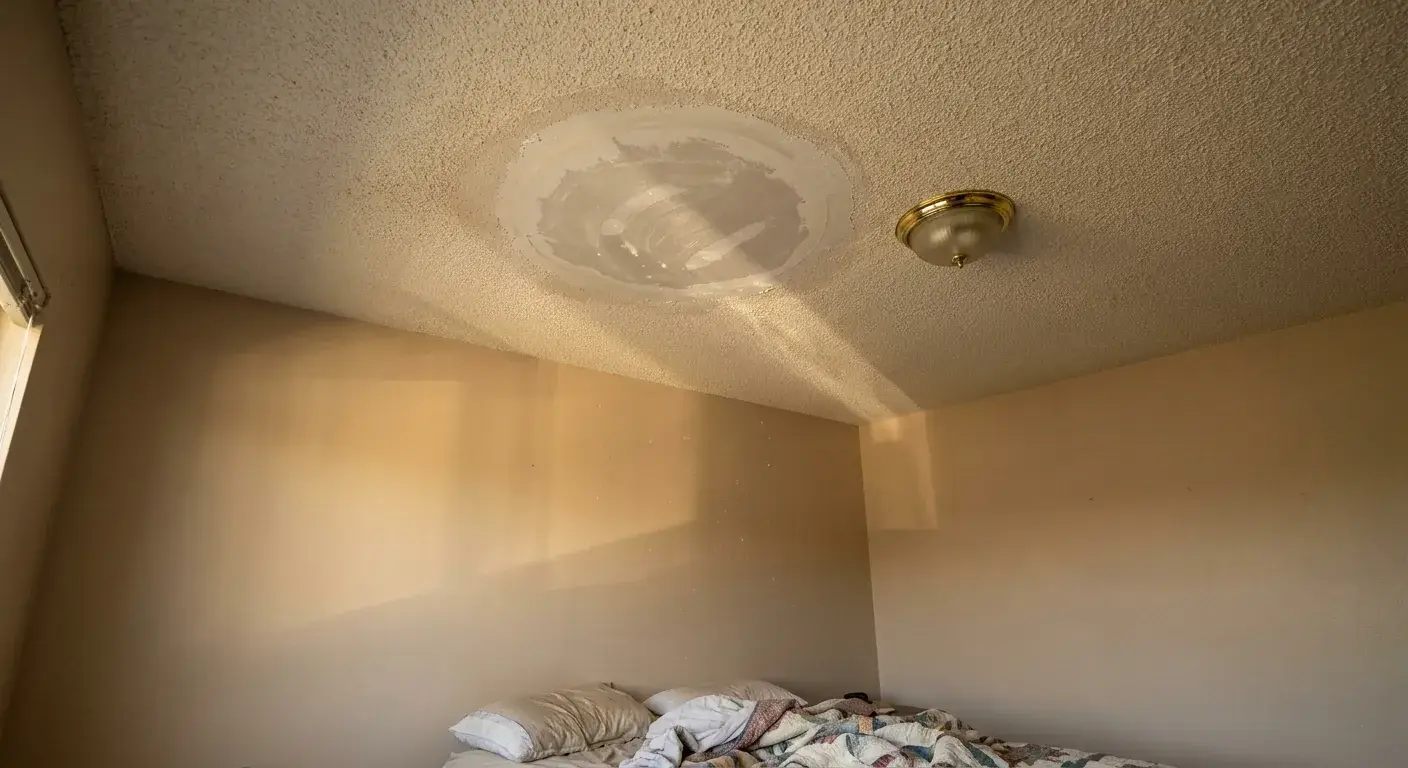
Quick answer: what it takes to repair a ceiling drywall hole
Size decides the method, so start there. Holes under 1 inch get lightweight spackle, holes from 1 to 6 inches get a self-adhesive patch bedded in setting-type compound, and anything larger than 6 inches gets a rigid drywall patch screwed to wood backing, then tape, two or three thin coats of joint compound, sanding, primer, texture, and paint. Plan on about two hours of hands-on work spread across one to three days. The patch holds up only when the hole size drives the method and the ceiling around the opening is sound and dry, so weak, crumbly, or wet edges move you up a bracket no matter how small the hole looks.
Before you start: materials, tools, and the checks that tell you this method fits
Compound is not one product. Lightweight spackle handles pinholes, all-purpose premixed joint compound gives you the flattest finish coats, and setting-type compound gets you same-day progress. Pick by the hole in front of you, not by whatever is left in the garage.
Short checklist: patch material, backing strips, tape, joint compound, primer, ceiling paint, and safety gear. The long version is below.
Tools
- Utility knife and a jab saw or keyhole saw
- Stud finder, pencil, carpenter’s square or straightedge
- Drill or driver and 1-1/4 inch coarse-thread drywall screws
- 6 inch drywall knife and a 10 or 12 inch finishing knife
- Sanding sponge or pole sander, 120 to 150 grit
- Drop cloth, safety glasses, dust mask, a stable ladder
Materials
- Drywall scrap in the same thickness as the ceiling, usually 1/2 inch
- 1×3 furring strips or 3/4 inch plywood cut into backing strips
- Self-adhesive fiberglass mesh tape or paper joint tape
- Lightweight spackle, plus premixed or setting-type joint compound
- Stain-blocking primer, texture material, ceiling paint
If this is your first ceiling repair, a mesh patch kit from any hardware store covers holes up to roughly 6 inches and saves you cutting board. The metal-backed kits are stiffer overhead. Past 6 inches a kit won’t cut it, and you buy the scrap, the strips, and the screws instead.
Stop signs that mean this method does not fit. Do not start patching if the ceiling sags over a broad area, if the gypsum is soft or swollen, if you find mold or wet insulation, if wiring or a junction box sits in the opening, or if the surrounding texture crumbles under a fingertip. the U.S. EPA reports that asbestos-containing material can release fibers when it is cut, torn, sanded, sawed, drilled or scraped, so a suspect ceiling gets tested before a blade touches it.
| Step | Hands-on time | Wait before the next step |
|---|---|---|
| Inspect and dry the area | 15 to 30 minutes | Hours to days if wet |
| Cut back and fit the patch | 20 to 40 minutes | None |
| Install backing and screw the patch | 20 minutes | None |
| Tape and first coat | 20 minutes | 20 minutes to 24 hours |
| Second and third coats | 15 minutes each | About 24 hours each for premixed |
| Sand, prime, texture, paint | 45 to 90 minutes | 1 to 2 hours between coatings |
Step 1: Inspect the damage and stop the cause first
Find out what made the hole before you fix the hole. Most ceiling openings come from a leak or from an access cut left behind by a plumber, an electrician, or an HVAC tech. Each cause changes what happens next.
Three hard stops, and none of them are negotiable:
- The water source is unknown or still active. Stop and find it. Fresh mud over a live leak softens, stains, and hides mold behind a surface that now looks finished.
- The ceiling is soft, swollen, or detached from the joists. That board gets replaced, not patched. Filling the visible hole leaves failed gypsum in place.
- Wiring, a loose cord, or a junction box is exposed. Do not cut or screw another inch without an electrician. Cords get run over joists and along the framing near outlets and fixtures where nobody expects them.
Press the ceiling with your palm a foot out from the hole in every direction. Firm and crisp is good. Spongy, gritty, or drummy means the board has lost its bond or its strength, and that area comes out instead of getting filled. Damaged, crumbling building materials are also an asbestos concern in older homes, and the EPA notes that remodeling work can disturb them.
Then look up into the cavity with a flashlight before cutting anything. You’re checking for water-darkened joists, compressed or soaked insulation, ductwork, supply lines, and cable. Pull wet insulation out and let the cavity dry, because closing a damp cavity traps the problem. If the hole came from an access cut, confirm the trade work is finished and any fixture box is fastened to framing on its own, not hanging on the drywall.
Pro tip: Stop the leak, then patch the ceiling. Precision Patch Pros handles water-damage drywall repair, but not leak detection, water extraction, emergency dry-out, or mold remediation. Get the source stopped and the cavity dry first. Then the patch is a finish job instead of a temporary cover-up.
Step 2: Choose the right repair method for the hole size
Match the method to the size, then check the edges before you commit.
- Under 1 inch (nail pops, screw holes, small dents): lightweight spackle in two thin fills. No tape, no cutting. Overfill slightly, since spackle shrinks as it dries.
- 1 to 6 inches: a self-adhesive fiberglass or metal-backed mesh patch bedded in setting-type compound. The metal-backed style is stiffer overhead and resists the dent you get from a knife pass.
- Larger than 6 inches, or any ragged opening: cut back to a square or rectangle and screw in a real drywall patch over wood backing.
- Small round holes from a recessed can or a hole saw: a cut-to-fit drywall plug beats enlarging the opening. Trace the hole on your scrap, cut the plug a hair small, slip a backing strip behind it, and keep the round shape.
Two exceptions override the chart. Cut back to solid material whenever the edges are crumbly, delaminated, or water-softened, even if that turns a 4 inch hole into a 12 inch one. And if the ceiling around the hole has pulled away from the joists, tape and mud will not put it back. That area gets refastened or replaced.
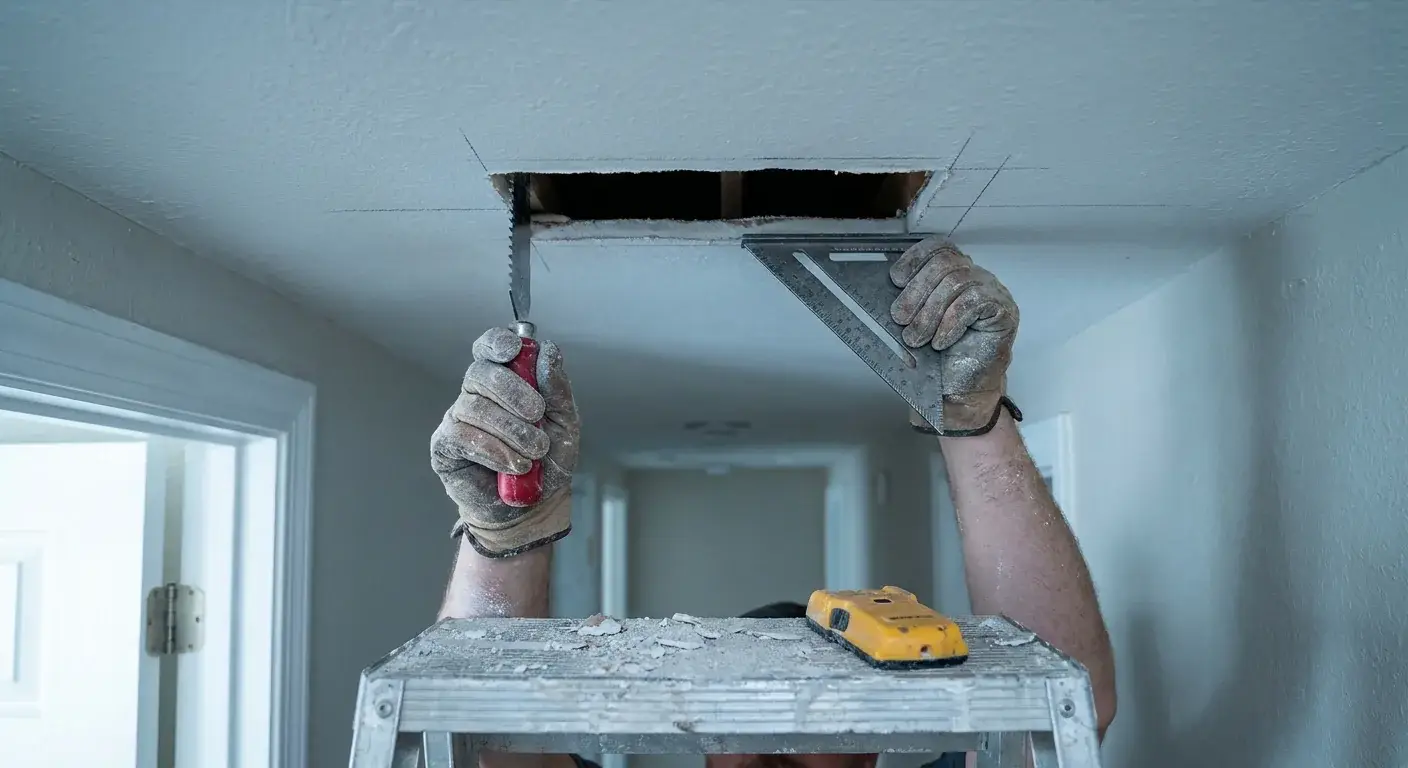
Squaring an opening takes five minutes and pays for itself. Run a stud finder first so you know where the joists sit. Hold a carpenter’s square against the damage and pencil a line at least 1 inch past the worst edge on all four sides, then check that opposite lines measure the same and the corners read square. Snap or draw the lines dark enough to follow, and cut them with a jab saw held shallow so the blade can’t catch a wire or a pipe. Straight edges give tape a flat path, give screws a predictable line, and keep the seams where your knife can feather them.
Step 3: Install backing or a patch that will not fall out
When no joist runs beside the opening, you build your own nailing surface. Cut backing cleats from 1×3 furring or 3/4 inch plywood, each about 4 to 6 inches longer than the hole so 2 to 3 inches of wood lands on solid ceiling at both ends. Slide a cleat up into the cavity and pull it tight against the back of the drywall along one edge of the opening.
Hold the cleat with a scrap screwed through it as a handle, then drive screws through the existing ceiling into the wood about 2 inches back from the cut edge, spaced around 6 inches apart. Use screws long enough to bite at least an inch of solid wood. 1-1/4 inch coarse-thread drywall screws do that through 1/2 inch board. Every edge of the patch needs solid wood behind it, so a small opening takes a cleat on two sides and a large square takes one on all four. Set the patch and run perimeter screws into the cleats about every 6 inches, heads just below the paper face without tearing it. Where the patch crosses a joist, screw into the joist too.
The mistake to avoid: trusting adhesive, mesh tape, or a thick pile of compound to hold a ceiling patch. Compound bridges a gap and carries no load overhead. Fill a large gouge with mud alone and the house moves through one season, the patch flexes, and the outline of the old hole comes back through your fresh paint as a hairline crack. Larger openings that need multiple cleats are covered in more depth in “How to Repair a Big Hole in Drywall: 7 Steps That Hold Up.”
Before taping, push up on the patch. It should not flex, rock, or click. If it moves at all, add screws until it doesn’t. If the ceiling repair is over a stairwell or a vaulted room, that is a fair moment to hand it off, and you can get a photo quote on the repair instead of wrestling a ladder.
Step 4: Tape, coat, and sand the repair in thin layers
Tape the seams, coat three times thin, and sand only after the compound is hard all the way through, not just firm on top.
Drying and setting are two different things. Premixed drying-type compound usually needs about a day to dry between coats under normal room conditions, and it can feel firm on the surface while still damp underneath. Cool air, humid air, thick coats, and overhead work all stretch that out. Setting-type compound hardens by chemical reaction on a clock printed on the bag, which is how a ceiling patch gets finished in one day. As USG notes, Sheetrock Brand Durabond 90 gives about 60 minutes of working time with a setting time of 85 to 130 minutes. The tradeoff is control. It stiffens while you’re still spreading it and it sands much harder than premixed mud, so a beginner often gets a flatter ceiling by waiting out the slower product.
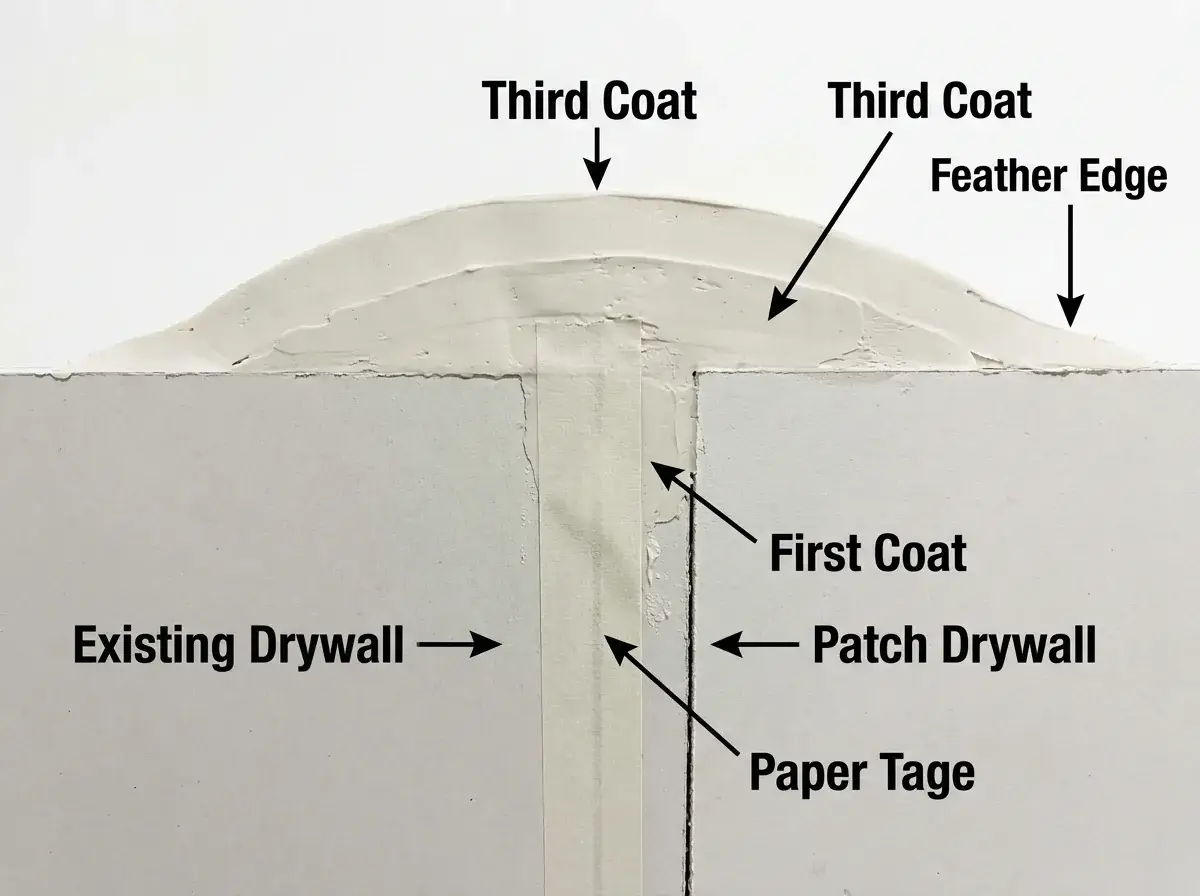
On a ceiling, let the seam pick the tape. Paper tape embedded in compound is the stronger joint and the right choice for the long butt joints around a replacement patch, where the ceiling flexes and a weak seam cracks first. Self-adhesive fiberglass mesh is easier to place overhead and it suits a small patch, but pair it with setting-type compound so the weave fills solid. Mesh plus soft premixed mud is the classic recipe for a hairline crack coming back.
The coats go like this:
- First coat, 6 inch knife. Press compound through the tape, then wipe it nearly flat. You want tape locked down, not buried.
- Second coat, 10 inch knife. Widen past the first coat by a few inches on every side.
- Third coat, 12 inch knife. A thin skim only, feathered so the edge disappears under your fingertips.
Then sand with 120 to 150 grit, using a light touch and a sanding sponge on the feathered edges. Cracking, sagging, and ridges almost always trace back to three causes: a patch that still moves, coats applied too thick so the compound shrinks as it cures, or sanding into damp mud and tearing it. Fix the support and thin the coats and those problems stop.
Step 5: Prime, paint, and match the ceiling texture
Prime after sanding. Bare compound and exposed drywall paper drink paint at a different rate than the aged ceiling around them, and skipping primer is the single most common reason a flat, well-sanded repair still shows as a dull halo. Use a stain-blocking primer anywhere a water mark was involved.
Texture comes after primer and before finish paint:
- Smooth ceilings: skim the area wider than you think you need, sand to a uniform sheen, and check it with a light held flat against the ceiling.
- Orange peel: spray in light passes from about 18 inches away, building up to match the droplet size around it. Test on cardboard first.
- Knockdown: spray heavier, wait until the peaks lose their gloss, then flatten with a wide knife using almost no pressure.
- Popcorn: matching sprayed popcorn on a patch rarely looks right. Refinishing the full ceiling is usually the honest fix.
Treat the painting as the last step of the repair rather than a separate job. Ceiling paint flashes easily, so rolling the whole ceiling corner to corner is often the only way to make a patch fully vanish, especially on a flat white that has aged unevenly.
How to tell it worked. Stand under the repair, then walk to the far corner and look across the ceiling at a low angle with a lamp held near the surface. You want no shadow line, no bump, no tape edge, and no change in sheen. Run your palm over the seam and you should feel ceiling, not patch. Hired out, a ceiling patch typically runs a couple hundred dollars on up depending on size, texture and access, and the full breakdown lives in “Hole in Drywall Repair Guide: Costs, DIY or Pro.”
If the ceiling is sagging, the texture is unusual, or the deadline is a move-out inspection, hand it over. Send 2-3 pictures and your zip code for a quote within 10 minutes, and most jobs finish in one visit with patch, texture match and paint touch-up, backed by a 5-year workmanship guarantee.
Frequently Asked Questions
Can you fix a hole in a ceiling without drywall?
Only if the hole is under about 6 inches and the surrounding board is solid. A self-adhesive mesh or metal-backed patch plus setting-type compound spans that gap without a drywall insert. Larger openings need a rigid piece of matching board, because compound alone has no strength overhead and will crack out.
How much should a ceiling drywall repair cost?
It depends on the size of the hole, the texture on the ceiling, and how hard the spot is to reach, so a 4 inch patch in a bedroom and the same patch over a stairwell are not the same job. DIY materials for one small hole are cheap. Hiring out is mostly labor, finishing, and paint. The full breakdown, DIY versus pro, is in “Hole in Drywall Repair Guide: Costs, DIY or Pro.”
How do you know whether an old textured ceiling contains asbestos before cutting it?
You can’t tell by looking. Sprayed and textured ceilings installed before the late 1970s are the usual suspects, so have a sample tested by an accredited lab or hire an asbestos professional to collect it. Until you have results, leave the material undisturbed. No scraping, drilling, or sanding.
Do I have to remove wet insulation before I close the ceiling back up?
Yes. Soaked batts hold water against the joists and drywall for weeks and slow the whole cavity’s drying. Pull the wet insulation, let the framing dry, confirm it with a moisture meter or simple touch test, then install fresh insulation and patch.
How do I patch the hole left after removing a ceiling fan or recessed light?
Cut the opening back to a clean square, add backing strips on two sides, and screw in a matching drywall plug. Make sure the old electrical box is either removed or left accessible per code, since junctions can’t be buried behind finished drywall. An electrician should handle disconnecting and capping.
How can I work safely on a tall ceiling or stairwell?
Use a stable platform, not a ladder leaned at an angle, and never work overhead with a blade while one hand grips a rail. Kill the circuit at the breaker before cutting near a fixture, and avoid metal ladders around electrical work. Stairwells, vaults, and ceilings above about 12 feet are the classic point to hire out.
Does a ceiling patch need to be primed with a stain-blocking primer?
If there was any water mark, yes. Regular primer lets tannins and rust-colored stains bleed through within days, while a stain-blocking primer locks them down. On a dry, non-stained patch, a standard drywall primer-sealer is enough to stop flashing.