
A hole in the wall looks worse than it is. The drywall itself is cheap, the tools are simple, and the sequence has not changed in decades. What separates a repair that disappears from one you notice every evening when the lamp light rakes across the wall is the order you work in and the patience you give the compound between coats.
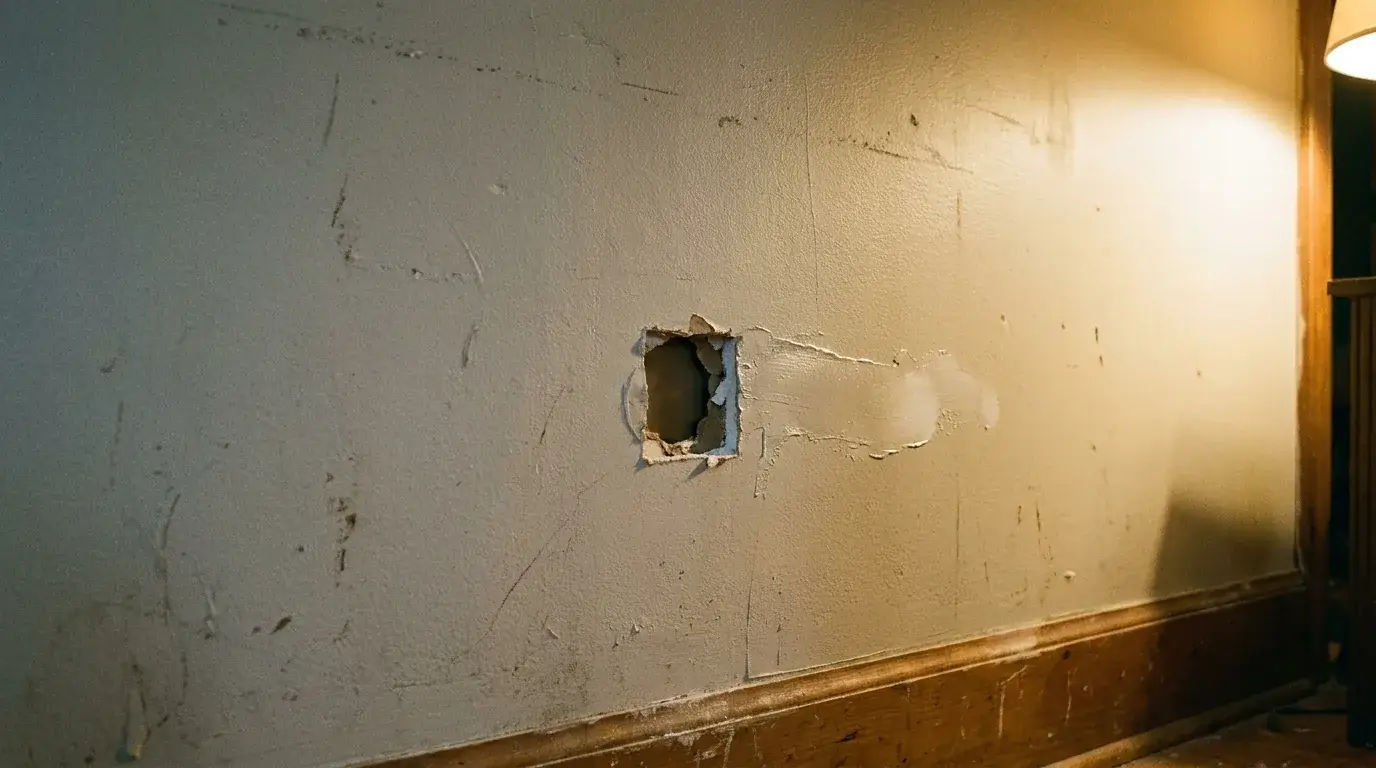
Quick answer: what this repair takes and what decides success
Most wall holes need joint compound or spackle, reinforcement sized to the hole, a 6 inch knife, sandpaper, primer and matching paint. Hands-on time runs from 20 minutes for a nail hole to about 90 minutes for a large patch, but plan on one or two days of calendar time because compound has to dry between coats. Hole width decides the method. A good result is flat, ridge free, texture matched and invisible under side light after primer and paint.
Before you start: check the hole size, tools, and whether DIY fits
Yes, most homeowners can repair drywall themselves when the damage is cosmetic and smaller than a dinner plate. Measure the hole at its widest point first, because width picks the method. Under 1/4 inch is spackle work, up to about 1 inch takes a mesh patch, 1 to 4 inches takes tape or a flanged patch, and past 4 inches you need backing or a drywall insert. Step 1 has the full cutoffs.
Materials
- Lightweight spackle for dents and holes under 1/4 inch
- All-purpose joint compound for taped and larger repairs. USG recommends its Sheetrock Brand All Purpose Joint Compound for repairing cracks in interior plaster and masonry not subject to moisture.
- Setting-type compound (20, 45 or 90 minute) if you want same-day coats
- Self-adhesive fiberglass mesh patch or paper joint tape
- Scrap drywall in the same nominal thickness as your wall, usually 1/2 inch
- Two 1×3 wood cleats and 1 1/4 inch drywall screws
- Primer, matching paint, and texture spray if the wall is orange peel or knockdown
Tools
- Utility knife, drywall saw, carpenter’s square, pencil, stud finder
- 6 inch drywall knife and 12 inch taping knife
- 120 to 150 grit sanding sponge, drop cloth, dust mask, safety glasses
The fit test. This method fits a dry, cosmetic hole in a flat section of wall. It does not fit if the drywall is soft, stained, sagging or musty, if a leak is still active, if you can see wiring, pipe or ductwork inside the opening, or if the damage crosses a corner or follows a whole taped seam. Those are different jobs. The last section says who to call.
Step 1: Classify the damage before you buy anything
Measure the hole at its widest point, then pick the method. Size is the whole decision, so here are firm cutoffs instead of the usual small, medium and large labels.
| Widest measurement | Right method | Reinforcement |
|---|---|---|
| Under 1/4 inch (nails, pins, small dents) | Spackle, one or two thin fills | None |
| 1/4 inch to about 1 inch | Self-adhesive mesh patch, skimmed | Fiberglass mesh only |
| 1 to 4 inches (doorknob, fist) | Tape or a flanged patch, then coats | Paper tape crisscross, patch kit, or a California patch |
| 4 to 6 inches | Drywall insert | Wood cleats behind the edges plus paper tape |
| Over 6 inches | Cut back square, fur out, insert | 1×3 backing screwed every 6 inches |
Draws its store-bought patch or mesh tape line at about 2 inches in diameter, according to Fine Homebuilding.
The mistake to avoid: buying a repair kit before measuring. A 6 inch mesh patch stretched over a 5 inch void will telegraph a soft, flexing hump no matter how well you finish it.
Step 2: Trim loose paper, crumbly edges, and damaged drywall
Cut back before you fill. Run a utility knife around the opening and remove every crushed edge, delaminated paper flap and crumb of loose gypsum until you reach firm material that does not move under thumb pressure. Then brush or vacuum the dust out of the cavity edges and wipe the surrounding paint so the patch or tape has something to grab.
If the paper face is torn but no gypsum is missing, cut the loose paper away, seal the exposed brown core with oil-based or shellac primer, and only then prefill the gouge. Skip that seal and the paper bubbles the moment waterborne compound or paint touches it.
The mistake to avoid: patching over crumbling edges. Compound bonds to the paint film and the paper, not to loose chalk. Every failed patch we have reopened had soft gypsum behind it.
Step 3: Choose the right repair method for the hole size
Tape and patches reinforce. Compound only shapes. Pick by width:
- Under 1/4 inch: spackle only, no tape and no patch.
- 1/4 to 1 inch: a self-adhesive mesh patch that lands on sound drywall well past the hole edge.
- 1 to 4 inches: paper tape crisscrossed into a bed of mud, a flanged patch kit, or a California patch.
- Over 4 inches: a drywall insert of the same nominal thickness, screwed to studs or to wood backing.
Mud has no tensile strength, so any opening you can’t bridge with supported material gets tape or a patch. Paper tape is stronger and flatter. Fiberglass mesh is faster and more forgiving for a beginner but weaker on wide or flexing openings.
Small holes and dents
Press spackle into the hole with a putty knife and scrape it flush in one pass. Nail and screw holes almost always need a second thin fill because lightweight spackle shrinks back as it dries. From 1/4 inch up to about 1 inch, a mesh patch stuck to clean, dry paint and skimmed with two thin coats is enough, because the sound drywall around the hole carries the load.
The mistake to avoid: overbuilding. Excess compound around a tiny hole leaves a raised halo that takes more sanding to remove than the fill took to apply. Anchor damage is covered in “how to repair anchor holes in drywall.”
Medium holes that need tape and compound
Between 1 and 4 inches the reinforcement does the structural work. The compound only shapes it. A flanged patch kit is the fast route for a doorknob hole. Where a bulge would show, a California patch sits flatter. Cut a drywall plug about 2 inches wider than the hole, snap the gypsum off a 1 inch paper border, test fit the plug and trim it until it drops in tight, then butter that paper flange into the mud so the plug fills the void instead of bridging it.
If you tape instead, spread a bed of all-purpose mud around the opening, lay two or three strips of paper tape in a crisscross, and squeeze each strip until mud comes out both edges. Press too lightly and you trap dry pockets that bubble. Press too hard and you starve the tape, which then cracks along the line.
The mistake to avoid: compound alone over a void. A 3 inch unsupported bridge of mud cracks around the perimeter within a season, usually right after you paint.
Large holes that need a drywall insert
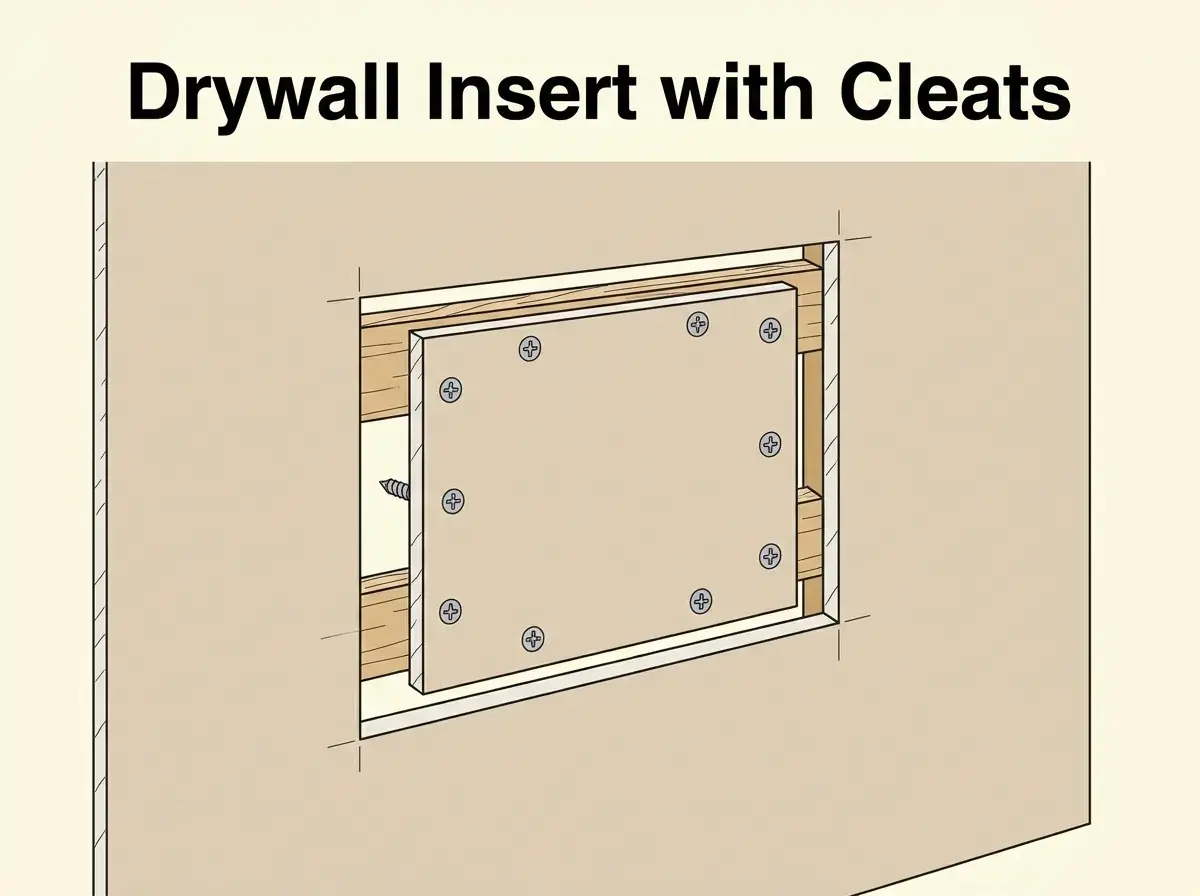
Past about 4 inches, stop filling and start replacing. Square the opening first. Mark lines about 1 inch outside the damage on all four sides, score the face paper, then cut the rectangle with a drywall saw. If a stud runs through the opening, cut back to the center of it so one edge of the insert screws straight to framing.
If no stud is in reach, slide two 1×3 cleats behind the opening, hold them tight to the back of the wall, and screw through the face into each cleat about every 6 inches. Bob Vila says holes more than 6 inches wide need furring strips to provide adequate support. Cut the insert from drywall of the same nominal thickness and slightly smaller than the opening so it drops in without forcing. Screw it to the cleats, back-fill the gap around it with mud, then tape all four joints with paper tape.
The mistake to avoid: bridging a large void with mud and mesh. It will bulge, crack, or both. Full sequences live in “how to repair a big hole in drywall” and “big hole drywall repair.”
Step 4: Apply compound in thin coats and feather the edges
Plan on two or three coats, each one thinner and wider than the last. Two or three coats are normal on larger repairs. A tape coat, dry and sand, a second coat, dry again, then a third skim with a wide knife when you want a very smooth finish.
- Small repair, up to about 1 inch: coat one with the 6 inch knife to bed the mesh patch or fill flush, coat two with the same knife, 2 to 3 inches wider. Two coats is the whole job.
- Medium repair or an insert: a tape coat under about 1/8 inch thick with the 6 inch knife, a second coat 2 to 3 inches past it, then a skim with a 10 or 12 inch taping knife held almost flat and spread wider than the taped seam.
Feathering is how far the compound thins to nothing. Carry the edge 3 to 4 inches past a small mesh repair and 8 to 10 inches on a paper-flange patch or a taped insert. Steepen the knife in the center and flatten it as you pull outward so the blade wipes the perimeter clean. If you can feel a ridge with your fingertips, another coat will not bury it.
The mistake to avoid: filling the hole level in one pass. Thick compound shrinks toward the center. What you sand flat today reads as a dish tomorrow.
Step 5: Let it dry fully, then sand without damaging the repair
Drying and setting are two different events. Premixed compound dries by evaporation. Setting-type compound hardens through a chemical reaction, then still has to dry.
Pro-tip: setting vs. drying time
Reference conditions for drying are roughly 70 to 77 degrees and 50 to 70 percent relative humidity. Conventional premixed joint compound usually needs about a day between coats at 70 degrees and 70 percent relative humidity, and can take longer in cold, humid, or poorly ventilated rooms. Setting compounds come in 5, 20, 45 and 90 minute working-time grades. That hardness is not dryness. Adding water does not speed a setting compound up. The 90 minute grades cannot have their set time changed by dilution at all.
Schedule around the numbers in that box. Quick-set mud can give you two coats in one session, so a 20 minute grade gets a bedding coat and a fill coat in an afternoon, while premixed compound needs overnight between coats. Mix only what you can spread in half the stated working time, because a 20 minute pan sets whether you’re finished or not. Most beginners lose the first batch learning that.
Check before you touch sandpaper. A patch that has gone uniformly bright white is dry. A gray center means moisture is still leaving the fill.
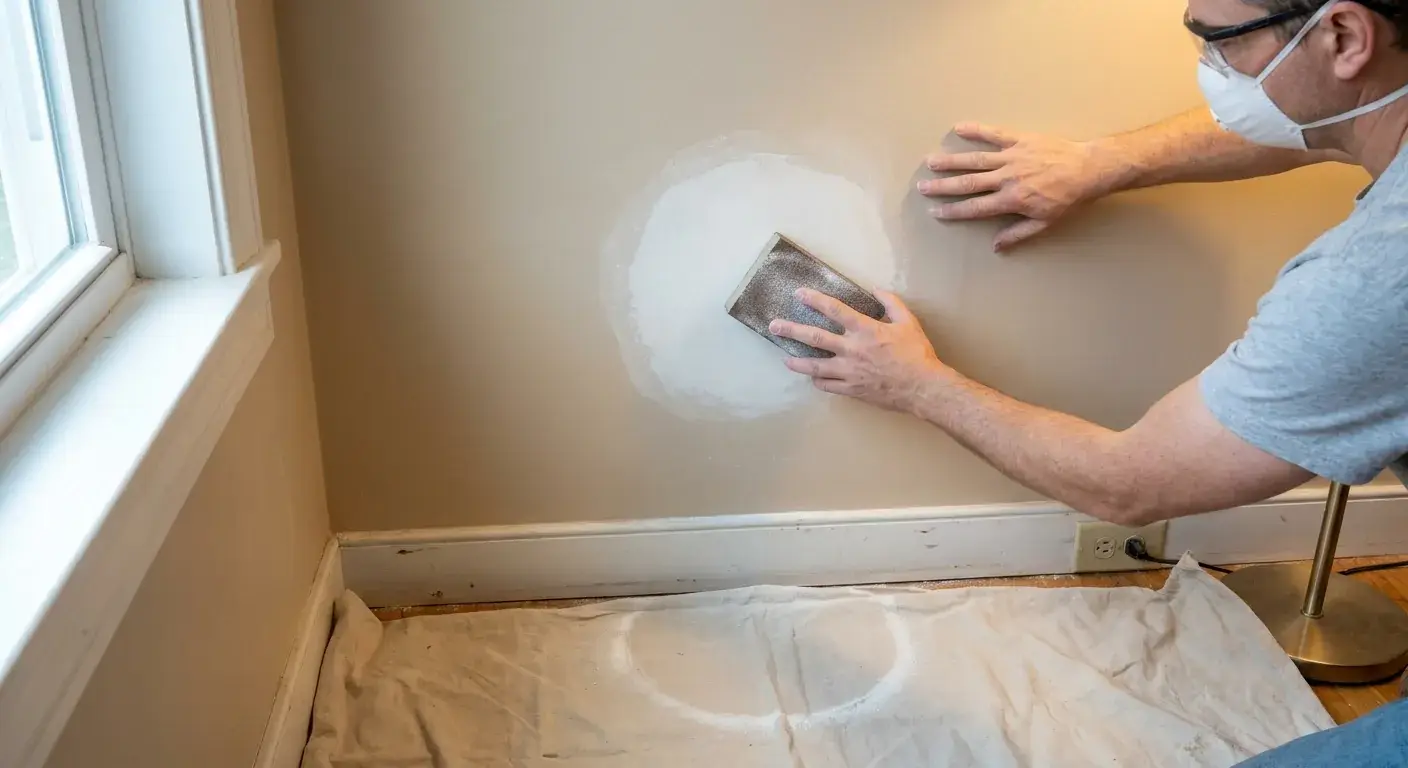
Sand with a 120 to 150 grit sponge and light pressure, and stop the moment the surface goes flat. Dig in and you fuzz the paper or expose the tape. NIOSH found that five commercially available vacuum sanding controls reduced dust exposures by 80 to 97 percent. A damp sponge in place of dry sanding works well on small patches.
Step 6: Prime, paint, and check whether the repair disappeared
Prime first, always. Cured joint compound is far more porous than the painted wall around it, so paint soaks in, dries duller, and leaves the exact circle you were trying to hide. One coat of drywall or PVA primer over the whole patched area, out to the edge of the compound, evens that porosity out.
Then check the finished result:
- Flatness: hold a light flat against the wall and sight down the surface. No hump, no dish, no shadow ring.
- Edges: run a bare hand over the perimeter. No ridge, no grit, no lip.
- Flashing: under raked side light, a dull or shiny halo means the primer missed part of the compound. Prime again before you paint.
- Texture: orange peel or knockdown has to carry the same pattern. Spray light, let it flash off, and knock it down to match the grain.
- Paint: roll it with the same nap as the original wall so the stipple matches.
If the spot still shows, the cause is almost always no primer, a texture mismatch, or a sheen mismatch from spot painting a wall that was last painted years ago. When the sheen or the age of the surrounding paint does not line up, cut in at the nearest corner and repaint the full wall.
When to call a pro instead
Most flat, dry, cosmetic holes are a good DIY afternoon. Stop and hire out when:
- The drywall is damp, stained, sagging or musty, or water is still coming in.
- You can see wiring, pipe or ductwork inside the opening.
- The damage runs into a corner, hits corner bead, or follows a whole taped seam.
- The wall is orange peel, knockdown, skip trowel or popcorn and you can’t match the grain.
- The repair is on a ceiling or above head height.
- A move-out inspection, listing photos or a tenant turnover is on the calendar.
Hiring it out usually runs from under a hundred dollars for a small patch into the low hundreds for a larger one. The cost detail belongs to “hole in drywall repair.”
On one recent job, a new window’s rough opening was patched, corner bead installed, then floated smooth and texture-matched so the repair blended into the wall. If your wall needs that, send a couple of pictures and your zip code and you get a quote back within 10 minutes.
Precision Patch Pros is licensed and insured under CSLB License #830875, serving Southern California since 2020, with a 5-year workmanship guarantee. We do not do leak detection, water extraction or mold remediation, so that work comes first.
Frequently Asked Questions
Does Home Depot fix drywall?
Big-box stores sell the patch kits, compound, and drywall, and some locations refer installation to third-party contractors, but the repair itself is not performed by store staff. For a patch that has to match existing texture and paint, a drywall specialist is the more predictable path than a general referral.
Can I repair drywall myself?
Yes, for a dry cosmetic hole in a flat section of wall. A first timer can handle anything up to about 4 inches with a patch kit and two coats of compound. Past that, squaring the opening and backing an insert takes more practice. Water damage, exposed wiring and aged texture are where DIY jobs most often get redone.
How big of a hole can drywall repair fix?
There is no upper limit on what drywall repair can fix, only on what one patch can fix. Anything past about 6 inches means cutting back to studs or wood backing and setting in a replacement piece. Once several holes sit close together it’s faster to replace the drywall between studs. If the opening reaches wiring or plumbing, it stops being a patch job.
How to fix a hole in the wall without a stud?
Use wood backing. Slip two 1×3 cleats into the cavity, hold them against the back of the existing drywall, and screw through the wall face into each end so they span the opening. Your insert then screws to those cleats, which gives the patch the rigid support a stud would have provided.
Can I use drywall tape to patch a hole?
Tape reinforces an opening. It does not span one on its own. On holes from about 1 to 4 inches you can bed two or three crisscrossed strips of paper tape into wet mud so the tape carries the fill, but every strip needs a pocket-free bed or it bubbles later. Anything wider needs a rigid backer or a drywall insert behind the tape.
When should water-damaged drywall be replaced instead of patched?
Replace it when the panel is soft to finger pressure, sagging, crumbling, or still damp, and when a stain returns after priming. Patching over wet gypsum traps moisture and the repair fails again. Precision Patch Pros repairs water-damaged drywall but does not do water extraction, dry-out, or mold remediation, so the leak and the drying come first.
Can a drywall hole be repaired in one day with fast-setting compound?
Often, yes, on small to medium patches. A 20 minute setting compound lets you bed, recoat, and sand within a few hours, then prime and paint the same afternoon. Large inserts and heavily built-up repairs are safer over two days, because a thick coat that hardens fast can still hold moisture inside.
How can you match existing orange-peel or knockdown wall texture?
Test the spray on cardboard first and adjust the nozzle until the droplet size matches the wall, not the can’s label. Orange peel is sprayed and left alone. Knockdown is sprayed heavier, allowed to flash for a few minutes, then flattened with a wide blade. Matching an aged texture is the hardest part of the job, which is why texture matching on orange peel, knockdown, smooth, and popcorn is handled as its own step rather than an afterthought.