
Quick Answer: What a Big Drywall Hole Repair Takes
Once a hole pushes past 4 inches or so, filler won’t hold. The job becomes a cut-out repair: you square the opening, add wood backing, screw in a same-thickness drywall patch, tape it, coat it, then sand, prime, texture and paint. Hands-on work runs two to four hours, but each compound coat has to dry before the next one goes on, so the finish stretches past one session.
One thing decides whether the repair lasts: the patch has to be held by screws into wood or framing, not by joint compound. Compound bridges a seam. It doesn’t carry a panel.
Tools and materials:
- Drywall of the same thickness as the existing board (measure at the hole)
- Scrap 1 x 3 lumber or plywood backing, plus 1 1/4 inch coarse-thread drywall screws
- Utility knife, drywall saw, carpenter’s square, pencil, stud finder with AC detection
- Self-adhesive fiberglass mesh tape or paper tape
- Setting-type compound (45 or 90 minute) for fills, premixed for finish coats
- 6 inch joint knife plus a 10 or 12 inch knife for feathering
- Sanding sponge or screen (120 and 220 grit), drop cloth, dust mask, eye protection
- Drywall or PVA primer, matching texture material, matching paint
As This Old House notes, for holes larger than 6 inches in diameter, the backing method is two short 1 x 3 boards plus a scrap piece of drywall.
This method fits a dry, single-layer wall or ceiling with solid board around the damage. It doesn’t fit wet or crumbling drywall, fire-rated assemblies, or damage that keeps coming back in the same spot.
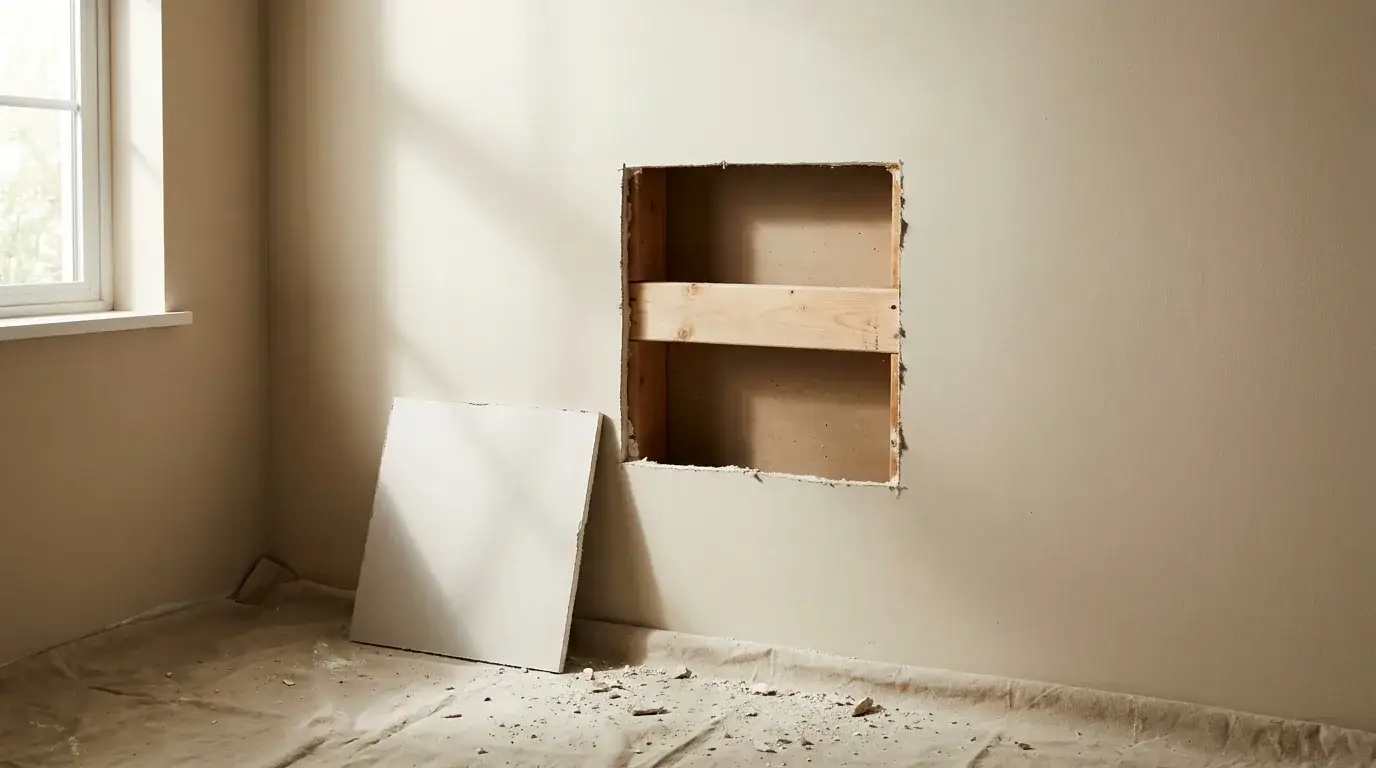
Step 1: Square Up the Damage and Inspect the Cavity
Inspect before you cut, in this order: kill the breaker, scan the wall, look inside with a mirror, then feel the cavity by hand. Stop right there if you find wet insulation, a damp cavity, or a live plumbing line at the cut edge, because that’s a water job, not a patch job.
- Kill the power. Turn off the breaker feeding any outlet, switch, or fixture on that wall, then test the nearest outlet to confirm it’s dead.
- Scan the area. Run a stud finder with live-wire detection across the wall and mark every stud, wire, and pipe it picks up.
- Look inside. Shine a flashlight into the opening and hold a small mirror at an angle to see up, down, and to both sides of the cavity.
- Feel for what the scanner missed. Reach in with a gloved hand above and below the opening for cable, pipe, or bracing.
Never cut blind, and never cut deeper than the board. Set the blade just past the drywall thickness. Use a keyhole saw by hand where a wire crosses your line. Have a nail plate set over any cable sitting closer than 1 1/4 inches to the face of the framing.
Then mark the cut. Square a rectangle 1 inch outside the visible damage, or run the line to the center of a stud when the damage sits within about 2 inches of one. Score the lines with a utility knife, break out the waste by hand, and pull crushed gypsum and torn paper until every remaining edge is firm.
Stop and reassess on standing water, staining that spreads past the hole, or a musty smell. On visible mold, the EPA says an area under about 10 square feet, roughly a 3 ft. by 3 ft. According to the U.S. EPA, patch, can usually be handled yourself in most cases. On water damage, Precision Patch Pros confirms the area is dry with a moisture meter and applies an antimicrobial solution before new drywall goes in.
Step 3: Fasten the Patch So It Stays Flat
A patch works when two opposite edges can be screwed to framing or to wood backing you install. Once the opening passes about 12 inches, crosses more than one framing bay, runs into a corner or ceiling seam, or the board is soft from moisture, replace the section out to stud centers instead.
| Hole size and location | What to do |
|---|---|
| Under 2 inches, field of wall | Mesh patch or setting compound fill |
| 2 to 6 inches, between studs | California patch or cut-out patch with backing |
| 6 to 12 inches, between studs | Squared cut-out, 1 x 3 backing both sides, screwed patch |
| Over 12 inches or spanning two studs | Cut back to stud centers, replace the full bay |
| Reaches a corner, ceiling seam, or bead | Replace to the nearest framing member, re-bead the corner |
| Wet, sagging, or crumbling board | Remove, dry and verify, then replace |
Slide each backing board into the cavity, overlap it into the hole by 1 1/4 inches, and screw through the face of the existing drywall into the board top and bottom. Cut the patch about 1/8 inch smaller than the opening so it drops in without force, then drive screws into the backing at 6 to 8 inch spacing.
Keep every screw at least 1 inch in from the patch edge, or the gypsum crumbles behind the paper and the patch loosens later. Countersink each head until the paper dimples without tearing, then run your knife across the patch and sink any head that clicks. A bent or rusted corner bead gets cut out and a new length fastened and coated, because bead can’t be straightened in place. For extensive mechanical damage, industry guidance often calls for removing board back to the framing and replacing the damaged section.
Step 4: Tape the Seams and Build the First Coat
Big openings need mechanical support before any tape or mud goes on. Mesh tape, a self-adhesive patch, or spackle stretched over an open hole with nothing behind it cracks, usually within a season of normal movement. Those products belong on small holes and not on a 6 or 12 inch one.
- Dust the seams. Wipe loose gypsum off the joint area with a dry brush so tape and compound bond.
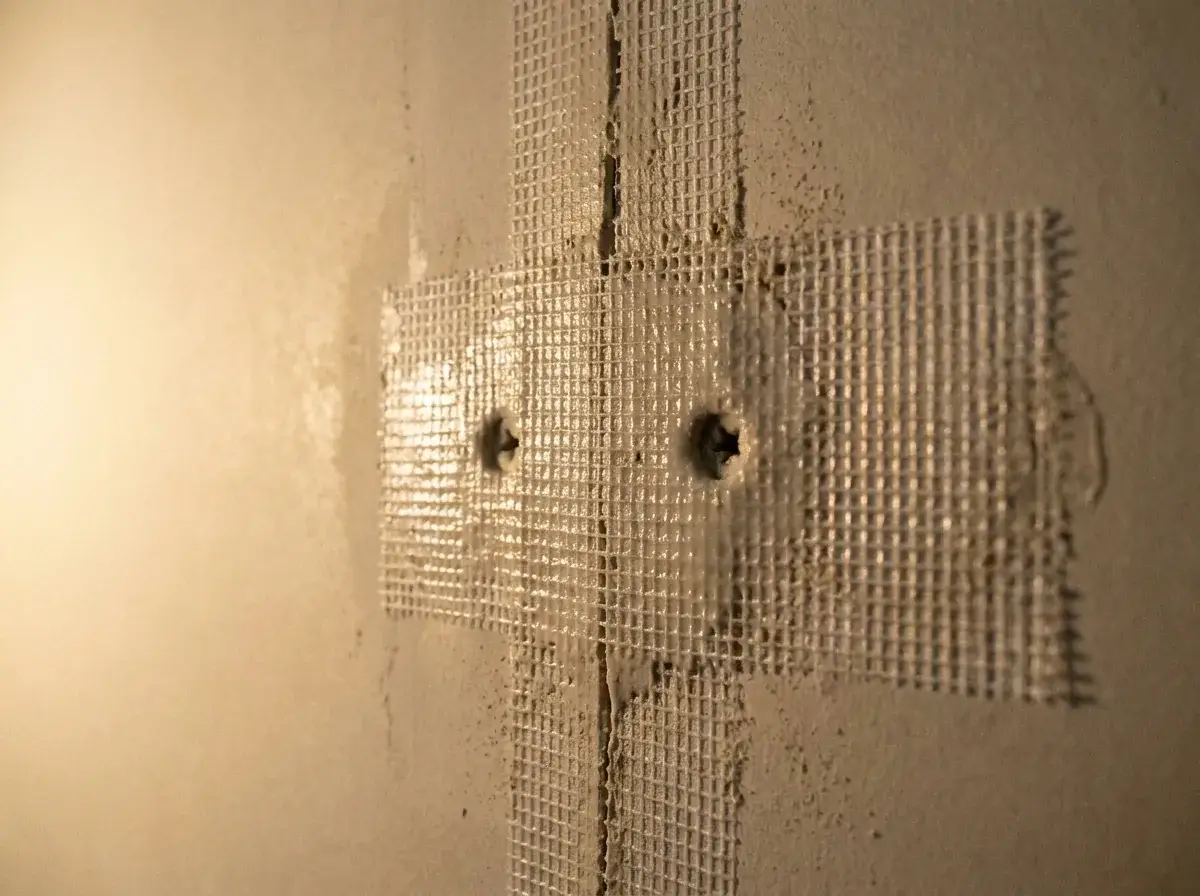
- Lay the tape. Center mesh tape over each of the four seams and butt the ends at the corners instead of overlapping them, because overlaps build a ridge you can’t sand out.
- Pair tape with the right mud. Mesh belongs with setting-type compound, which cures hard and keeps the open weave from cracking. Paper tape belongs in all-purpose or taping compound, bedded with a 6 inch knife. Mesh under lightweight premixed is the combination that cracks on a big patch, so save premixed for the finish coats.
- Press the first coat through. Use the 6 inch knife at a low angle and force compound into the mesh until no white strands show, about 1/8 inch thick over the tape.
- Fill the screw dimples in the same pass, one light stroke each.
The mistake here is treating coat one as a hiding coat. A thick blob shrinks, cracks down the middle, and traps moisture under a hard shell.
Step 5: Add Wider Coats, Then Let the Compound Cure
Setting time and drying time are two different clocks, and confusing them causes most redos. A 90 minute setting compound hardens chemically in about 85 to 130 minutes, but it’s still holding water when it feels firm. Premixed all-purpose joint compound typically dries in about a day under normal conditions, though timing can shift with temperature and humidity. Read the compound, not the clock: damp mud looks slightly gray and feels cool against the back of your hand. Dry mud is uniform bright white, edge to edge.
Coat two goes on with a 10 inch knife, extending 2 to 3 inches past coat one. Coat three goes wider with a 12 inch knife, pressure heavier at the outside edge so the mud thins to nothing. At Precision Patch Pros, the patch gets feathered 8 to 12 inches out with two to three coats and sanding between, then primed and blended. That width is what makes a 10 inch patch invisible under room light.
| Stage | Hands-on time | Wait before next step |
|---|---|---|
| Cut, backing, patch, screws | 30 to 45 min | None |
| Tape and first coat | 20 min | 90 min (setting) or 24 hr (premixed) |
| Second coat, feathered wider | 15 min | 12 to 24 hr |
| Third finish coat | 15 min | 12 to 24 hr |
| Sand, dust, prime | 30 min | 1 to 2 hr for primer |
| Texture and paint | 30 to 60 min | 2 to 4 hr between paint coats |
| Whole job, quick-set compound | 2 to 4 hr total | one long day, start to paint |
| Whole job, premixed compound | 2 to 4 hr total | 2 to 3 days, start to paint |
Step 6: Sand, Prime, and Match the Finish
Sand, prime, then match the texture. A patch reads through the paint for three reasons: the compound was never feathered wide enough, the bare compound never got primer, or the texture doesn’t match. Knock down ridges with a 120 grit sponge, finish the feathered area with 220 grit in light circles, and feel for the transition with your bare palm rather than trusting your eyes.
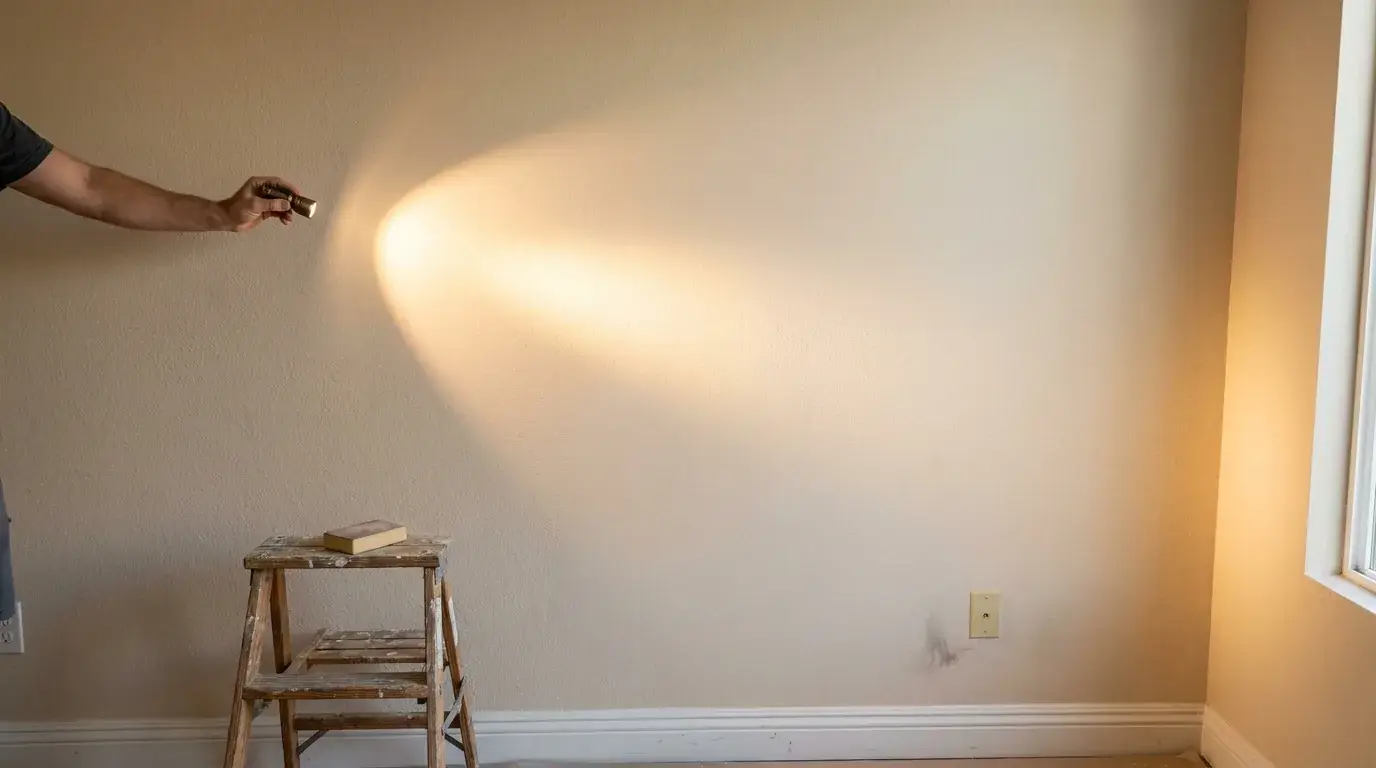
Pro-Tip: Inspect in angled light before you paint. Hold a flashlight almost parallel to the wall and sweep it across the repair. Ridges throw shadows, low spots go bright, and both are easy to fix with one thin skim. Doing this after the paint dries means sanding through fresh color.
Vacuum the dust, wipe with a barely damp sponge, then prime the whole patched and feathered area with a drywall or PVA primer. Skipping primer is what causes flashing, that dull rectangle that appears only when light hits the wall sideways.
Texture comes after primer, and every finish gets a test on scrap drywall or cardboard first:
- Smooth wall: skim the surrounding 2 feet with thinned compound and sand with 220 grit, reaching past the feathered edge.
- Roller stipple: thin compound to heavy cream, test a 1/2 inch nap and a 3/4 inch nap, then roll the repair in one direction only.
- Orange peel: spray thinned compound fine and light on the test board, match the droplet size, then dust the repair in two light passes.
- Knockdown: spray heavier, wait 10 to 15 minutes until the peaks lose their shine, flatten with a 12 inch knife, and use the same timing on the wall.
Then paint: on a textured wall, roll corner to corner or to the nearest break so the sheen matches. Precision Patch Pros handles the patch, the texture match and the paint touch-up in one visit, which is why homeowners across Bakersfield, the Antelope Valley and the San Fernando Valley send us two or three photos instead and skip the guesswork.
How to Tell the Repair Worked
Press the middle of the patch with your palm. It should feel like the rest of the wall: no flex, no drum sound, no give at the corners. Run your hand from the wall onto the repair with your eyes closed, and you shouldn’t feel where one starts. Then stand off to the side in normal room light and sweep the angled flashlight again: no rectangle outline, no shadow at the feathered edge, and a sheen that matches the surrounding paint from every angle.
When to Call a Pro Instead
Some large-hole repairs stop being a weekend project. Hand these off:
- Water damage. If water sat more than 48 hours, insulation is wet, or staining spreads beyond the hole, the section needs removal and verification. Extraction, dry-out and mold remediation are separate trades.
- Mold past a small area. When growth covers more than 10 square feet, the EPA advises consulting its Mold Remediation in Schools and Commercial Buildings guide.
- Ceilings. Gravity works against you, the patch has to be braced while wet, and sagging board may be holding water.
- Fire-rated or shared walls. These need a matching Type X panel of the same thickness, mechanically fastened and finished, to restore the rating.
- Cracks that keep reopening. Repeated cracking points to framing movement or an active leak, so filling it again just resets the clock.
- Openings spanning several studs, stairwells and high ceilings, plus smooth-wall and heavily textured rooms where one ridge or a pattern mismatch reads under window light.
Professional repairs in this category typically run into the low hundreds, and the full pricing breakdown lives in “Hole in Drywall Repair Guide: Costs, DIY or Pro.”
Precision Patch Pros is licensed and insured, CSLB License #830875, backs the work with a 5-year guarantee, and sends your quote within 10 minutes of getting photos. Send two or three pictures and get the wall back to looking like nothing happened.
Frequently Asked Questions
How to fill a 2 inch gap in drywall?
A 2 inch gap is small enough to fill without a cut-out, but not with lightweight spackle alone. Pack it with setting-type compound in two lifts, letting the first harden before the second, or bridge it with mesh tape over setting compound if the gap runs long and narrow. Feather the finish coat about 6 inches past the gap so no line shows.
Should I use premixed joint compound or setting-type compound for a large repair?
Use setting-type compound for the deep work: bedding mesh tape and filling anything more than 1/8 inch, since it hardens in 45 or 90 minutes and shrinks less. Switch to lightweight premixed for the last coat, because it sands far more easily and feathers thinner.
Can cracked drywall be repaired?
Yes, but the fix depends on why it cracked. A settled seam or a corner crack gets cut open in a V, taped with paper tape, and coated three times. A crack that reopens, grows, or follows a structural line needs the underlying movement or leak diagnosed first, or it will come back through the new patch.
Do drywall repair clips work for large holes?
Drywall repair clips give you fastening points along an edge that has no framing behind it, and they work well for openings that fall between studs. They still count as mechanical support, which is the requirement. For openings past about 12 inches, wood backing or replacing the full bay is more reliable than clips alone.
My drywall anchor hole is too big. What can I do to fix it?
For a blown-out anchor hole up to about 2 inches, pack it with setting-type compound over a short piece of mesh tape, or push in a plastic repair plug and coat over it. Anything larger gets a small squared patch with a scrap of wood backing behind it. Either way, put the new hardware into a stud or a toggle a few inches away, because the old spot will never hold the same shelf or TV mount again.
What does drywall repair mean?
Drywall repair means restoring both the panel and the finish: removing unsound board, reattaching or replacing it with mechanical fasteners, then taping, coating, sanding, priming, texturing, and painting so the area matches the rest of the surface. The panel work makes it strong. The finish work makes it disappear.