
A cracked or bubbled drywall seam is one of the most fixable flaws in a house. Whether a repair lasts comes down to two questions. Is the tape still bonded to the wall? Is something behind it moving or wet? Once you’ve got those answers, the right repair and the right person to do it are usually pretty clear.
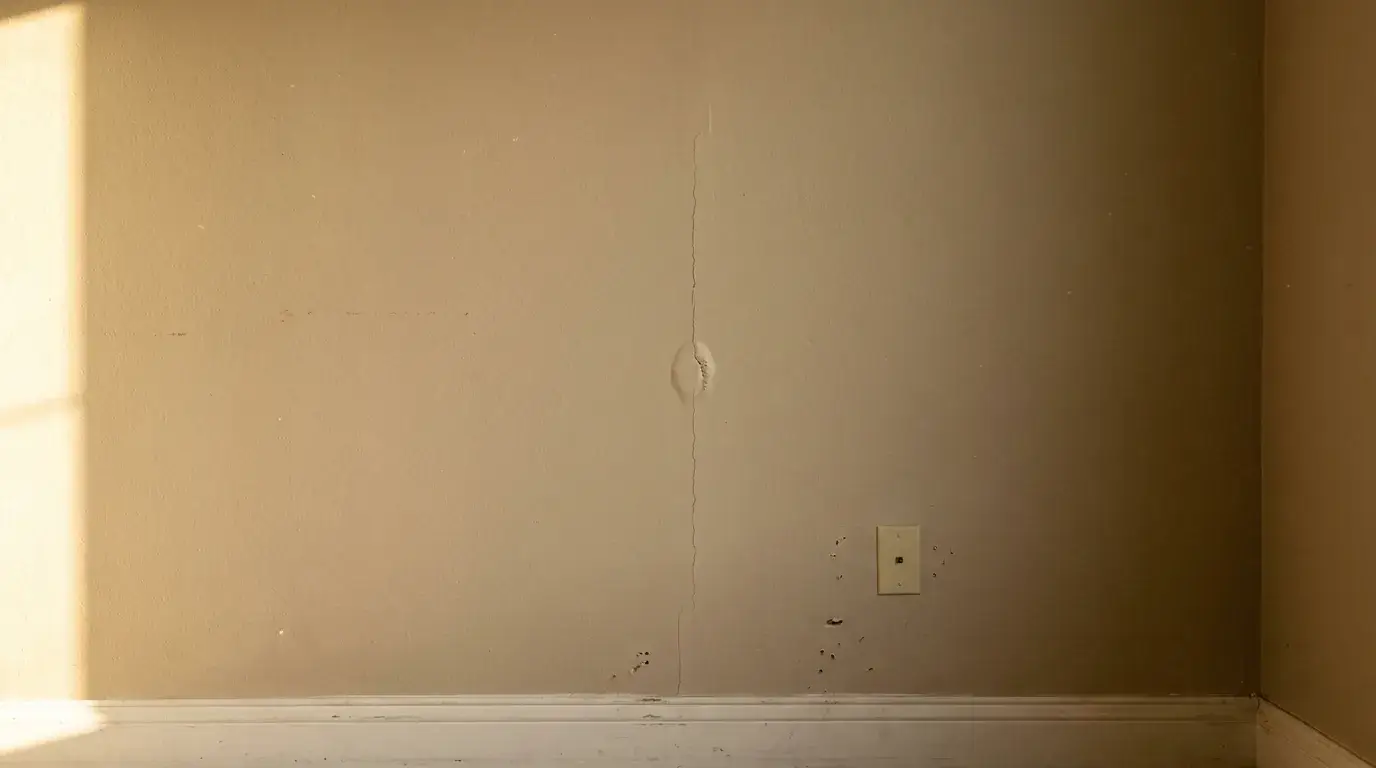
What Drywall Seam Repair Is and Who Needs It
Yes, bad drywall seams can be fixed, and usually no board needs replacing. Seam repair restores the joint where two sheets meet. That means the tape, the joint compound bedded over it and the finish on top, so the line disappears again. It covers hairline cracks, lifted or bubbled tape, popped nails and screws, split inside corners, ceiling seams and seams that keep reopening.
Homeowners tend to spot these after a hot, dry summer. Renters find them during a move-out walk-through, with a deposit on the line. Landlords and property managers find them between tenants, often in several rooms at once. That annoying moment when you notice one crack and suddenly see five? Yep.
Key takeaway: Most seam problems are cosmetic and can be repaired in place. The ones that aren’t usually give themselves away: a wide crack, a stain, a sag or a crack that keeps returning.
Which Seam Problem Do You Have? Choose Your Path
Start with one quick test. Press firmly on both sides of the crack with flat palms. If an edge flexes, the board is loose and needs fastening before any compound will hold.
- Hairline crack in the compound only: surface shrinkage or a thin finish coat. Fill and refinish. See “How to Repair a Crack in Drywall: 7 Steps That Hold Up”.
- Crack that follows the joint line: the tape has let go underneath, so it needs new tape. A taping failure sits exactly on the joint, with dry, firm board on both sides. See “How to Repair a Crack in Drywall: 7 Steps That Hold Up”.
- Bubbled or blistered tape: too little compound went under the tape at install. See “how to repair a cracked drywall seam”.
- Popped nail or screw: a round bump that catches the light. Reset it and refinish. See “How to Repair a Crack in Drywall: 7 Steps That Hold Up”.
- Inside-corner split: the corner flexes as the framing moves. It needs folded paper tape. See “how to repair a cracked drywall seam”.
- Ceiling seam crack: either a finish defect or a support problem. See “crack in ceiling drywall repair”.
- Wide, diagonal, stair-step or recurring crack: movement, settling or framing. Stress and settling cracks run at an angle from door and window corners and grow slowly. Go to When to Hire a Drywall Pro Instead.
- Soft, swollen or stained board near the seam: moisture, often shown by yellow or brown rings, soft paper or a musty smell. Find and stop the leak before anyone patches it. Board that’s dry, firm and only lightly stained may need just a stain-blocking primer and refinish. Soft, swollen or crumbling gypsum has to be cut out, since compound over wet board will bubble and fail. Go to When to Hire a Drywall Pro Instead.
Can I Repair a Seam Crack Myself, and Do I Need to Retape It?
You can, as long as the board is firm and the tape is still stuck. A hairline crack in the compound only needs filling. A crack along the joint, or tape you can lift with a fingernail, needs new tape on that stretch.
You rarely need to retape the whole seam. A spot repair holds only where the tape is still bonded, so the loose section comes out and the rest stays. Say the tape lifts along just a 12-inch stretch of an 8-foot seam. Only that 12 inches comes out. Gaps wider than about 1/8 inch take setting-type compound first, because ready-mix shrinks too much in a deep gap. The finished repair feathers out roughly 10 to 12 inches wide. As This Old House notes, joint compound shrinks as it dries, so one coat is never enough.
The repair, from diagnosis to texture matching, is in “How to Repair a Crack in Drywall: 7 Steps That Hold Up”.
Cracks Along Ceiling Seams
You can usually fix a ceiling seam without replacing the ceiling if the crack is narrow, dry and stable. A straight hairline along a joint, with the ceiling flat on both sides, is a finish problem. Thin compound or poorly bedded tape is the usual cause.
Treat it as a warning if the crack is wider than 1/8 inch, if one side hangs lower, if the board sags between joists, if the crack runs diagonally or if you see any stain. A bulging seam that looks like a ridge often means fasteners are letting go, poor materials or moisture. Overhead work is harder too. Wet mud pulls downward, and window light shows every ridge.
A stain changes the job. On one Precision Patch Pros kitchen ceiling leak, the crew cut out the damaged section, hung fresh drywall, taped and floated the area and repainted the kitchen so no sign of the leak remained. The warning signs are laid out in “crack in ceiling drywall repair”.
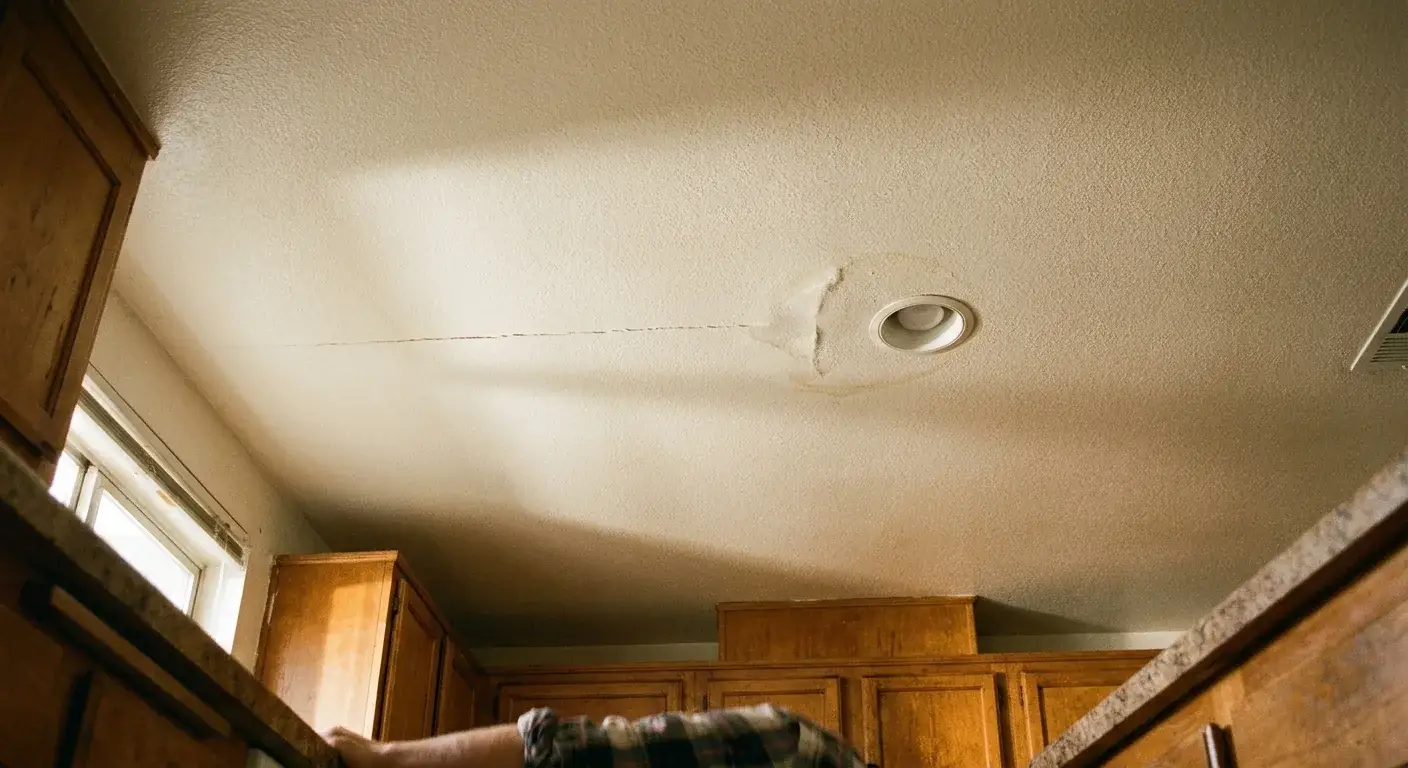
Cracked, Bubbled or Separating Seams
To fix a bubble or fill a gap, first decide whether the tape stays or goes. Tape that’s bonded at both ends, with a small blister in the middle, can be re-bedded in place. Tape that’s torn, dirty, peeling in long runs or bubbling for the second time has to come out.
Piling mud over loose tape fails. The new layer sits on something that isn’t attached, so the blister grows, the ridge thickens and the seam ends up looking worse than before.
Paper tape is stronger in corners and on joints that move. According to USG, fiberglass mesh is easier for flat repairs, and its maker says it gives a smooth joint in just two coats. Ready-mix coats need about 24 hours to dry between coats, while setting compound can be recoated once it hardens. Cutout limits and tape choice are in “how to repair a cracked drywall seam”.
Seams That Keep Coming Back or Still Show After Painting
If a seam reopens every year after a careful retape, something is moving. Press both sides again, and note whether the crack returns in the same season each year. The usual culprits are framing lumber that swells and shrinks with the seasons, fasteners spaced too far apart, long walls or ceilings with no control joints, and moisture from a slow leak, condensation or the roof. If the board flexes, screws about 6 inches apart along the stud should go in before anyone retapes.
Sometimes the seam is sound but still shows. Then the finish is the problem. A hump, texture sanded flat or a sheen mismatch shows under raking light, so hold a flashlight flat against the wall to spot it. Bare compound soaks up paint differently, so an unprimed patch shows as a dull spot called flashing. Compound also cures weak unless air and surfaces stay at or above 55°F until it’s dry.
The repair methods are in “How to Repair a Crack in Drywall: 7 Steps That Hold Up” for joint cracks and “how to repair a cracked drywall seam” for bubbled or separating tape. If a competent repair fails again, it’s time for a pro. Want a second opinion first? send 2 or 3 pictures and get a quote within 10 minutes.
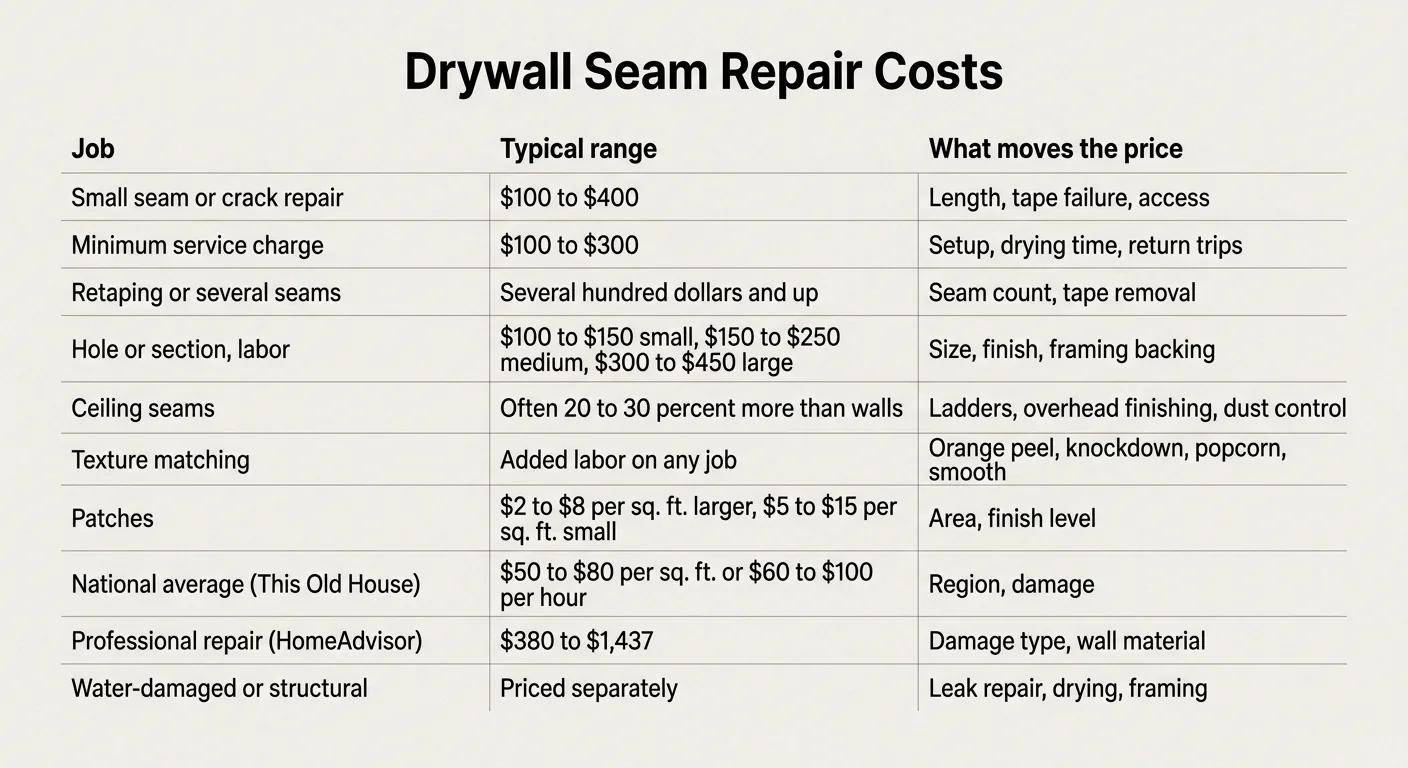
What Drywall Seam Repair Costs
| Job | Typical range | What moves the price |
|---|---|---|
| Small seam or crack repair | $100 to $400 | Length, tape failure, access |
| Minimum service charge | $100 to $300 | Setup, drying time, return trips |
| Retaping or several seams | Several hundred dollars and up | Seam count, tape removal |
| Hole or section, labor | $100 to $150 small, $150 to $250 medium, $300 to $450 large | Size, finish, framing backing |
| Ceiling seams | Often 20 to 30 percent more than walls | Ladders, overhead finishing, dust control |
| Texture matching | Added labor on any job | Orange peel, knockdown, popcorn, smooth |
| Patches | $2 to $8 per sq. ft. larger, $5 to $15 per sq. ft. small | Area, finish level |
| National average (This Old House) | $50 to $80 per sq. ft. or $60 to $100 per hour | Region, damage |
| Professional repair (HomeAdvisor) | $380 to $1,437 | Damage type, wall material |
| Water-damaged or structural | Priced separately | Leak repair, drying, framing |
Pricing across Southern California follows the same logic. Tiny repairs cost more per foot because setup, coats and drying take the same time regardless of size. It’s worth checking whether a quote includes primer, paint, texture, return visits and cleanup.
When to Hire a Drywall Pro Instead
Hire a pro when the damage goes beyond one small area, when a ceiling shows the warning signs in Cracks Along Ceiling Seams, or when the result has to be invisible by a set date. DIY works for a narrow, stable crack in dry, firm board. Help makes sense for any of these:
- Cracks wider than 1/8 to 1/4 inch
- Diagonal or stair-step cracks from door and window corners
- Any of the ceiling warning signs above, such as sagging or displaced board
- Several failing seams, corners or nail pops at once
- Orange peel, knockdown or popcorn texture to match
- A move-out inspection, sale or tenant turnover deadline
Landlords prepping a unit save the most by listing every crack, nail pop and corner in one quote, since setup and drying are fixed costs.
Who you call depends on the cause. A drywall specialist handles finish work. If moisture or movement is behind the crack, a leak or water-damage specialist, a structural engineer or a framing contractor comes first. Precision Patch Pros doesn’t do mold remediation, water extraction, leak detection or structural framing. Get those fixed first so the patch doesn’t fail.
Here’s what’s worth asking any pro:
- Will you cut out loose tape or only coat over it?
- Do primer, texture and paint touch-ups come in the price?
- How many visits will drying take?
- What guarantee covers the work if the seam reopens?
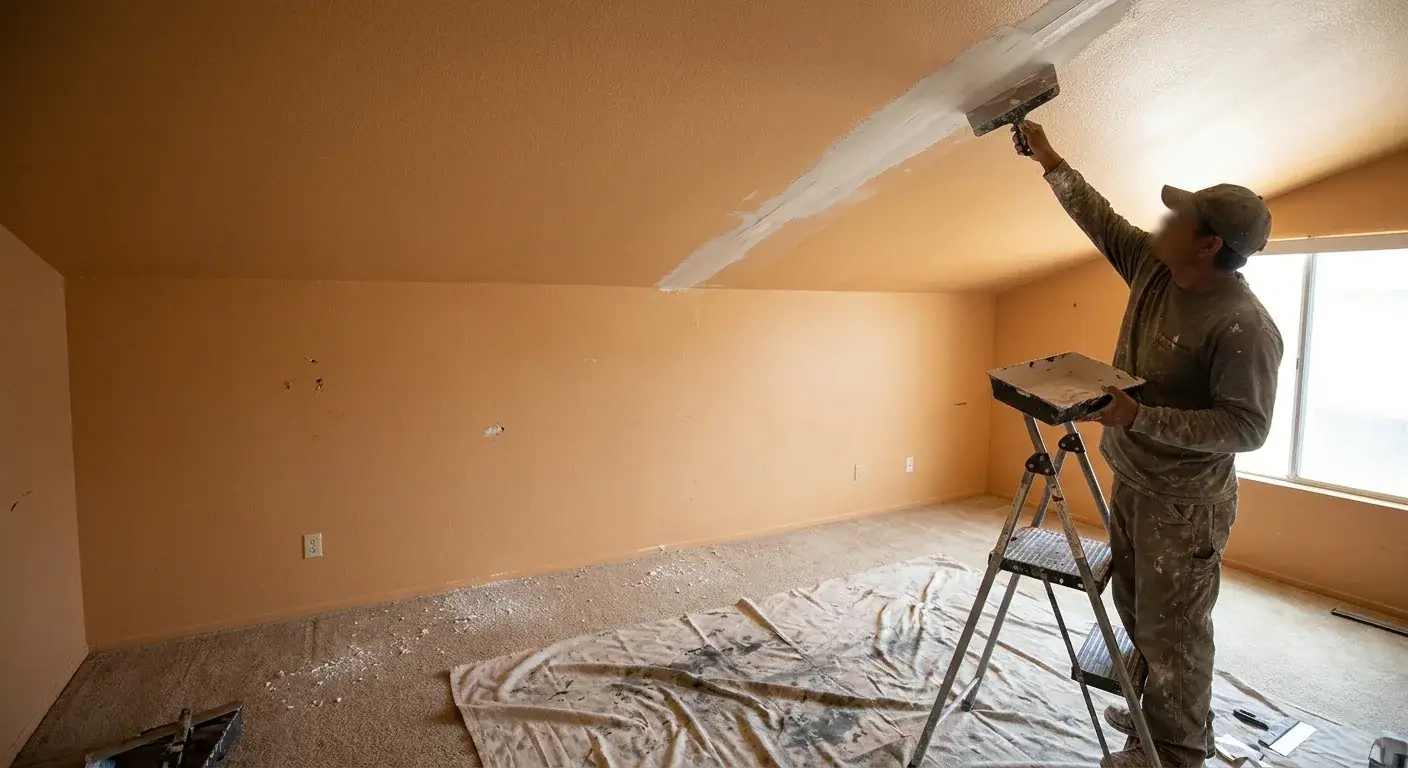
Precision Patch Pros is licensed and insured under CSLB #830875 and treats drywall repair like a finish job. Most jobs are done in one visit, including the patch, texture matching and paint touch-ups, and the work carries a 5-year guarantee. Text 2 or 3 pictures and get your quote within 10 minutes.
Frequently Asked Questions
Should you tape all drywall seams?
Yes. Every flat joint, butt joint and inside corner needs tape bedded in compound. Untaped joints crack within months as the boards move. Outside corners get metal or paper-faced corner bead instead of plain tape.
In what order do you tape drywall seams?
Ceilings go before walls, so wall tape overlaps ceiling tape at the corner. After that come butt joints, tapered joints and inside corners on each surface. The full taping and coating sequence is in “How to Repair a Crack in Drywall: 7 Steps That Hold Up”.
How do I fix a popped screw so it doesn’t come back?
Press the board tight to the stud, drive a new screw about 1.5 inches from the popped one, then reset or remove the old fastener. Dimpling and coating the heads are covered in “How to Repair a Crack in Drywall: 7 Steps That Hold Up”.
How do I match the existing texture after repairing a seam?
Test the texture on scrap cardboard and compare it with the wall in daylight. Orange peel is sprayed, knockdown is sprayed and then flattened with a knife after it sets briefly, and popcorn needs its own spray texture. Blend the edges a foot or more past the repair, then prime and paint the whole plane. Texture matching is covered in “How to Repair a Crack in Drywall: 7 Steps That Hold Up”.
How can I repair cracks quickly?
A setting-type compound with a short working time is the usual pick, sold as 20 or 45 minute mixes. It hardens chemically rather than by drying, so you can recoat the same day. Mix only what you can use before it sets, and go with an easy-sand version for the final coats.
How can I fill gaps between drywall seams?
Any gap wider than about 1/8 inch takes setting-type compound first, because ready-mix shrinks too much in a deep gap. Once it hardens, bed paper or mesh tape over the joint in a layer of compound. Finish with thin coats feathered out on both sides until the seam disappears.
What tools and supplies do I need for seam repair?
You’ll want a utility knife, a 6-inch knife and a 10 or 12-inch knife, a mud pan, setting-type and ready-mix compound, and paper or fiberglass tape. Add drywall screws and a drill for loose board, a sanding sponge, primer and paint. A flashlight helps with checking the finish, and drop cloths catch the dust.
How do I skim coat a wall after seam repairs?
Thin coats of joint compound go over the whole area, about 1/8 inch or less per layer. Each layer needs about 24 hours to dry before the next one. Sand lightly between coats, then prime before painting so the skim coat and the old finish take paint the same way.