
Most damaged ceiling drywall can be repaired. The fix is often smaller than the stain makes it look. What decides the job is whether the board is still dry, firm and attached. If it is, patching, texture matching and a paint touch-up can make the repair disappear. If it’s soft, wet or sagging, that section comes out first.
Contents – What Ceiling Drywall Repair Covers and Who Needs It – Which Ceiling Problem Do You Have? Choose Your Path – Cracks, Nail Pops and Seams – Water Stains and Leak Damage – Sagging Ceilings – Emergency Ceiling Damage – Choosing a Ceiling Drywall Repair Contractor – What Ceiling Drywall Repair Costs – When to Hire a Pro for Ceiling Drywall Repair – Frequently Asked Questions
What Ceiling Drywall Repair Covers and Who Needs It
Yes, damaged drywall can almost always be repaired. On a ceiling, that means restoring the board, the joints and the finish overhead so the damage stops showing. It covers resetting loose board, retaping cracks, patching holes, sealing stains, cutting out water-damaged sections and blending texture and paint around the work.
The usual suspects are nail pops, hairline and seam cracks, holes left by plumber or electrician access cuts, water stains, sagging sections and broader water damage. Homeowners see most of it. Renters facing a move-out inspection need it fast. Landlords and property managers deal with it between tenants, often after a leak from the unit above.
Key takeaway: The visible mark is often only the symptom. A nail pop can point to framing movement, and a small brown ring can sit under soaked insulation. Fix the cause and the patch stays fixed.
Which Ceiling Problem Do You Have? Choose Your Path
A small, dry hole, nail pop or hairline crack is cosmetic, and a careful DIYer can handle it. Cracks wider than 1/4 inch, diagonal cracks running off a door or window corner, and cracks that come back after two repairs usually point to movement or moisture behind the board. That’s contractor territory. A stain doesn’t prove an active leak. Damp, soft or spreading discoloration does.
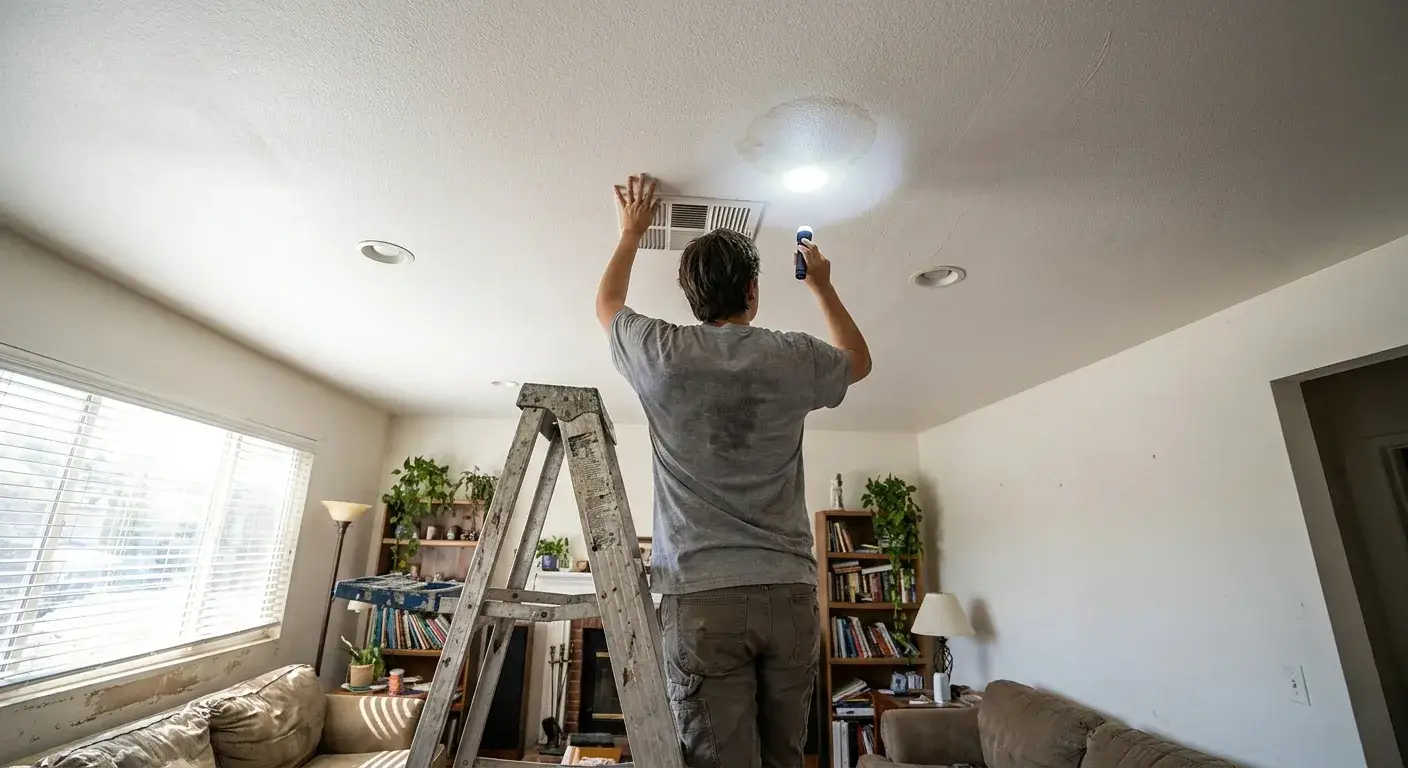
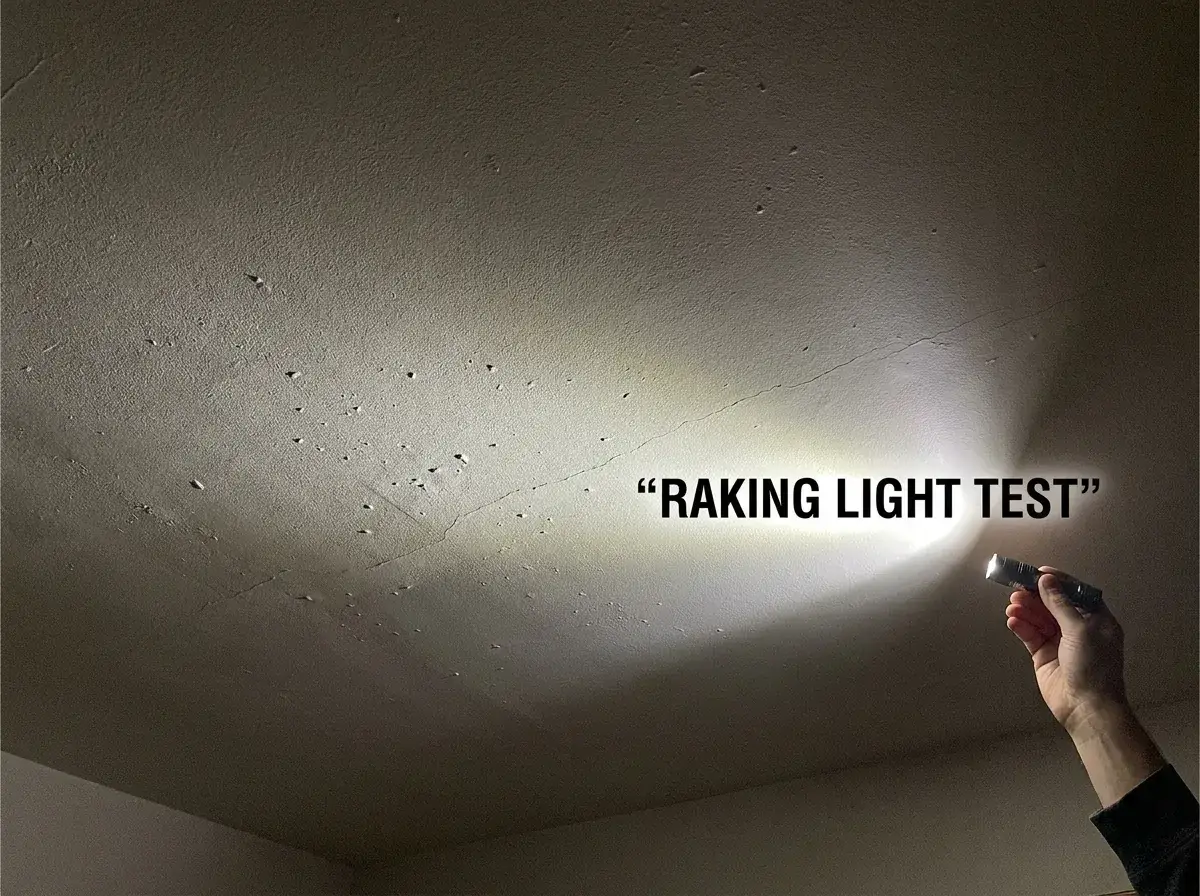
Press gently near the damage, then shine a flashlight across the ceiling at a low angle. What you see and feel tells you most of what you need.
- Small, dry nail pop or hairline crack. Cosmetic. A screw, compound, primer and paint usually settle it. Next step: Cracks, Nail Pops and Seams.
- Seam crack that keeps coming back. The surface is cosmetic, the joint is not. It needs new tape. Next step: Cracks, Nail Pops and Seams.
- Stain, board dry and firm. Usually repairable in place once the source is fixed. Next step: Water Stains and Leak Damage.
- Wet or soft board. Hazardous. Leave it open to dry and don’t seal it. Next step: “emergency drywall repair.”
- Sagging or bowing. Hazardous. Clear the room. Next step: “how to repair sagging drywall ceiling.”
- High, vaulted or textured ceiling. The risk here is access and finish. Older popcorn ceilings may contain asbestos, so it’s worth testing before scraping or sanding. Next step: When to Hire a Pro for Ceiling Drywall Repair.
Damage that spans more than one framing bay belongs on the pro side of the line too, no matter how dry it looks.
In short: – Dry, small and stable: DIY is reasonable. – Wet, soft, sagging or recurring: stop and find the cause.
Not sure where your ceiling falls? Get a photo quote on your ceiling damage.
Cracks, Nail Pops and Seams
Ceiling cracks get fixed by opening the crack, clearing out loose compound and rebuilding the joint. Smearing filler over the line only lasts until the next season change. When a crack follows a seam, fresh tape bedded in compound is the answer, because a skim coat alone reopens the moment the joint moves.
Nail pops work the same way. Hammering the nail back in buys a few months, tops. A drywall screw driven an inch or two away pulls the board tight to the framing, and the old fastener gets set or removed and covered.
Still seeing your patch after sanding and painting? The feathering probably stopped too soon. Each thin coat should reach 3 to 6 inches past the last. Precision Patch Pros feathers ceiling crack repairs 8 to 12 inches wide over two to three coats, so the edge disappears. Prime before painting, since bare compound soaks up paint differently and flashes (that dull patch you spot from across the room). Under raking light from a window or recessed can, some ceilings need a skim coat or a full repaint to hide the edge.
Water Stains and Leak Damage
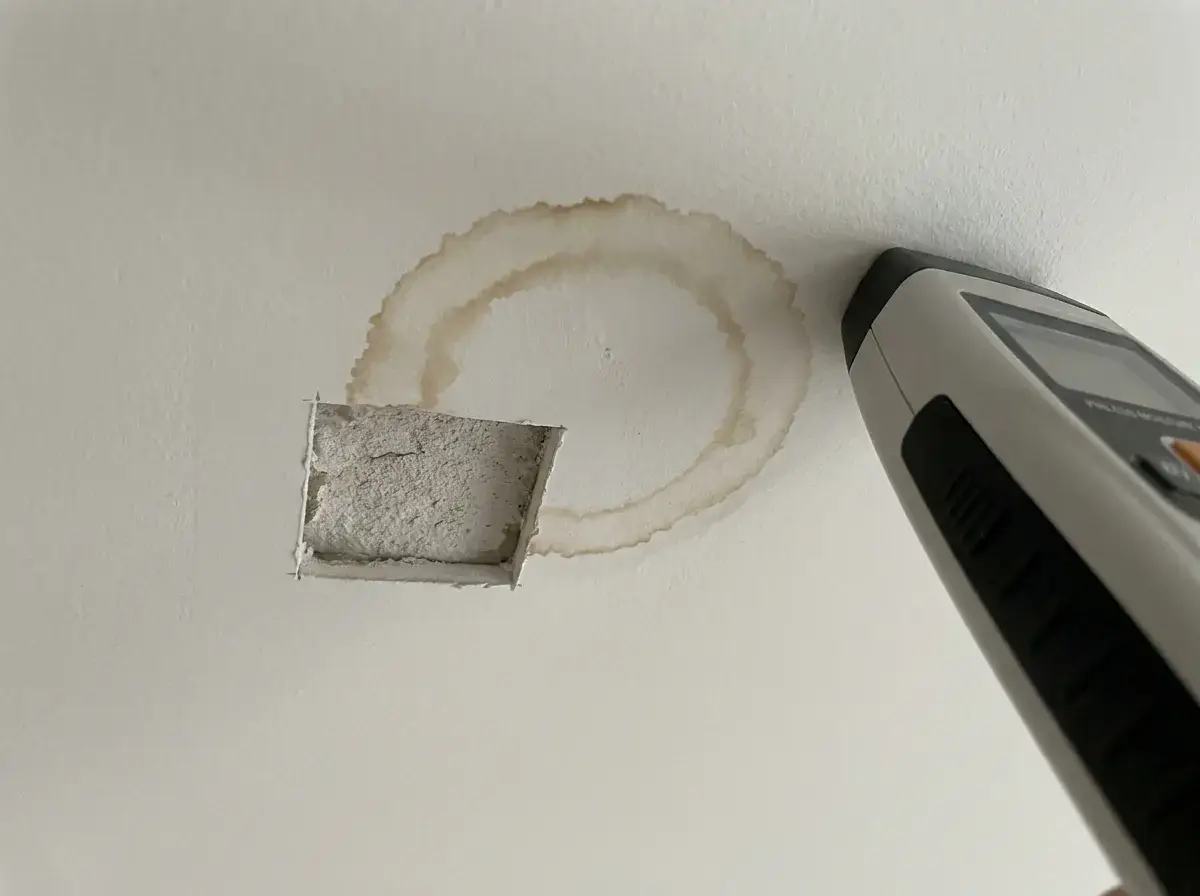
You don’t always need to replace ceiling drywall after a leak. A water-stained ceiling can often be repaired in place when the source is fixed and the board is firm, dry and intact with tight seams. Soft, swollen, bubbling or crumbling board has lost its strength and gets cut back to sound material.
Timing decides a lot. As the U.S. EPA’s Mold Course notes, in most cases mold won’t grow if wet materials are dried within 24 to 48 hours. Board that stays wet past that window, or water of unknown origin like a drain line, goes to restoration and mold specialists first. Water extraction, dry-out and mold remediation are separate trades, and drywall repair comes after them. Before new board goes up, Precision Patch Pros checks the framing with a moisture meter and applies an antimicrobial treatment.
Warning: Painting over a stain hides the symptom and leaves the cause. Stain-blocking primer only works on board that is already dry. On damp board, the ring returns and the moisture keeps working behind it.
Sagging Ceilings
Sagging ceiling drywall should be replaced in the affected area, never patched, and the room should stay empty until it’s checked. A sag is riskier than a crack. Gravity pulls on wet board and tired fasteners around the clock, and a section can drop without warning, sometimes after the visible leak has stopped.
Usual causes? Moisture in the board, failed or too few fasteners, and heavy insulation or pooled water above. Each one has to be corrected before new board goes up. Skip that and the replacement droops along the same line.
Keep people and pets out, move furniture from under the bulge and leave it alone. A water-filled bubble can let go all at once. Cut-out sizing, framing checks and the rebuild sequence are covered in “how to repair sagging drywall ceiling.”
Emergency Ceiling Damage
When a ceiling is dripping or coming down, stop the water first. Close the fixture valve or main supply for a plumbing leak, catch roof water with buckets, and flip the breaker for any light, fan or smoke detector in the wet zone. Working on drywall around a recessed light or ceiling fan isn’t safe until an electrician clears the wiring.
Then call whoever owns the source, whether that’s a roofer, plumber, HVAC tech or mold specialist. Take photos of everything before cleanup, for your insurer or landlord. The timeline and what each visit involves are in “emergency drywall repair.”
Choosing a Ceiling Drywall Repair Contractor
The person who fixes drywall is a drywall finisher, or for small and medium damage, a drywall repair specialist. A general handyman can patch a hole. Texture matching and invisible blending are finisher skills.
Judge the finish under your room’s real lighting, with the cans on and the blinds open. Ridges, a patch that flashes through the paint, mismatched texture and unpainted edges all justify rework before you pay.
Two questions are worth asking up front. How will they match the texture? And will they paint only the patch or the whole ceiling plane? Spot painting rarely blends on an older ceiling. The full buying guide, with the questions and red flags to check, is in “ceiling drywall repair contractor.”
What Ceiling Drywall Repair Costs
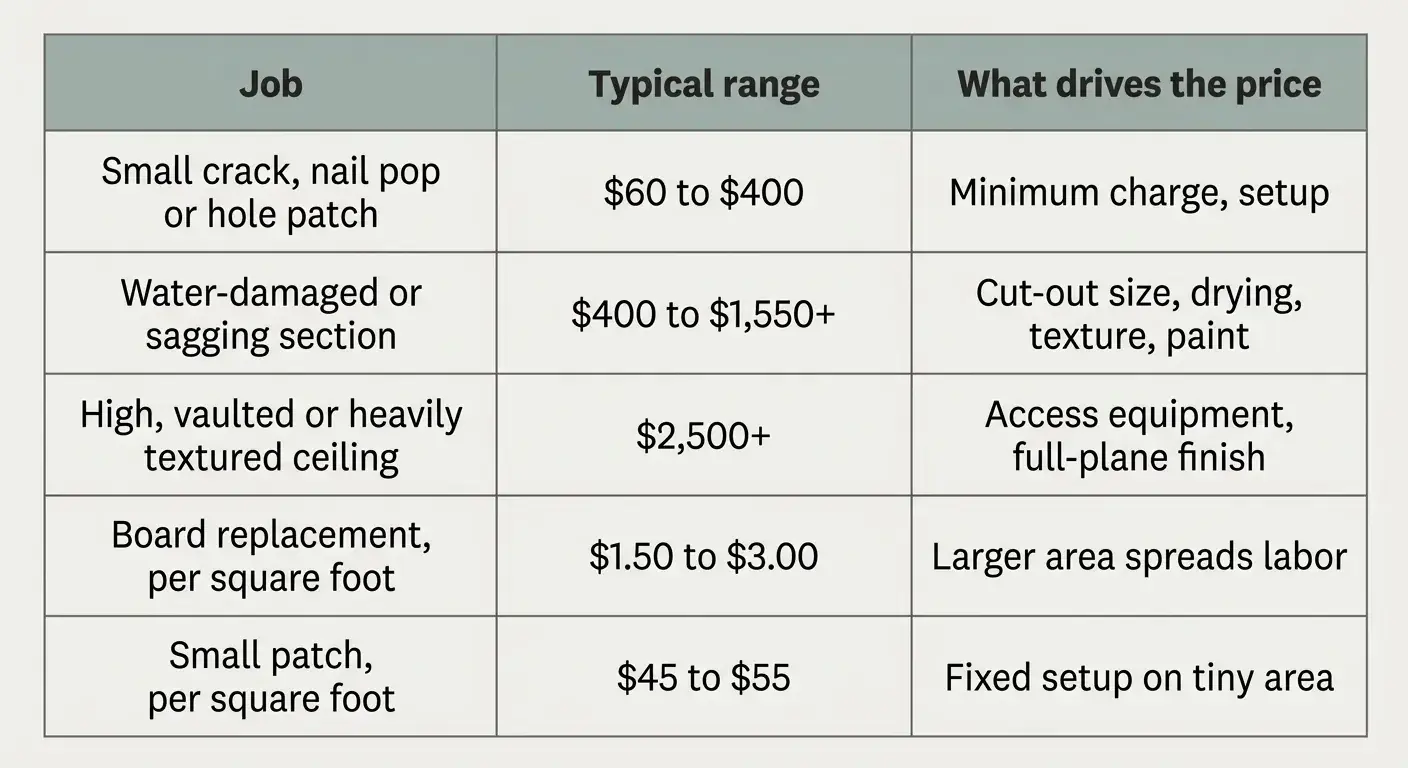
A ceiling drywall repair costs anywhere from about $60 for a small nail pop to $2,500 or more for high, textured or heavily water-damaged work. According to Fixr, nationally, drywall repair runs $200 to $550, with an average of $350.
| Job | Typical range | What drives the price |
|---|---|---|
| Small crack, nail pop or hole patch | $60 to $400 | A $100 to $250 minimum often applies |
| Water-damaged or sagging section | $400 to $1,550+ | Cut-out size, drying, texture, paint |
| High, vaulted or heavily textured ceiling | $2,500+ | Access equipment, full-plane texture and paint |
| Board replacement, per square foot | $1.50 to $3.00 | Labor spread over a large area |
| Small patch, per square foot | $45 to $55 | Fixed setup on a tiny area |
For a local reference point, a water-damaged drywall repair at Precision Patch Pros typically totals $500 to $750.
Why does a 2-square-foot patch cost hundreds? Most of the bill is fixed. Travel, masking floors and furniture, primer, paint and the minimum charge are the same whether the hole is small or not. Compound also has to dry between coats, so many jobs take two or three visits, even when the later ones last 30 minutes. Fixing the leak itself is usually a separate bill. A good quote lists demolition, new board, tape, texture, primer, paint, cleanup and disposal, so you can compare bids line by line.
When to Hire a Pro for Ceiling Drywall Repair
You can repair drywall yourself when the damage is small, dry, stable and inside one framing bay. Past that size, or in any of these cases, a professional pays for itself:
- Sagging, soft or bubbling board
- Holes large enough to need new board and backing
- Water of unknown origin
- High, vaulted or popcorn ceilings, or long stretches of overhead ladder work
- Damage near wiring, recessed lights or plumbing
- Cracks that return after earlier repairs
- A move-out or tenant turnover deadline
Can it be finished in one day? A small patch with fast-setting compound often can. A ceiling that needs new board runs closer to this calendar. Day one is the cut-out, hanging, tape and first coat. Day two is the second coat, sanding and texture. Day three is primer and paint once the texture dries. Cool or humid weather stretches every step.
Before hiring, ask what the quote includes, whether a minimum charge applies and what the warranty covers.
Precision Patch Pros handles drywall repair across Bakersfield, the Antelope Valley, Santa Clarita and the San Fernando Valley, with patching, texture matching and paint touch-ups done in one visit on most jobs. We’re licensed and insured under CSLB License #830875, serving Southern California since 2020, and every job is backed by a 5-year workmanship guarantee. Send two or three pictures and get your quote within 10 minutes.
Frequently Asked Questions
How do you fix a big hole in ceiling drywall?
Trace a matching patch, then cut the damage back to that clean square with a drywall saw. Screw wood backing strips across the opening about 6 inches apart, and fasten the patch to them with screws every 6 inches or so. Tape the seams, add thin coats of compound, then prime, texture and paint. You’ll need a drywall saw, drill, screws, 6 and 12-inch knives, tape, compound and a sanding sponge.
What is the going rate for a drywall finisher?
Drywall repair labor typically runs about $60 to $90 per hour. A small ceiling patch takes one to two hours of hands-on work, but drying time between coats can add return visits. That’s why many finishers charge a flat minimum of about $150 to $250 on small jobs instead of billing by the hour.
How do you match popcorn, knockdown, or orange-peel texture after a drywall repair?
Practice on scrap cardboard first. Orange peel uses thinned compound sprayed in fine droplets. Knockdown uses heavier splatter, flattened with a trowel after it sets for several minutes. Popcorn uses a dedicated patch product. Let the texture dry fully before priming, because wet texture looks darker and hides mismatches.
How to cover drywall seams on a ceiling?
Bed paper tape or fiberglass mesh tape over the seam. Mesh pairs best with quick-setting compound, since premixed mud can crack through it. Lay the tape coat with a 6-inch knife, then feather the second and third coats with a 10 or 12-inch knife so the seam blends under ceiling light. Sand lightly, prime and paint.
How dry does ceiling drywall need to be before it can be patched?
Check with a moisture meter. Readings below about 16% are a common dry target for repair. Between 16% and 20% the board is still damp, and above 20% it’s wet with elevated mold risk. Take readings in several spots, including past the visible stain.
Will homeowners insurance cover water-damaged ceiling drywall?
It depends on the cause. Sudden, accidental events like a burst supply line are often covered, while slow leaks and maintenance issues frequently aren’t. Photograph the damage, keep the failed part, and call your insurer before cutting anything out.
Do ceiling drywall repairs require a permit?
Cosmetic patching, priming and painting usually don’t. Replacing framing, moving electrical, repairing a roof leak or doing structural work may trigger local approval. Your city or county building department sets the rules, so check before a large replacement.
How much dust and mess should I expect from ceiling drywall repair?
Sanding compound overhead throws fine dust everywhere it can travel. Expect plastic sheeting over floors and furniture, the HVAC turned off during sanding, and smoke detectors briefly covered so dust doesn’t set them off. Vacuum sanders and damp sponges cut the mess sharply.
How much to charge to replace ceiling drywall?
Standard ceiling drywall replacement is reported at about $1.50 to $3.00 per square foot, with labor at roughly $60 to $90 per hour. Small jobs usually hit a minimum charge instead. A fair quote also covers demolition, texture, primer, paint and disposal, since those often cost more than the board.