
Yes, most ceiling drywall damage is repairable. Whether you’re staring up at a small crack, a water stain, or a hole left by an old fixture, the good news is that you won’t always need to tear down an entire ceiling and start from scratch. In many cases, a skilled patch, some careful finishing work, and attention to texture matching will restore your ceiling to its original appearance.
Ceiling repairs are more complex than wall repairs. Gravity works against you, imperfections are more visible under overhead lighting, and matching texture on a ceiling is genuinely challenging. But that doesn’t mean the damage can’t be fixed. Small holes, hairline cracks, water stains, and even minor sagging can often be addressed with targeted repair work rather than full replacement. What you’re dealing with matters. Understanding the type of damage, the repair approach that makes sense, and when it’s time to bring in professional help, all that stuff shapes what happens next.
This guide walks you through how to assess ceiling damage, when patching will work, when replacement is necessary, and what to expect in terms of cost, time, and complexity. If you’re trying to decide whether that ceiling issue is a weekend DIY project or a call to a pro, you’re in the right place.
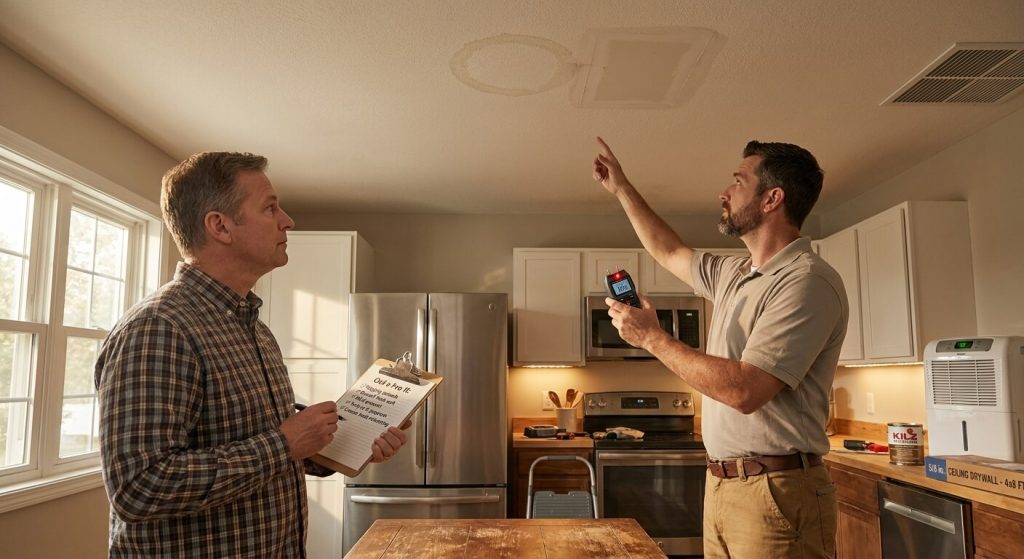
Yes, Most Ceiling Drywall Damage Is Repairable
Here’s the reassuring part: the majority of ceiling drywall problems can be fixed without replacing entire panels. Holes from old light fixtures, cracks from settling, water stains after a leak has been fixed, and even some sagging issues are all candidates for professional-quality repair work that leaves the ceiling looking untouched. The repair might involve cutting out damaged material, reinforcing the structure behind it, and blending the patch so completely that you’d never know it was there.
Ceiling repairs do require more skill and care than wall repairs. Ceilings are scrutinized differently. Overhead light casts shadows across every imperfection, and even a slight hump or divot can become obvious when the sun hits it at the right angle. Texture matching is harder on ceilings because spray patterns and knockdown techniques must be applied overhead. Any inconsistency stands out immediately. Gravity also complicates the work. Mudding and sanding overhead is physically demanding, and holding materials in place until they set takes patience and the right tools.
But complexity doesn’t mean impossible. Professional drywall repair specialists treat ceiling work as a finish job from the start. They know how to feather edges invisibly, match textures precisely, and leave a result that looks like the damage never happened. For homeowners willing to invest the time and care, smaller ceiling repairs are also within reach, as long as expectations about texture matching and finish quality are realistic.
Assess Your Damage: A Quick Diagnostic Guide
Before deciding whether to patch or replace, you need to understand what you’re working with. Walk directly underneath the damaged area and look up with good lighting (ideally natural daylight or a bright work light held at an angle). This reveals texture inconsistencies, color differences, and subtle changes in the plane of the ceiling that overhead fixtures might hide. Next, gently press on the damaged area with your fingertips. Firm drywall that gives slightly under pressure is normal. Soft, spongy, or crumbly material indicates water damage or structural breakdown and requires more than a cosmetic patch.
Run your hand across the surface in all directions to feel for irregularities. Hairline cracks may not be visible but can be felt as faint ridges. Check the surrounding area, not just the obvious damage. A water stain in one spot often signals a problem that has spread beyond what you can see. Tap lightly with your knuckles in a grid pattern around the damage. A solid, consistent sound means the drywall is still attached to the framing. A hollow or dull thud suggests the panel has separated from the joists or that moisture has compromised adhesion.
This diagnostic process helps you sort damage into categories and decide what kind of repair is needed.
Hairline Cracks and Network Cracking
Hairline cracks are thin, shallow fissures that often appear along seams or in corners where the ceiling meets the wall. They’re typically cosmetic, caused by minor settling, seasonal humidity changes, or poorly finished joints during original installation. A single hairline crack running along a seam isn’t a structural concern. It just means the tape or mud underneath has separated slightly from movement in the framing.
Network cracking (where multiple fine cracks radiate out in a web pattern) usually points to improper mudding technique, too many layers of joint compound applied too quickly, or paint applied before the mud fully cured. These cracks are repairable with scraping, re-taping, and proper drying time between coats. If cracks keep reappearing in the same spot after repair, the issue is likely framing movement or an improperly supported seam, which requires addressing the structure behind the drywall.
Small Holes and Impact Damage
Small holes, nail pops, and impact dents are among the easiest ceiling repairs to execute. A hole from removing a light fixture, a doorknob that swung too high, or fasteners that pulled through during original installation all fall into this category. These repairs involve filling the void, reinforcing with backing if necessary, and blending the surface texture to match the surrounding ceiling.
The challenge with ceiling holes isn’t structural. It’s the visibility of the patch. Because ceilings are viewed from below under direct and indirect light, even a slight color or texture mismatch becomes obvious. Gravity also complicates application. Mud sags if applied too thickly, and holding backing or mesh in place overhead while fastening requires extra hands or creative use of supports. But the damage itself is straightforward to fix if you’re methodical and patient with finishing.
Water Stains and Soft Drywall
Water stains are the most anxiety-inducing ceiling issue because they signal a problem that may extend beyond the surface. A brown or yellow stain doesn’t always mean the drywall itself is damaged. Sometimes the stain is just discoloration. The paper facing absorbed moisture, but the gypsum core remained intact. You can test this by pressing firmly on the stained area. If it feels firm and doesn’t compress, the damage may be cosmetic, and you can seal and repaint once the source of the water has been fixed.
Soft, spongy, or sagging drywall is a different story. That means the gypsum core has broken down and the paper facing has separated. This material has lost its structural integrity and won’t hold fasteners or support weight. Soft drywall must be cut out and replaced. No amount of patching compound will restore strength to compromised gypsum. Address the water source first, whether that’s a roof leak, plumbing issue, or condensation problem, before repairing the ceiling. Otherwise, the new patch will fail just as the original drywall did.
Sagging or Bowing Ceilings
Minor sagging, where a section of ceiling dips slightly but remains attached to the framing, can result from heavy insulation resting on the drywall, improper fastener spacing, or humidity-related expansion. If the sag is less than an inch and the drywall still feels firm, it’s often repairable by adding fasteners, removing excess insulation from above, and shimming the low spot back into plane before refinishing.
Significant sagging, where the ceiling bows more than an inch or two, or where large sections have visibly separated from the joists, indicates a structural problem that patching won’t fix. This can happen when drywall was hung parallel to the joists instead of perpendicular, when the wrong thickness was used for the joist spacing, or when long-term moisture weakened both the drywall and the fasteners. In these cases, the affected panels need to be removed and rehung correctly with proper support and fastener spacing. Trying to patch over a structurally compromised ceiling just delays the inevitable and risks further damage or even collapse.
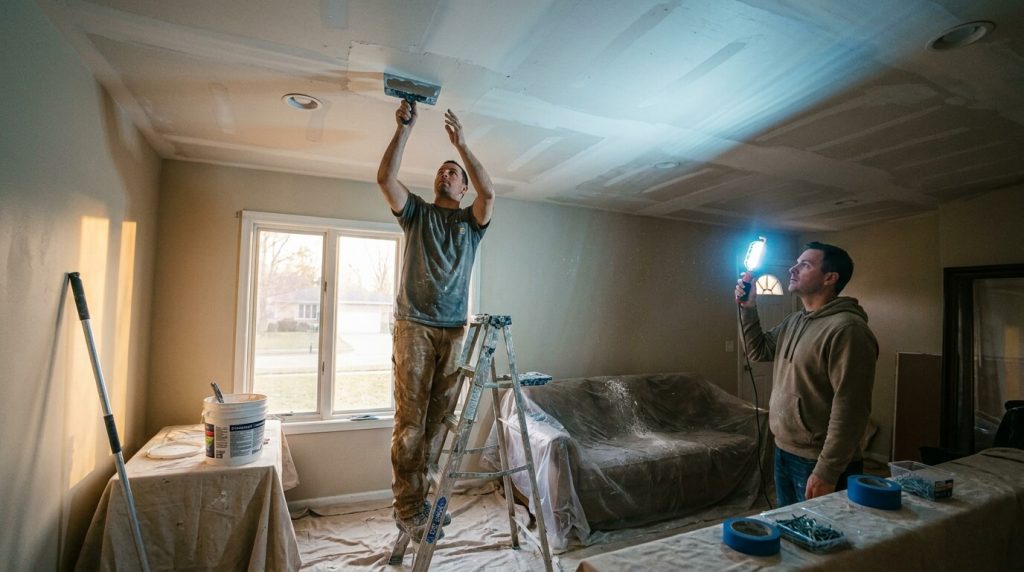
When Ceiling Drywall Can Be Patched
Not every ceiling issue requires full panel replacement. Here are the scenarios where targeted patching delivers professional, long-lasting results:
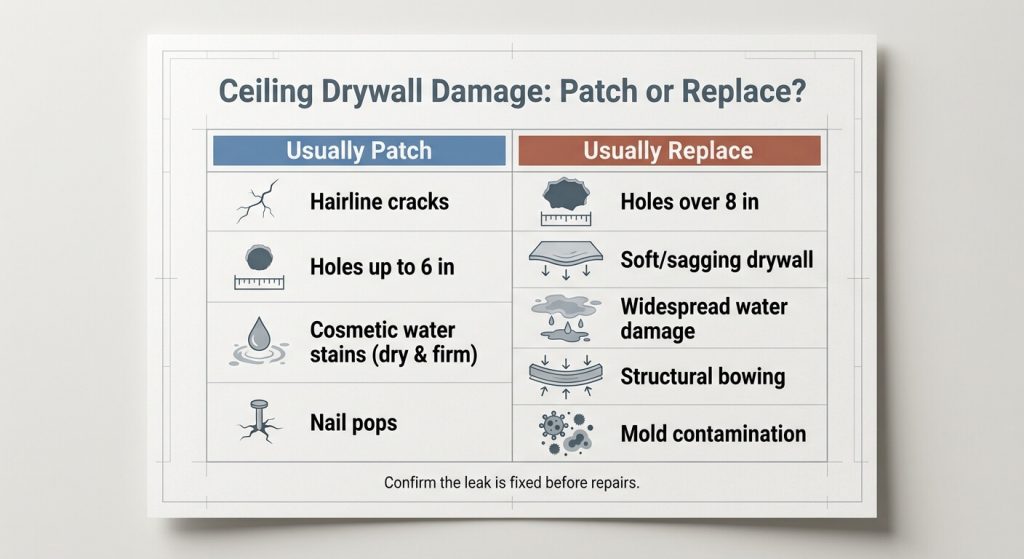
- Holes up to about 6 inches in diameter: Small to medium holes can be patched with backing, mesh, and compound. Difficulty: moderate. The patch itself is straightforward, but texture matching takes skill.
- Hairline cracks and seam separation: Surface cracks from settling or poor finishing can be scraped, re-taped, and feathered smooth. Difficulty: easy to moderate, depending on access and whether the crack reappears.
- Cosmetic water stains on firm drywall: If the stain is discoloration only and the drywall beneath is solid, a stain-blocking primer and paint will cover it. Difficulty: easy, but requires confirming the moisture source has been eliminated.
- Minor texture damage or small areas of peeling paint: Localized texture can be resprayed and blended if the underlying drywall is sound. Difficulty: challenging, because matching existing texture is a specialized skill.
- Nail pops and fastener holes: These are filled, sanded, primed, and repainted in a single visit. Difficulty: easy, as long as you’re careful with sanding to avoid creating a visible hump.
- Small areas of soft drywall (less than 1 square foot): The damaged section can be cut out, backed, patched, and finished without replacing the entire sheet. Difficulty: moderate to challenging, especially if the damage is near a seam or corner.
The common thread: the structural integrity of the surrounding drywall is intact, the damaged area is localized, and the repair can be blended without leaving a visible line or texture mismatch.
When Full Ceiling Replacement Is Necessary
Some damage is too extensive or too compromised for a patch to work long-term. Here’s when you need full panel replacement rather than a repair:
Large holes exceeding 6 to 8 inches: At this size, the effort to back, patch, and blend the repair approaches the cost and difficulty of cutting out the damaged section and installing a new piece. The new piece will be stronger, flatter, and easier to finish invisibly.
Widespread water damage: If more than a quarter of a ceiling panel is soft, stained, or sagging, replacement is the only reliable option. Patching multiple soft spots leaves weak zones that will fail under stress, and the time spent patching exceeds the time to replace.
Structural sagging over large areas: When an entire ceiling or large section has pulled away from the joists or bowed significantly, the fasteners have failed, and the drywall has lost its ability to stay in plane. Refastening without addressing the root cause (wrong thickness, improper hanging direction, or inadequate support) just delays the same problem.
Extensive cracking from settling or framing movement: If cracks radiate across multiple seams or reappear shortly after repair, the framing is still moving and patching won’t hold. The ceiling needs to be removed, the framing stabilized, and new drywall installed with proper joint staggering and fastener spacing.
Mold or contamination: If mold has colonized the drywall, especially the paper facing, it cannot be cleaned adequately. The material must be removed and replaced to eliminate the health hazard and prevent recurrence.
Skipping replacement when it’s needed sets you up for recurring problems. A patch over structurally compromised drywall will crack, sag, or separate within months. The repair won’t hold, the texture won’t match, and you’ll end up paying twice (once for the failed patch and again for the replacement). If a professional tells you a section needs replacing, it’s not upselling. It’s protecting your investment and your ceiling’s long-term performance.
Step-by-Step Repair for Common Patchable Damage
Let’s walk through a typical small-hole repair, the kind most homeowners encounter when a ceiling light fixture is removed, or a small puncture happens during attic work. This process applies to holes roughly 1 to 4 inches in diameter where the surrounding drywall is sound.
First, clean the damaged area. Use a utility knife to cut away any loose or torn paper and gypsum around the hole. The goal is a clean edge that compound can bond to. Why: ragged edges and loose material prevent adhesion and create bumps under the patch.
Second, install backing. Cut a piece of wood or metal backer slightly larger than the hole, slip it into the opening, and secure it to the back of the drywall with screws driven through the existing drywall into the backer. The screws should be countersunk just below the surface but not so deep they tear the paper. Why: the backer gives the patch something solid to attach to and prevents the repair from sagging or cracking.
Third, cut a patch. Measure the hole, add about half an inch on each side, and cut a piece of drywall to fit. Press it into place against the backing and drive screws through the patch into the backer, spacing them about 6 inches apart. Why: proper fastener spacing prevents the patch from separating and ensures it sits flush with the surrounding ceiling.
Fourth, apply joint compound and tape. Spread a thin layer of compound over the seams where the patch meets the existing drywall, press mesh or paper tape into the wet compound, and smooth it out. Let it dry completely, usually overnight. Why: tape reinforces the seam and prevents cracking as the compound dries and the ceiling flexes slightly over time.
Fifth, apply successive coats of compound, feathering each layer farther out from the center of the patch. Sand lightly between coats once dry. Why: feathering creates a gradual transition so the patch doesn’t form a visible hump, and sanding removes ridges and imperfections that would show through paint or texture.
Supplies and Prep You’ll Need
Here’s what you’ll need for a basic ceiling patch:
- Drop cloths or plastic sheeting to protect floors and furniture.
- Safety glasses and a dust mask (ceiling work generates fine dust that falls directly into your face).
- Utility knife and drywall saw for cutting.
- Backing material: wood strips, metal backer, or a commercial patch kit.
- Drywall screws and a drill or screw gun.
- Joint compound (also called mud) in a pre-mixed tub for convenience.
- Mesh or paper drywall tape.
- Putty knife or taping knife (4-inch and 6-inch widths are standard).
- Sanding sponge or pole sander (for smoothing dried compound overhead without arm fatigue).
- Stain-blocking primer if you’re covering water stains.
- Ceiling paint and texture spray if you need to match the finish.
Dust control is critical with ceiling work. Every scrape, cut, and sanding pass sends particles straight down. Cover everything in the room and open windows if possible.
Applying and Blending the Patch
Once your backing and patch are in place, the finishing work begins. Spread your first coat of joint compound over the seams and fastener heads using smooth, even strokes. Don’t glob it on. Thin layers dry faster and shrink less, reducing the need for heavy sanding later. Press tape into the wet compound if you haven’t already, then smooth it flat with your knife. Let this coat dry completely before moving to the next step.
Your second coat should extend beyond the edges of the first, feathering out the transition. Feathering means gradually thinning the compound as you move away from the center so the patch blends into the surrounding surface without a visible ridge. This is where ceiling work gets tricky. Overhead lighting will reveal any hump or valley you leave behind, so take your time and check your work from multiple angles with a bright light.
Sand gently between coats. Aggressive sanding creates more dust and can gouge the compound or tear the drywall paper. A light touch with a sanding sponge is usually enough. After your final coat and final sanding, wipe the area with a damp cloth to remove dust, then prime before texturing or painting. Why: primer seals the compound, prevents it from absorbing paint unevenly, and ensures your texture adheres correctly.
Ceiling Texture Matching Complexity: Matching ceiling texture is where most DIY repairs fail. Smooth ceilings are the easiest. You just need to feather and sand the compound perfectly flat. Textured ceilings (knockdown, orange peel, or popcorn) require matching the pattern, spray density, and knockdown timing. Spray texture comes in aerosol cans for small repairs, but getting the droplet size and coverage to match existing texture takes practice. Most pros do test sprays on scrap drywall first to dial in the pattern. If your ceiling has a complex or aged texture, professional help often makes the difference between a patch that disappears and one that stands out forever.
The Texture-Matching Challenge
Ceiling texture isn’t just decorative. It hides minor imperfections, reduces the visibility of seams, and creates a consistent finish across large, uninterrupted surfaces. When you patch a ceiling, you’re not just fixing the drywall. You’re recreating that texture so the repair blends seamlessly.
Common ceiling textures include smooth (which is actually the hardest to match because there’s nowhere to hide imperfections), knockdown (where wet texture is sprayed and then lightly flattened with a trowel), orange peel (a fine to medium spray pattern left untouched), and popcorn (the older textured finish that’s been out of favor for years but still exists in millions of homes). Each texture requires different tools, techniques, and timing.
Knockdown texture demands you spray, wait for the right level of dryness, and then knock down the peaks with a wide trowel at just the right angle and pressure. Too soon and you smear it. Too late and it won’t flatten. Orange peel requires the right spray gun or aerosol tip, the correct distance from the ceiling, and consistent overlap in your passes. Popcorn texture often contains asbestos in pre-1980s homes, so scraping or disturbing it requires testing and professional abatement if positive.
Just painting over a patch without matching texture won’t work. The patch will appear as a flat, shiny spot against the surrounding texture, and every light source will highlight it. If you’re not confident in your ability to match the texture, or if the existing texture is irregular or aged, this is where professional help pays off.
Why Ceiling Repairs Are Trickier Than Wall Repairs
Ceilings present challenges that walls don’t. Gravity is the obvious one. Mud sags, tools are harder to control overhead, and holding materials in place while fastening requires extra effort or mechanical aids like lifts and braces. But the bigger issue is visibility. Ceilings are scrutinized under harsh overhead lighting and natural light from multiple angles. A wall patch might be hidden in shadow or obscured by furniture. A ceiling patch is always on display.
Texture complexity is another factor. Walls are often painted flat or eggshell, which is forgiving. Ceilings, especially in older homes, carry heavy textures that are difficult to replicate. The tools and materials used to create those textures may no longer be readily available, and the original application was done by a crew with specialized equipment, not a homeowner with an aerosol can.
Workspace awkwardness also matters. Reaching overhead for extended periods is physically taxing. Your arms tire, your neck cramps, and your precision suffers. Professionals use scaffolding, adjustable stilts, and drywall lifts to maintain control and comfort. DIYers working off a stepladder or makeshift platform often struggle to maintain consistent pressure and angle, which leads to uneven compound application and poor texture matching.
The stakes are higher with ceilings. A poorly patched wall might go unnoticed. A poorly patched ceiling draws the eye every time someone walks into the room. That’s why professional ceiling repair specialists focus so heavily on finish quality, because the work is always visible and always judged.
Cost and Time Expectations
If you’re tackling a small ceiling patch yourself, expect to spend $15 to $50 on materials: drywall, compound, tape, backing, screws, sandpaper, and primer. A single aerosol can of texture spray adds another $8 to $12. Your time investment will be 2 to 4 hours for a straightforward patch, but add more if you’re learning as you go or if texture matching requires multiple attempts.
Professional ceiling repair costs vary based on damage size, texture complexity, and access. Small patches often run $3 to $6 per square foot, but very small jobs (under a square foot) can hit $50 to $75 once you factor in travel time, setup, and minimum charges. Larger repairs or full-ceiling remediation involving water damage, texture matching, and paint can range from $1,000 to $2,500 per ceiling in typical residential rooms. Homeowners considering a professional solution can explore our professional drywall repair services to learn more about the repair process and available services.
The price difference between DIY and professional work reflects skill, speed, and finish quality. A pro can match texture, feather edges invisibly, and guarantee the work won’t crack or sag. A DIY repair might hold structurally but look like a patch forever. If the ceiling is in a high-visibility room (a kitchen, living room, or entryway), professional work often pays for itself in resale value and daily enjoyment of the space.
Time expectations for professional work are usually a single-day visit for small to medium repairs, assuming no structural issues. Larger projects involving panel replacement, multiple patches, or extensive texture work may require a second visit once primer and compound have fully cured.
How to Prevent Ceiling Damage From Recurring
Repairing ceiling damage is one thing. Preventing it from happening again is another. Here are the most effective preventive measures:
- Control indoor humidity: Keep levels between 30% and 50% year-round with ventilation, dehumidifiers, or HVAC settings to prevent expansion, contraction, and mold growth.
- Fix leaks immediately: Roof leaks, plumbing drips, and HVAC condensation lines should be repaired as soon as they’re discovered. Water damage worsens fast.
- Inspect attic insulation: Make sure insulation isn’t compressing the drywall from above. Heavy or improperly installed insulation can cause sagging over time.
- Use proper drywall thickness and installation technique: If you’re replacing panels, use 5/8-inch drywall on ceilings (especially with 24-inch on-center joist spacing) and hang sheets perpendicular to joists to reduce sag and cracking.
- Address framing movement: Seasonal expansion, settling, and structural shifts can crack ceilings. If cracks keep reappearing in the same spot, a structural engineer may need to evaluate the framing.
- Prime and paint correctly: Use stain-blocking primer over repaired areas and apply paint in thin, even coats to prevent peeling and ensure long-term adhesion.
One-time ceiling repair is realistic when the root cause is addressed. Patch a hole caused by a one-time accident, and it stays fixed. Patch a crack caused by ongoing framing movement without stabilizing the framing, and you’ll be patching again in six months.
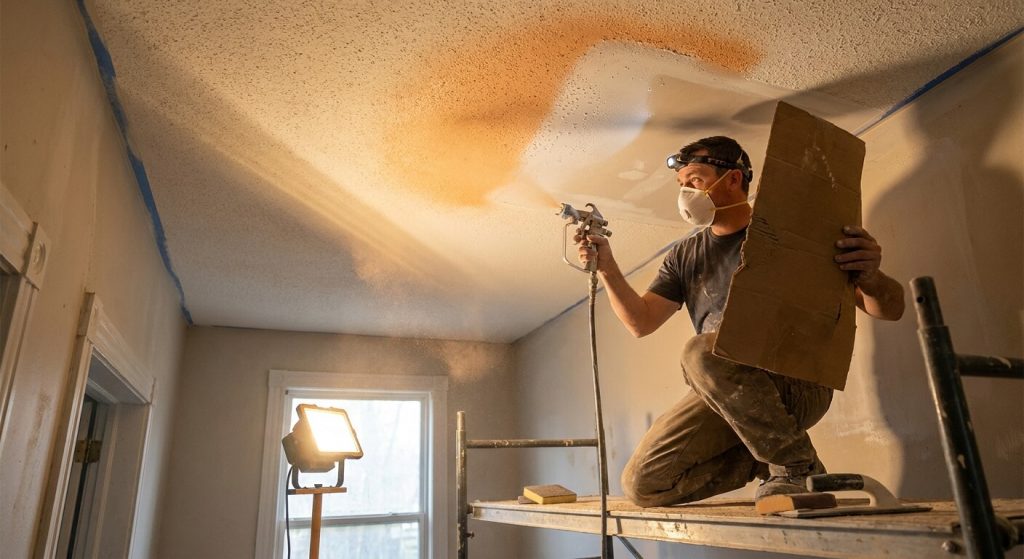
When to Call a Professional
DIY ceiling repair makes sense for small, straightforward damage in low-visibility areas where texture matching isn’t critical. But certain situations call for professional help from the start:
Structural concerns: If you see widespread sagging, large cracks, or signs that the ceiling has separated from the framing, a professional needs to assess whether the framing, fasteners, or installation method is the problem.
Large damage areas: Holes bigger than 6 inches, water damage covering multiple square feet, or multiple patches needed across a single ceiling are more efficiently handled by a crew with the tools and experience to do it right the first time.
Texture matching beyond your skill level: If your ceiling has knockdown, orange peel, or popcorn texture and you’ve never worked with spray texture before, a professional finish will look better and last longer. Mismatched texture is nearly impossible to fix without redoing the entire ceiling.
Recurrent problems: Cracks or stains that keep coming back after repair signal an underlying issue that patching won’t solve. A professional can diagnose the root cause (whether it’s framing movement, moisture infiltration, or improper original installation) and fix it permanently.
Professional drywall repair specialists bring finish-quality standards to every job. They match texture precisely, feather edges invisibly, and often guarantee their work for multiple years. That guarantee means if the repair cracks or fails, they’ll come back and make it right at no additional cost. For homeowners preparing to sell, hosting events, or simply wanting their home to look its best, professional repair delivers peace of mind that a DIY patch often can’t match.
The Bottom Line
Yes, ceiling drywall is repairable in most cases. Small holes, hairline cracks, cosmetic water stains, and minor texture damage can all be patched and finished to the point where the repair disappears completely. Larger damage, structural sagging, widespread water compromise, and extensive cracking often require panel replacement rather than patching, but even full replacement is a targeted fix, not a whole-house project.
Success depends on three factors: the type and extent of damage, your skill level and comfort working overhead, and your ability to match texture and blend the repair invisibly. If the damage is minor, the ceiling texture is simple, and you’re willing to invest the time to do it right, DIY repair is achievable. If the damage is extensive, the texture is complex, or the repair keeps failing, professional help ensures a result that lasts and looks flawless.
Ceiling damage isn’t the end of the world. With the right approach (whether that’s a careful DIY patch or a call to a skilled specialist), your ceiling can be restored to its original condition and guaranteed to stay that way for years.
Frequently Asked Questions
What tools do I need for ceiling drywall installation or repair?
For basic repair work, you’ll need a utility knife, drywall saw, drill or screw gun, joint compound, drywall tape, putty knives in multiple sizes, a sanding sponge, primer, and paint or texture spray. For larger installations, add a drywall lift or T-braces to hold sheets in place, a measuring tape, a T-square, and protective gear including safety glasses and a dust mask. Drop cloths and plastic sheeting are essential since ceiling work generates dust and debris that falls directly downward.
Should I use 1/2-inch or 5/8-inch drywall on my ceiling?
Use 5/8-inch drywall on ceilings, especially if your joists are spaced 24 inches on center or if you’re in a high-humidity environment. The extra thickness resists sagging better than 1/2-inch and provides better sound insulation. Sag-resistant drywall (often labeled as such) is specifically engineered for overhead use and is worth the small price premium for long-term performance.
How do I repair a sagging drywall ceiling?
If the sag is minor and the drywall still feels firm, add screws to reattach it to the joists, remove excess insulation from above that may be weighing it down, and shim the low area back into plane before refinishing. If the sag is pronounced (more than an inch or two) or if the drywall feels soft, the panel has lost structural integrity and needs to be removed and replaced. Sagging often indicates improper installation technique, inadequate thickness, or long-term moisture damage.
What is the correct screw spacing for ceiling drywall?
Space screws approximately 12 inches apart along each joist or truss when hanging ceiling drywall. Along the perimeter and at butt joints, reduce spacing to around 6 to 8 inches for better hold. Screws should be countersunk just below the surface without tearing the paper facing. Proper spacing prevents sagging, reduces screw pops, and ensures the panel stays securely attached over time.
How much does ceiling drywall repair usually cost?
Professional ceiling drywall repair typically costs $3 to $6 per square foot for patches (including texture matching and paint), with very small patches under a square foot sometimes hitting $50 to $75 due to minimum charges. Full-ceiling remediation involving water damage, panel replacement, and complex texture work can range from $1,000 to $2,500 per ceiling depending on size, access, and finish complexity. DIY material costs for small repairs run $15 to $50, not including texture spray or primer.
How do I match ceiling texture after a repair?
Matching ceiling texture requires the right spray equipment, correct distance and angle during application, and sometimes multiple test sprays on scrap material to dial in the pattern. Knockdown texture must be sprayed, allowed to partially dry, and then lightly flattened with a trowel. Orange peel stays as sprayed. Popcorn texture may require a hopper gun and is difficult to replicate precisely. For complex or aged textures, professional texture matching ensures an invisible repair that blends completely with the surrounding surface.
What are common mistakes when installing ceiling drywall?
The most common mistakes include hanging sheets parallel to the joists instead of perpendicular (which increases sagging and crack visibility), using insufficient fastener spacing (leading to separation and screw pops), skipping backing at unsupported edges (causing cracks and weak joints), applying too much joint compound at once (resulting in sagging and long drying times), and failing to prime before texturing or painting (which causes poor adhesion and uneven finish). Another frequent error is neglecting to stagger seams, which creates long, visible crack lines across the ceiling.
Can I install ceiling drywall over existing furring strips?
In most cases, it’s better to remove furring strips and fasten drywall directly to the joists for maximum stability and to avoid adding unnecessary layers that complicate fastening and finishing. Furring strips can create an uneven plane and make it harder to achieve a flat, smooth ceiling. If the strips are there to clear obstacles or level an uneven surface, correct the underlying issue rather than building over it. Direct attachment to solid framing gives you the best long-term result.