
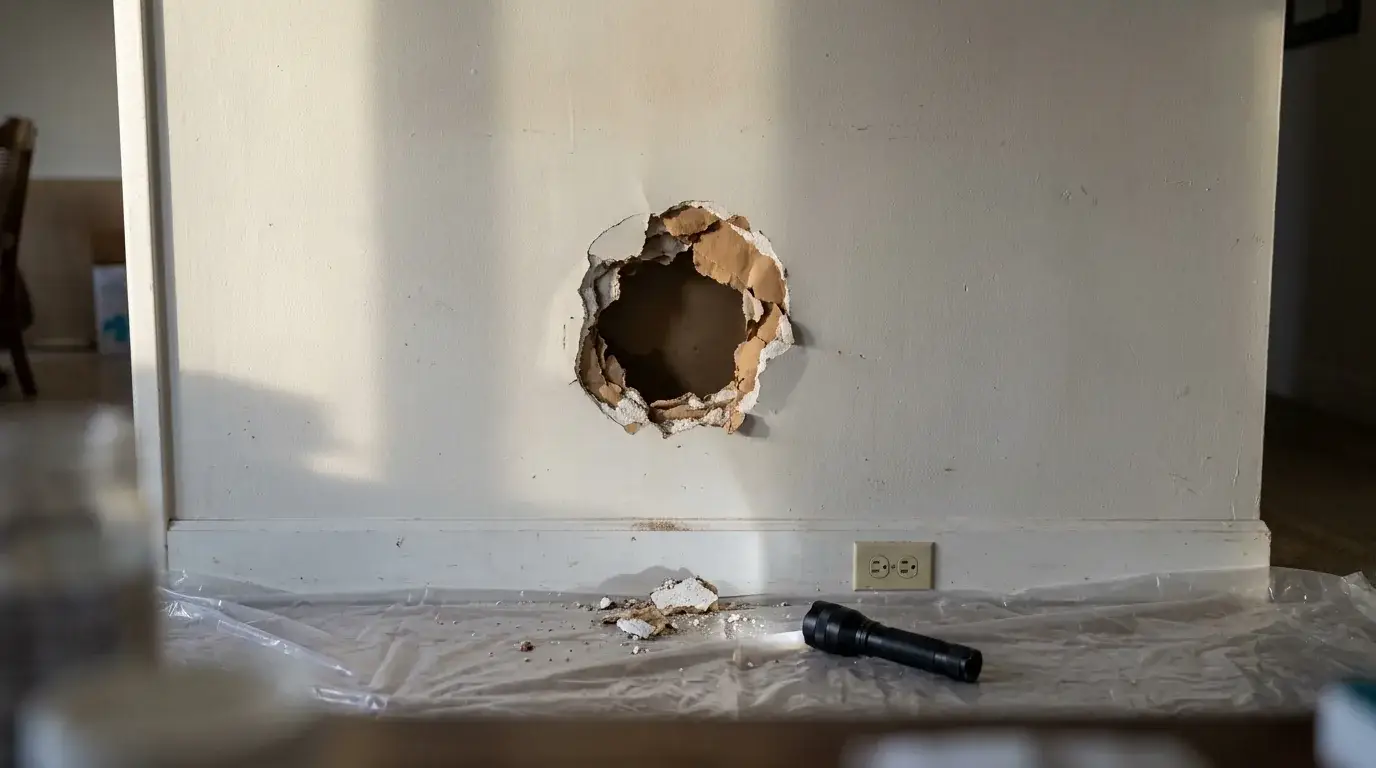
A doorknob hole is a filler job. A dinner-plate hole is a rebuild, and treating it like filler is why so many big patches crack, sag, or telegraph a square outline through fresh paint. Large openings need something solid behind them before any compound touches the wall. Here is the sequence a drywall specialist follows, in order, with the timing, the materials, and the point where most people should stop and hand it off.
Quick answer: what a big drywall repair takes and what makes it hold up
You don’t cover a huge hole. You rebuild that section of wall. The order runs: diagnose the cause and check the cavity, square the opening, add backing, fit a matching patch, tape the seams, mud in three thin coats, sand, prime, texture, and paint.
Two things decide whether it holds up. The patch needs wood backing screwed at every edge (not compound doing the holding), and the replacement board has to match the existing panel in thickness and type so the face lands flush.
Plan on 1 to 4 hours of hands-on work spread across 1 to 2 days, longer if you are matching texture. Stop and call a pro when the wall is fire rated, when the drywall is still damp, or when the repair is overhead in a ceiling.
Before you start: materials, tools, and when this method fits
This method fits a clean impact hole in ordinary interior drywall, roughly 4 to 16 inches across, where the board around it is dry, firm, and paper faced.
Tools
- Stud finder with AC wire detection
- Drywall saw or oscillating multitool, utility knife
- Carpenter’s square, tape measure, pencil, level
- Drill/driver
- 6-inch, 8-inch, and 10- or 12-inch drywall knives
- Sanding sponge or pole sander, shop vac with a dust filter
- Eye protection, dust mask, gloves
Materials
- Replacement drywall matching the existing thickness, usually 1/2 inch on walls and 5/8 inch on ceilings and rated walls
- Thickness check when the broken edge is too ragged to read: pull an outlet cover and measure the board at the box, or measure at a nearby intact wall
- 1×3 or plywood backing strips, about 3 inches wide
- Coarse-thread drywall screws for wood framing, 1-1/4 inch
- Paper joint tape, or mesh tape with a setting-type compound
- Setting-type compound for the fill coat, all-purpose or lightweight for the finish coats
- PVA drywall primer, matching texture material, matching paint
Stop and get a specialist when:
- Wiring, plumbing, gas line, or ductwork sits in the cavity
- The board is stained, soft, or swollen, or the water source is still active
- The damage is in a ceiling, a stairwell, a corridor, or a wall shared with another unit
- The wall is fire rated, a shaft wall, or part of a listed assembly
- The building predates the 1980s and the texture or old compound has not been tested for asbestos
Pro tip: pick the method before you buy. A backer-supported patch, a California patch, and a cut-back-to-studs replacement each need a different board size and a different amount of backing. The second trip to the store turns a two-hour job into an all-day one.
Step 1: Classify the hole and inspect for hidden problems
Measure the opening, then look inside it with a flashlight before you cut anything. Size sets the method.
- Under 1/2 inch: spackle and a putty knife. Nothing more.
- 1/2 inch to 4 inches: a self-adhesive mesh patch or a face-paper California patch.
- 4 to 12 inches: a gypsum patch supported by wood backing strips. That is this guide.
- Over 12 to 16 inches, or damage crossing a stud: cut back to framing and replace the section stud to stud.
Now the inspection. Shine a light into the cavity and look for electrical cable, copper or PEX lines, insulation, ducts, stains on the back of the board, and mold. Run a stud finder with live-wire detection across the area you plan to cut. Remember that outlet boxes mark where cable runs vertically.
The mistake to avoid: plunging a saw in blind and cutting a hidden electrical cord. Set your saw depth to the board thickness (about 1/2 inch), and cut shallow.
If the hole came from a leak, the drywall is the last problem to solve. At Precision Patch Pros, a moisture meter confirms the area is dry and an antimicrobial solution is applied before new drywall goes in.
Step 2: Square up the opening and remove damaged drywall
Yes, you almost always make the hole bigger. A ragged tear leaves crushed gypsum, peeled face paper, and thin unsupported corners. Every one of those is a future crack. A clean rectangle gives you straight lines to tape and solid edges to fasten.
Mark a square around the damage with a pencil and a carpenter’s square. Keep the top and bottom lines level, and extend them to firm board on all four sides, usually 1 to 2 inches past the visible break. If a stud sits close to one edge, cut to the center of that stud so the patch lands on real framing. Score the line with a utility knife, then cut through with a jab saw held shallow.
The mistake to avoid: leaving a lip of crushed gypsum or torn paper inside the opening. Press on the board around the edges. If it flexes or crumbles, keep cutting.
Step 3: Measure the board, cut the patch, and install backing
Match the board before you cut the patch. Most interior walls are 1/2 inch and most ceilings, garage walls, and rated walls are 5/8 inch. Confirm which one you have. When the broken edge is too ragged to measure, take the reading at an outlet box or a nearby intact wall instead of guessing. On rated work the replacement has to be the right board, not just the right depth. As USG notes, 5/8 inch Sheetrock Brand Patch and Repair Panels, for example, are Type X panels and can be used to make small repairs to many fire rated assemblies.
- Cut the patch to the opening size minus about 1/8 inch so it drops in without binding.
- Cut backing strips from 1×3 or 3-inch plywood, each about 4 inches longer than the opening so both ends reach solid board.
- Slide a strip into the cavity behind the existing drywall at the left and right edges, hold it tight to the back of the board, and drive two screws through the face of the existing drywall into each end.
- When no stud sits behind the top and bottom edges, add a horizontal strip there the same way. Every edge of the patch needs wood behind it. Backing is what stops the seam from moving.
- Dry-fit the patch. It should sit flush, with a 1/16 to 1/8 inch gap on all sides.
The mistake to avoid: a patch that sits proud or recessed. A 1/2 inch patch in a 5/8 inch wall leaves a dish you chase for three coats. A thick patch makes a hump no feathering hides.
If the cavity turns out to hold wiring, a pipe, or wet insulation, stop there. You can send us 2 or 3 pictures and get a quote within 10 minutes rather than guess at what is behind the drywall.
Step 4: Fasten the patch and tape the seams the right way
Screw the patch to the backing first, then tape. Drive screws about every 6 inches around the patch perimeter, roughly 3/4 inch in from the edge. Set each head just below the paper face without tearing it. Use the same spacing through the existing drywall into the backing strips, so both sides of every seam are fastened. Compound is a finish, never the attachment.
Then pick the tape. Paper tape is stronger in tension and it beds fine in ordinary premixed compound, which makes it the safer default on a large patch. Fiberglass mesh is faster to place and pros like it for quick work, but it generally needs setting-type compound to reach full strength. Mesh bedded in ordinary premixed mud stays soft. That pairing is one of the most common reasons a big patch cracks along its outline.
For paper tape, lay a thin bed of compound over the seam with a 6-inch knife, press the tape into it, then pull the knife along at a low angle to squeeze out the excess.
The mistake to avoid: voids under the tape. Any spot where the tape bridges a gap will bubble and crack, so feel along the seam with your fingertips after you bed it.
Step 5: Apply compound, let each coat dry, and sand between coats
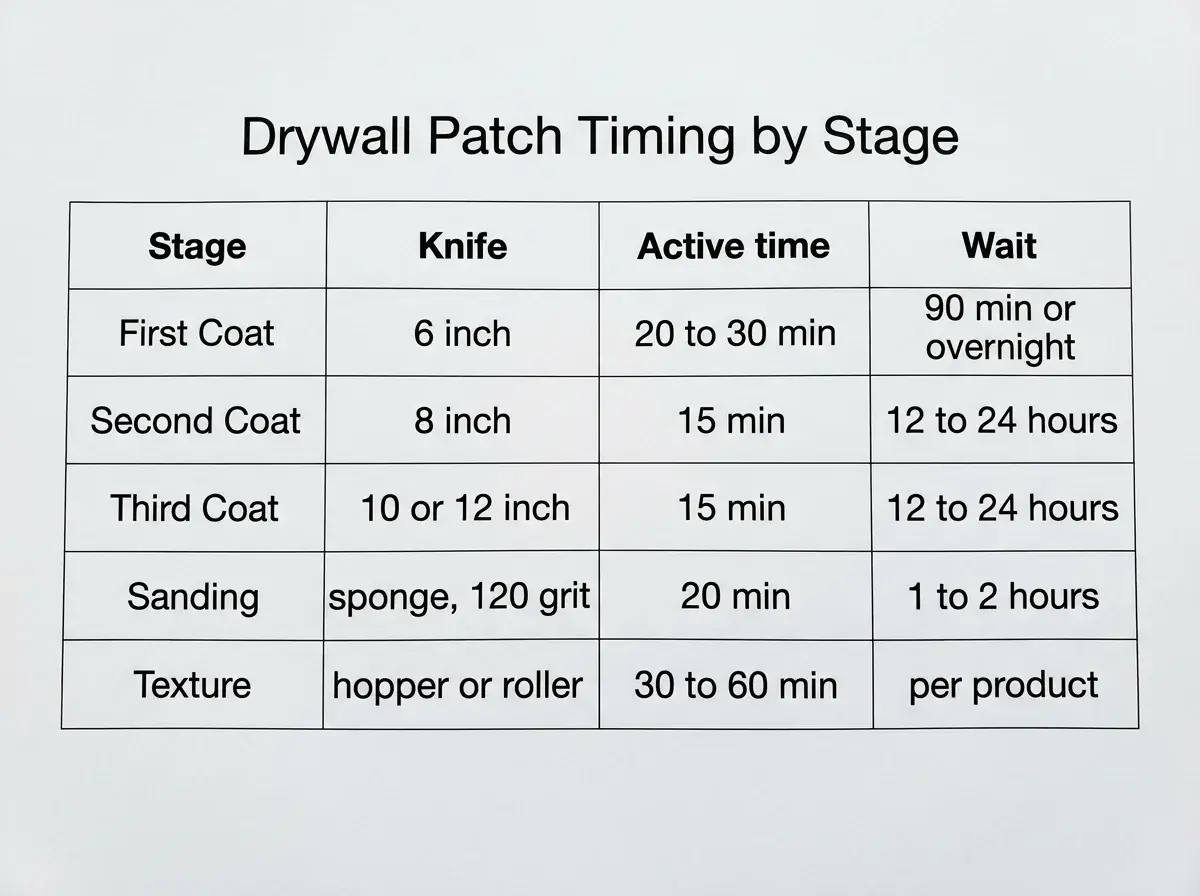
Three coats, each thinner and wider than the last, with full drying between each. This is the step where the calendar matters more than the effort.
| Stage | Knife | Active time | Wait before next stage |
|---|---|---|---|
| Fill and tape coat | 6 inch | 20 to 30 min | 90 min (setting-type) or overnight (premixed) |
| Second coat, feathered 4 to 6 inches past the seam | 8 inch | 15 min | 12 to 24 hours |
| Third coat, feathered 8 to 10 inches past the seam | 10 or 12 inch | 15 min | 12 to 24 hours |
| Sand, dust, prime | sponge, 120 grit | 20 min | 1 to 2 hours for primer |
| Texture and paint | hopper or roller | 30 to 60 min | per product |
Can you finish in one day? Sometimes. Setting-type compound hardens on a chemical clock, but a 90-minute grade names a set class, not same-day paint readiness. Room temperature, humidity, and coat thickness all move the real number. A cool damp room can stretch an overnight premixed coat to a day and a half.
The mistake to avoid: sanding early, or sanding hard. Damp compound tears instead of dusting and exposes the tape edge. Start with 120 grit, use light pressure, and stop as soon as the surface is flat under a raking flashlight.
Step 6: Prime, texture, and paint so the repair disappears
Primer first, then texture, then paint. Bare joint compound drinks paint at a different rate than the painted wall around it. That is what produces the dull or shiny rectangle you only see from an angle. Roll PVA drywall primer over the whole repaired area, feathered slightly past the compound.
Match the texture and carry it wider than the patch. Orange peel and knockdown both come off a hopper or an aerosol can, so practice on cardboard until the droplet size matches the wall. Hold the same distance, and fade the spray out over the primed area. Knockdown gets a light pass with a wide blade once the spatter loses its shine, usually 5 to 15 minutes later. Let the texture dry, then paint.
Sheen decides how far the paint has to go. Flat hides a touch-up, while eggshell, satin, and semi-gloss all catch side light. A spot of paint inside a satin wall reads as a patch even in the exact color. Paint corner to corner when the sheen is above flat, when the wall gets strong side light, or when the existing paint has aged. Stop at a natural break: an inside corner, a trim line, or the end of the wall.
A finished repair shows no outline under a light held flat against the wall, no ridge you can feel with your palm, texture that fades out with no border, and one uniform sheen from any angle.
When to call a pro instead
Hand it off when the repair is overhead in a ceiling, when the wall is fire rated (a shaft wall or a corridor separation), when the board is still damp or the leak has not been fixed, or when the texture has to disappear across a large area. According to the Gypsum Association, GA-225-2019 is the Gypsum Association guide for repair of fire-rated gypsum panel product systems, and it runs from patching a small hole to full-scale replacement of large damaged areas.
Texture matching and repainting are part of the repair, not an afterthought. On one kitchen ceiling leak, the crew cut out the water damaged section, hung fresh drywall, taped and floated the whole area, and repainted the kitchen so no sign of the leak remained. Work at that size can run a day or two.
Precision Patch Pros is licensed and insured, CSLB License #830875, with a 5-year workmanship guarantee. Send us 2 or 3 pictures for a quote within 10 minutes. For what this work typically runs, see “Hole in Drywall Repair Guide: Costs, DIY or Pro.”
Frequently Asked Questions
How do you repair a large hole in a fire-rated drywall wall?
Use a patch of the same rated board, typically 5/8 inch Type X or a listed equivalent, cut to fit and mechanically fastened with screws to blocking installed behind the opening. Compound alone does not restore a rated membrane. Any penetration that passes through the wall needs its firestop system reinstated. Rated corridors, shaft walls, stairwells, and garage separations are worth having a licensed contractor handle with documentation.
Should I use a California patch or backing strips for a large hole?
A California patch (where you leave a 1 inch flange of face paper around a plug of drywall) works well up to about 6 inches and needs no backing. Beyond that the plug has too much unsupported area and will flex, so switch to backing strips screwed behind the existing board. For openings crossing a stud bay, cut back to framing instead.
How far past the patch should new texture and paint reach?
Feather the texture 6 to 12 inches past the compound so the spatter fades instead of stopping at a line. Prime that whole area first, then take the paint out to a natural break: an inside corner, a trim line, or the end of the wall. A texture edge that stops in the middle of an open wall catches side light and shows even when the color is an exact match.
Can I fix a large hole in the wall without drywall?
For anything over about 4 inches, no. Foam blocks, screen patches, and thick filler have no rigidity across an open span. They flex when the wall is bumped and crack the compound above them. The only reliable substitutes are a rigid backer plus filler for narrow gaps under 2 inches, and even then a gypsum plug performs better.
What grit sandpaper should I use on a large drywall patch?
Start at 120 grit on a sanding sponge or pole sander for the final coat, and step to 150 or 220 grit for the last light pass if the wall will take a satin or semi-gloss finish. Anything coarser than 100 grit scuffs the face paper on the surrounding wall, which then soaks up paint and shows as a fuzzy halo.
How do I keep drywall dust out of the rest of the house?
Tape plastic over doorways, shut off the HVAC return in that room, and lay a drop cloth 4 feet past the work area. A sanding sponge throws far less dust than a pole sander, and a shop vac with a fine dust filter held near the seam catches most of the rest. Wet sanding with a damp sponge raises almost no airborne dust, though it takes longer.
How soon can I mount a TV or shelf over a repaired section?
Wait at least 24 hours after the final coat, and anchor only into framing or into the backing strips you installed. A patch has no more holding power than the board around it. An anchor set in fresh compound will pull through under a TV bracket. Add solid blocking behind the wall while the opening is still open.