
A ceiling hole looks like a simple fix. Cut a square, stick in a patch, mud it, done. Then three weeks later a hairline crack traces the patch perimeter, or a brown ring reappears, or the whole rectangle telegraphs through the paint every time afternoon light rakes across the ceiling.
Ceiling repairs fail for reasons that wall repairs usually don’t share. Gravity works against you. Moisture hides above the drywall instead of running down it. And overhead work tempts everyone into shortcuts. Here are the mistakes that force a redo, what each one actually costs you, and the right move instead.
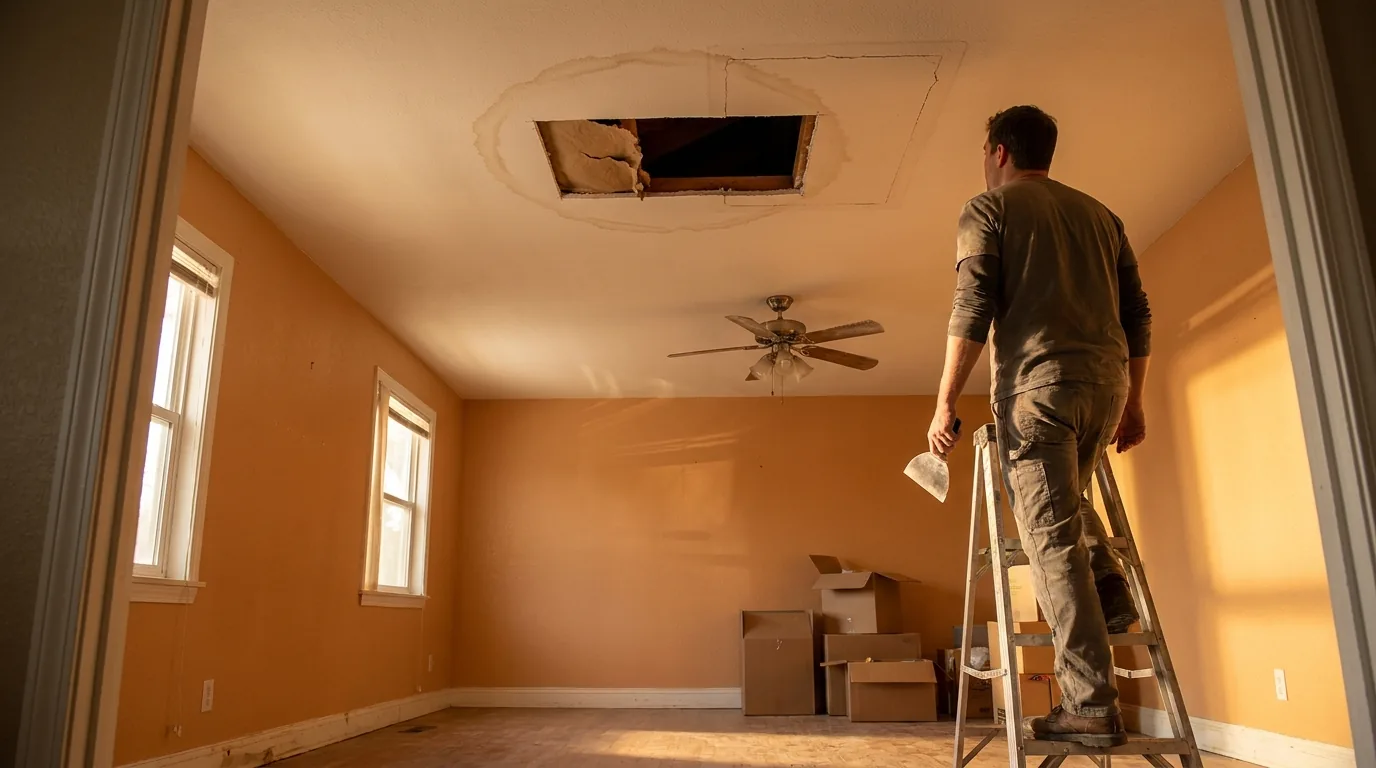
Why ceiling drywall repairs fail in the first place
The visible hole is rarely the whole problem. Nearly every ceiling redo we get called to traces back to the same four patterns. Hidden moisture nobody confirmed dry. Patch edges floating with no wood behind them. Gravity pulling thick compound into a sag. And a finish stage rushed through sanding, priming and texture. Each one ends the same way, with a patch you can see from the doorway.
Patching before fixing the source of water
What it looks like: a coffee-colored ring that keeps growing, drywall that feels spongy under a thumb, a ceiling that bows between joists, or nail heads rusting through the paint. Sometimes the only tell is a stain that comes back after two coats of ceiling paint.
Why people do it: the hole feels urgent and the leak feels invisible. A roof, a toilet supply line, an HVAC condensate pan or a failed flashing can all drop water far from where it got in.
What it costs: fresh compound softens and releases, the old stain bleeds back through the new paint within weeks, and the repair gets demolished a second time once wet insulation and stained framing turn up.
The right move: solve the leak first, then remove and dry the damaged material. Cut the swollen, soft drywall out instead of patching over it and stop at sound gypsum. At Precision Patch Pros, a moisture meter confirms the area is dry and an antimicrobial solution is applied before new drywall goes in. Once a small water-damaged spot is cut out and dry, a mesh patch or a drywall repair kit handles openings under about 4 inches. We don’t do water extraction, dry-out or mold remediation, so when a ceiling is still actively wet, that call goes to the right trade first.
Using the wrong repair method for the size of the hole
What it looks like: compound packed into a torn, irregular opening, or a peel-and-stick plate stuck over a hole the size of a dinner plate.
Why people do it: cutting more ceiling feels like making the damage bigger, so people patch the smallest shape they can.
What it costs: shrinkage, a cracked perimeter, and a second repair that ends up larger than the first cut would have been.
The right move: match the method to what the patch edges rest on.
| Opening size | Right method | Why |
|---|---|---|
| Under about 1 inch (anchors, nail pops, screw dimples) | Setting-type filler, two thin passes | Nothing to support, depth is the only issue |
| 1 to 4 inches | Fitted drywall plug or a California patch | Small enough that a bonded plug carries itself |
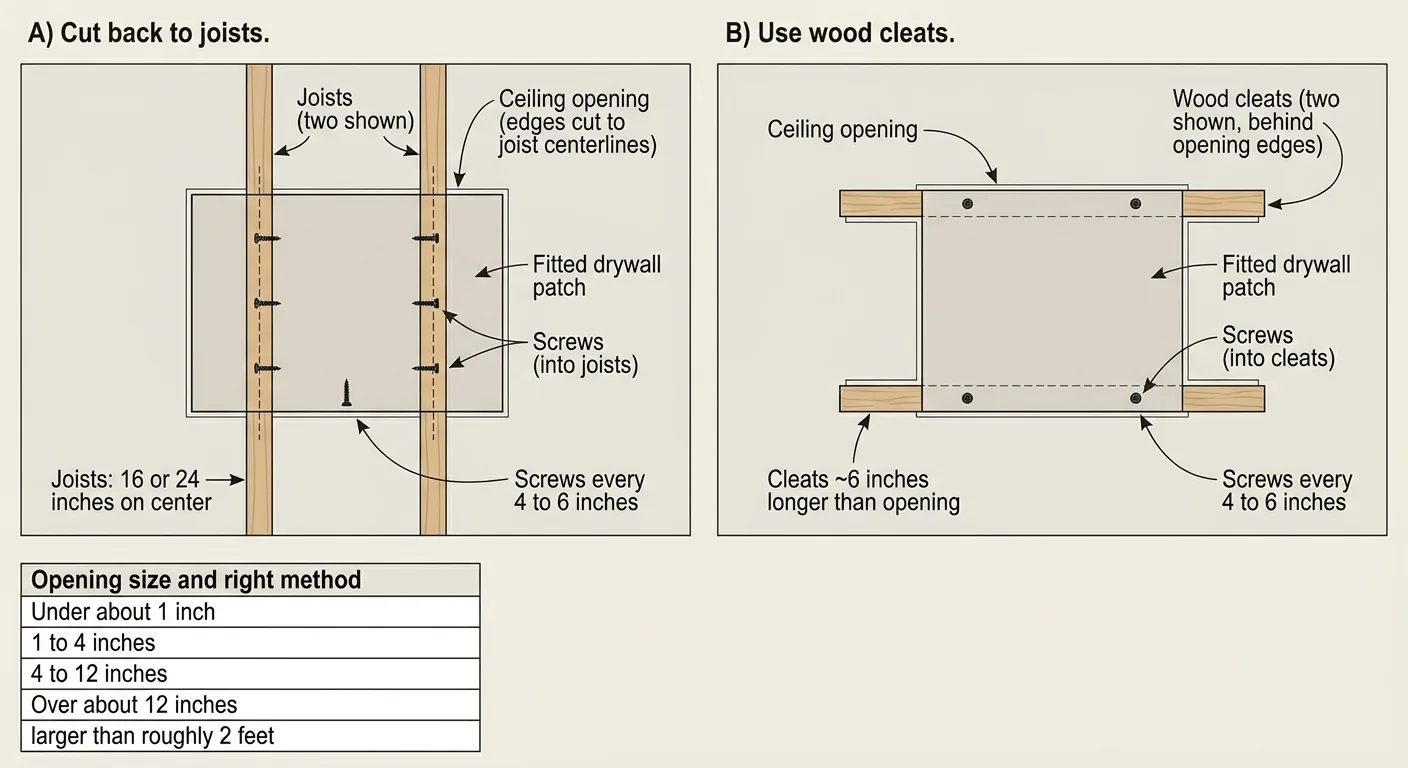
| 4 to 12 inches | Square the hole, add 1×3 or 2×4 wood cleats behind it, screw a fitted piece to the cleats | Free edges will crack without wood behind them |
| Over about 12 inches, or foot-sized and irregular | Cut back to the centerline of the nearest joists on two sides, hang a new section | Too large to hang off cleats alone |
| Sagging, soft, or larger than roughly 2 feet in each direction | Replace the panel section | Gypsum panel repair, not a surface fill |
The threshold. If a squared opening is over about 12 inches, or if both long edges can reach the centerline of a joist, cut back to the joists and screw the new piece straight to them. Under 12 inches with no joist in reach, bridge the opening with cleats. Joists usually sit 16 or 24 inches on center, so run a stud finder perpendicular to their direction before you draw the rectangle.
No joist where the edge lands. Cut 1×3 or 2×4 stock about 6 inches longer than the opening. Slide each piece up through the hole, hold it tight to the back of the existing drywall so it overlaps roughly 3 inches on each side, and drive drywall screws through the ceiling into the cleat every 4 to 6 inches. Two cleats on opposite sides is the minimum, four for openings past 10 inches. Seat every screw just below the surface. An over-tightened screw breaks the face paper, crushes the core and holds almost nothing.
Measure the ceiling before you buy drywall. Ceiling board is usually 1/2 or 5/8 inch. Check it at the cut edge, since a patch that sits proud or low takes extra coats to hide.
The California patch. For a 1 to 4 inch hole, cut a plug about 2 inches larger than the opening, score and snap the gypsum core off the back, and tear off the waste so the face paper stays on all four sides as a flange. The plug drops in and the paper flange acts as its own tape, with no cleats needed at that size.
Irregular holes throw people off. The move is to enlarge, not shrink. Snap a straight rectangle around the damage, cut to sound gypsum with a jab saw, and you have four edges you can actually support.
Skipping backing, tape, or the right compound on a ceiling patch
What it looks like: mesh tape and premixed compound stretched across an opening with no wood behind it.
Why people do it: mesh is fast, forgiving and works fine on a wall, so it gets carried overhead without a second thought.
What it costs: mesh is elastic, and overhead the weight of the wet compound pulls on it. The joint bulges, then cracks along the patch perimeter. It’s the single most common ceiling failure we get called to redo.
The right move: put wood behind the patch, then pick the tape and compound pair that suits the job and your skill level.
| Combination | Strength | Working time | Best for |
|---|---|---|---|
| Paper tape + setting compound | Highest crack resistance overhead | 20 to 90 minutes per coat | Any seam between old and new ceiling drywall |
| Mesh tape + setting compound (hot mud) | Good, but only over solid backing | 20 to 90 minutes per coat | Beginners who need same-day coat buildup |
| Mesh tape + premixed compound | Weakest overhead, sags and bulges | Up to 24 hours per coat | Small wall repairs only |
| Compound alone, no tape | Fails, cracks at the perimeter | Not applicable | Nothing |
According to USG, plaster of Paris is another fast-setting option for holes and cracks in drywall and plaster walls and ceilings, and it sets hard within 30 to 50 minutes. That speed cuts both ways, so mix small batches.
If a ceiling repair has already been patched once and cracked again, that’s usually a backing problem, not a compound problem. Send us 2-3 pictures and we’ll get back to you within 10 minutes with a straight answer on whether it needs cleats or a new section.
Rushing the finish so the repair flashes, cracks, or shows through paint
A ceiling patch cracks around the edges after painting for one of two reasons. The joint had no tape, or the compound was sanded before it cured all the way through. Both problems happen during the finish stage, after the hard part is already done right.
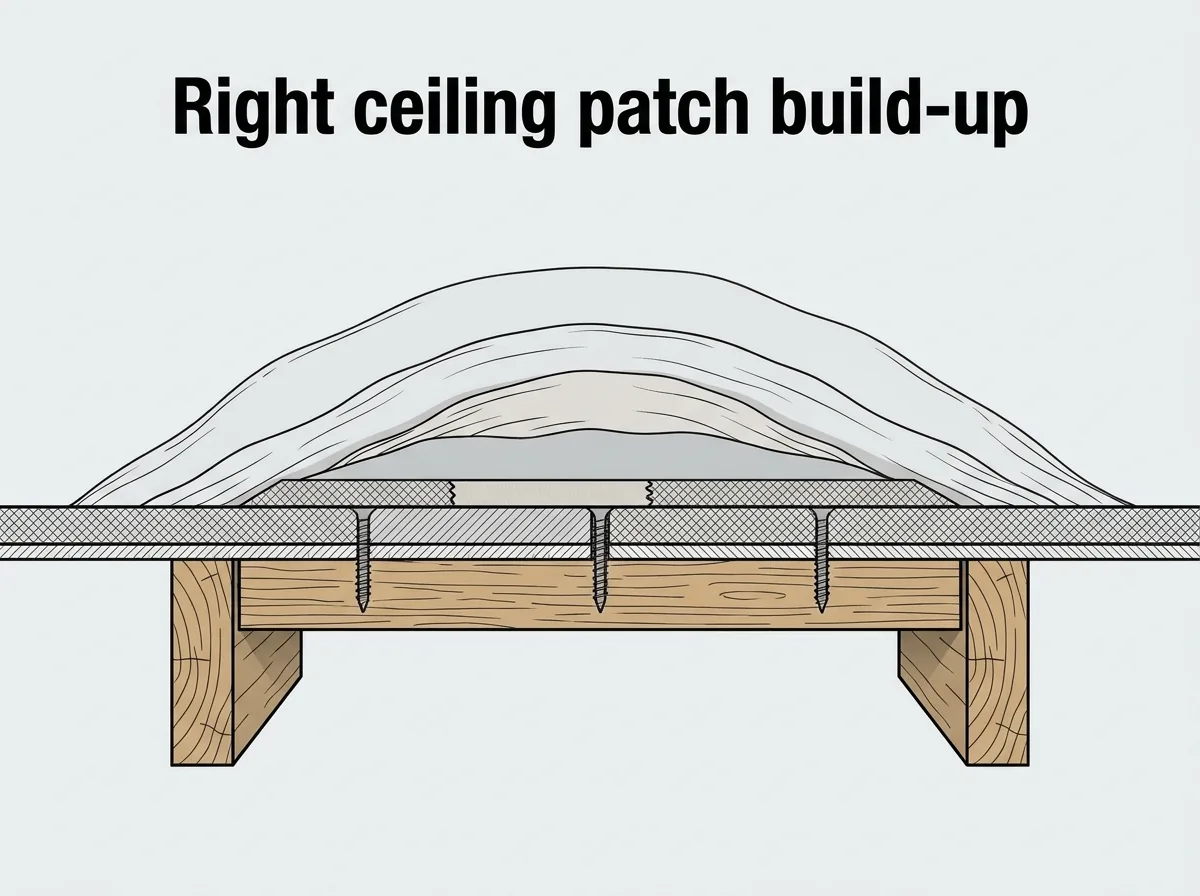
Three thin coats, feathered wider each pass. Coat one with a 6-inch knife, coat two with a 10-inch, coat three with a 12-inch. A heavy single pass shrinks as it dries and pulls the perimeter into a crack, and a coat that stops at the hole edge builds a ridge that raking ceiling light finds every time.
Real drying time. Premixed all-purpose compound wants up to 24 hours per coat on a ceiling, so plan on two to three days for three coats plus sanding, priming and paint. Setting compound goes by its stated set time and can cut that in half. Sanding a coat that is surface-dry and center-soft gouges the fill and tears the tape.
Sand light, then prime. Use 150 grit on the body and 220 at the transition, then prime the whole repair. Bare compound absorbs paint at a different rate than the painted ceiling around it and dries to a dull rectangle. Make it a stain-blocking primer if any staining was involved.
Texture last. Orange peel, knockdown and popcorn go on after primer, and a scrap test panel is what gets the spray distance and pressure right before you point the hopper at the ceiling.
Common Mistakes
- Painting over a stain instead of solving the leak
- Filling an irregular hole instead of squaring it first
- Letting a patch edge float with no wood behind it
- Mesh tape over an unbacked ceiling opening
- One thick coat instead of three thin ones
- Sanding a compound that is surface-dry and center-soft
- Feathering only as wide as the first knife
- Skipping primer, then wondering why the patch flashes
- Texture sprayed with no test panel
- Cutting old textured ceiling material without asking whether it needs testing first
The mistake that does the most damage
Treating an unstable ceiling opening as a cosmetic patch costs more than every other mistake combined. A large hole that sags, moves, or sits under a bathroom gets closed in an afternoon, and six months later the section comes down with wet insulation attached.
Run this checklist before the ceiling closes. Any item that fails is a stop-work trigger, not a detail to cover up.
- Sagging or softness. Press the drywall 12 inches out from the hole in four directions. Flex or crumble means the sound material starts further out.
- Moisture. Meter the surrounding gypsum, not just the stain. Painted drywall reads dry on the surface and holds water behind it.
- Exposed wiring. Wiring, junction boxes and ductwork are all things a blind screw can find. De-energize the circuit before your hands go into the cavity.
- Framing damage. Darkened, soft or split joists mean the water ran longer than anyone thought.
- Insulation. Compressed, matted or damp batts come out before the ceiling closes.
- Fixture support. A fan or heavy light needs a rated brace fastened to framing, never drywall and a patch.
When one of those checks fails, hand the job off and leave the ceiling open. Active water, exposed live wiring, framing damage, or a suspect textured ceiling in an older building. On asbestos the rules aren’t casual. OSHA reports that under OSHA’s asbestos standard, restoration work installing new drywall abutted to positive wallboard or joint compound stays covered, and a competent person has to determine the class of work and the precautions it triggers. That’s why an older textured ceiling is worth a phone call before a utility knife.
Openings around fixtures are their own case. On one dated coffered dining room ceiling, we reframed the section, hung new drywall, taped and floated it, added LED recessed lighting, then skim-coated and retextured so the finish stayed uniform across the whole ceiling.
How to get it right the first time
The short version, in order.
- Diagnose. Find why the hole exists: leak, access cut, impact, fixture removal.
- Dry and confirm. Meter it, treat it, and don’t build on damp gypsum.
- Cut back to sound material. Straight rectangle, solid edges, clean paper.
- Support it. Joist centerlines where you can reach them, 1×3 or 2×4 cleats where you can’t.
- Tape and coat. Paper tape embedded in compound, then three thin coats, each feathered wider and fully cured before sanding.
- Prime, texture, paint. In that order, with a test panel for the texture.
For the full step-by-step with coat timing, read “How to Repair a Ceiling Drywall Hole: 5 Steps That Hold Up.” A small ceiling patch usually runs in the low hundreds and climbs with water damage and texture work, and “Hole in Drywall Repair Guide: Costs, DIY or Pro” breaks the numbers down by hole size.
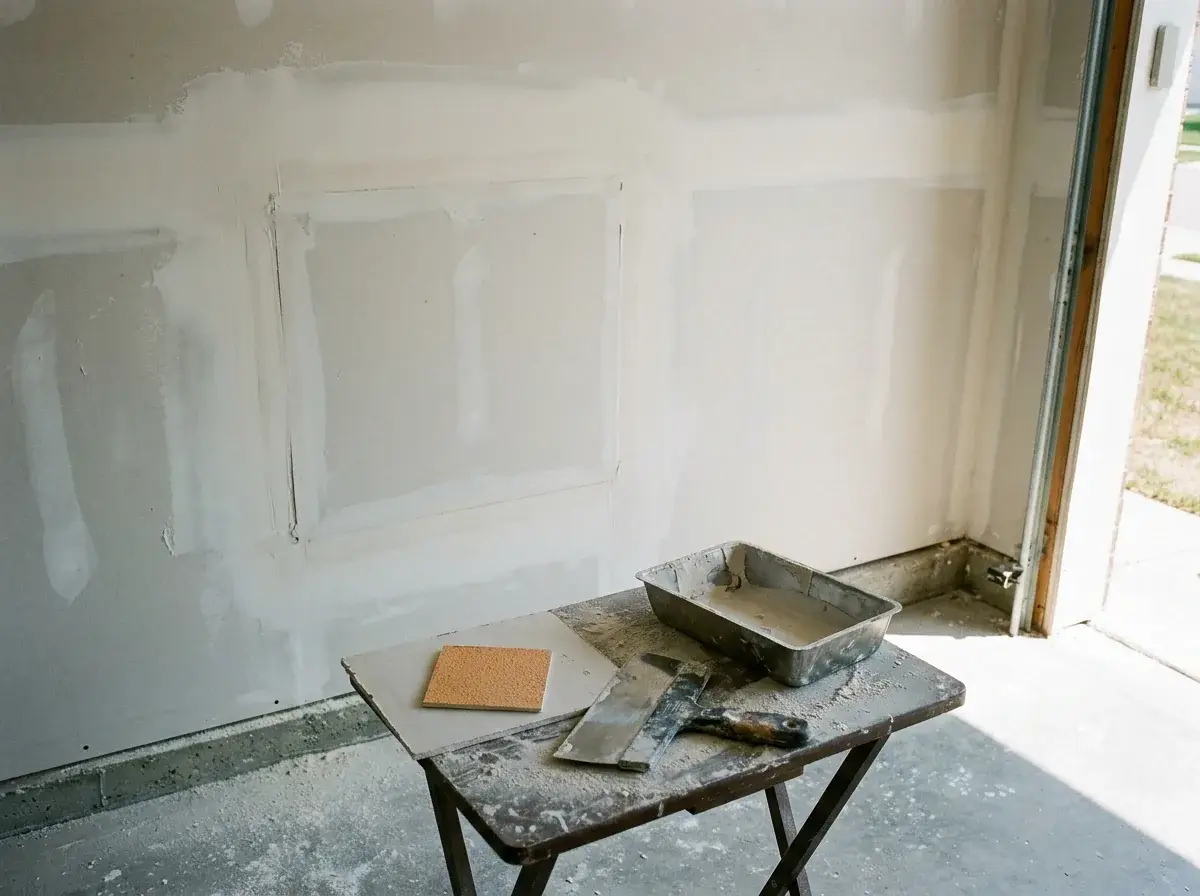
Precision Patch Pros treats drywall repair like a finish job, not a good enough patch. We’re licensed and insured, CSLB License #830875, serving Southern California since 2020 from Bakersfield and the Antelope Valley through Santa Clarita and the San Fernando Valley. Most jobs finish in one visit, patch, texture match and paint touch-up together, backed by a 5-year workmanship guarantee.
Get your ceiling repair quote in 10 minutes by sending a few photos of the damage.
Frequently Asked Questions
What is best to fill holes in a ceiling?
It depends on depth. For anything under an inch, a setting-type filler in two thin passes works because it shrinks less than premixed compound. Anything larger needs a fitted piece of matching-thickness drywall over wood backing, then paper tape and three coats, since compound alone has no structural strength overhead.
What is the best ceiling patching compound?
Setting-type compound, often called hot mud, is the better choice for the first coats on a ceiling because it hardens by chemical reaction rather than evaporation and shrinks less than premixed. Use a lightweight all-purpose or topping compound for the final skim coat, since it sands far easier. Mix hot mud in small batches. A 45-minute bag stiffens in the bucket whether you’re ready or not.
What is the best kit to patch a hole in the ceiling?
A small hole or crack can often be handled with drywall tape while small holes may be easier with a drywall repair kit. Above 4 inches, the peel-and-stick plate in most kits has no wood behind it and will eventually crack or bulge under its own weight. Buy scrap drywall and 1×3 furring instead.
Do you need primer over joint compound before painting a repaired ceiling?
Yes. Dried compound is porous and pulls paint in faster than the painted ceiling around it, so an unprimed patch dries to a dull rectangle even with the same can of paint. One coat of drywall primer over the repair and a few inches past it evens the absorption out. If the ceiling had any staining, use a stain-blocking primer instead of a standard PVA.
How many coats and how many days does a ceiling hole repair really take?
Plan on three thin coats. With premixed compound at up to 24 hours per coat, that’s roughly three days plus sanding, priming and paint. Setting compound can compress the schedule to one or two days, though the final topping coat and primer still need full dry time before texture.
Can I cover a ceiling hole with a vent or grille instead of patching it?
Only when the opening is genuinely near a duct that needs a return, and only when the grille is sized and sealed to the duct. A grille screwed over an open ceiling cavity lets conditioned air escape into the attic or floor assembly and does nothing for a fire-rated or sound-rated ceiling. As a cosmetic cover-up over a hole with no duct behind it, it’s a visible shortcut and usually a code problem.
What should I check before mounting a fan or light where the hole was?
Fixture weight never rides on drywall. A ceiling fan or heavy fixture needs a rated brace or blocking fastened to the joists, installed while the cavity is still open. Confirm the box is rated for the fixture’s weight and that the wiring is intact and de-energized before you close anything up.