
A small hole in drywall is one of the few home repairs a careful homeowner can make vanish completely. It’s also one of the easiest to botch. Patches fail for the same short list of reasons every time: loose paper left in the hole, one thick coat instead of two thin ones, sanding before the material is actually dry, and paint rolled over bare compound. Here’s the order a drywall specialist works in, and the point where most people should stop.
Quick answer: what a small drywall repair takes and what decides the result
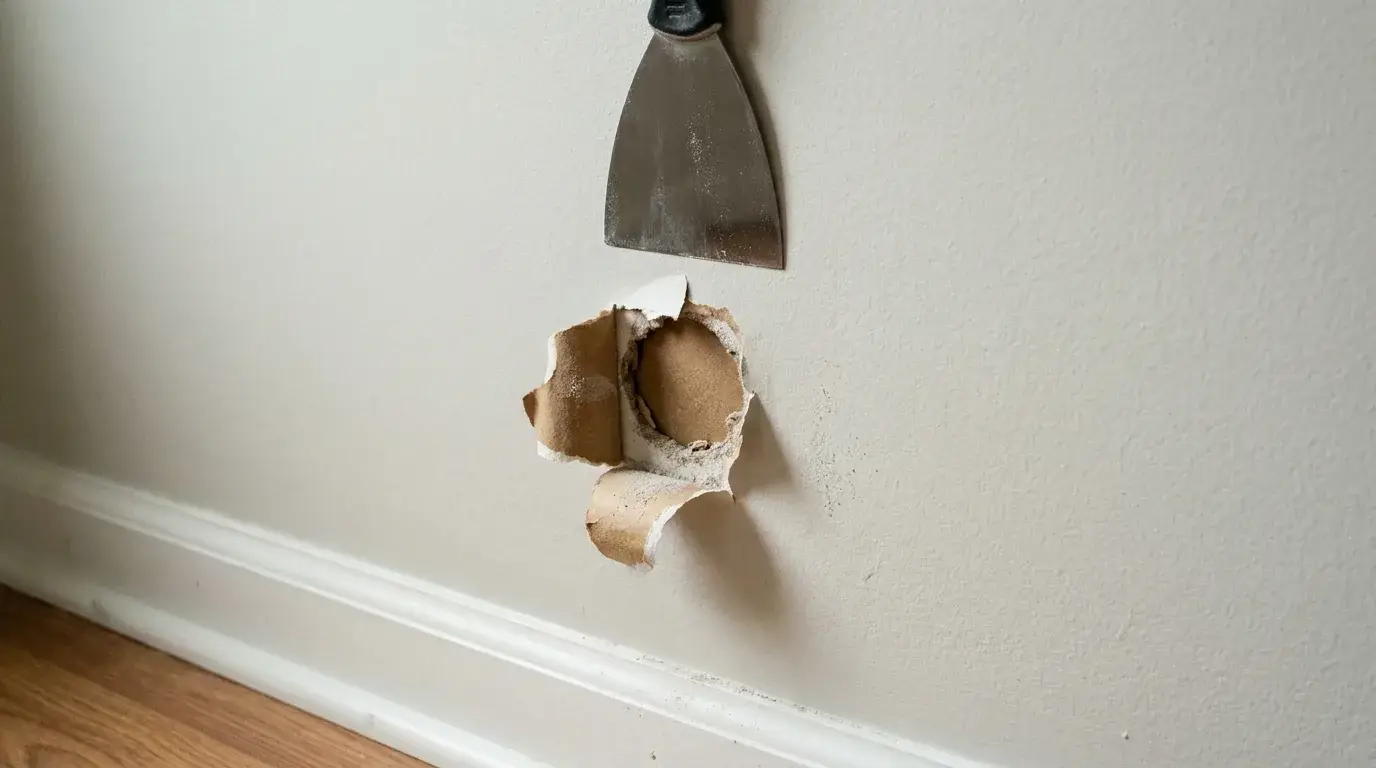
A dime-sized hole takes about 20 minutes of hands-on work spread over a day of waiting. Clean the torn edges, press lightweight spackle or patching compound into the void with a putty knife, scrape it flush, let it dry, sand lightly, then prime and touch up the paint. Everything you need fits in one hand.
Three things decide the result: the fill is bone dry before you sand, the compound is feathered well past the hole, and the patch is primed before paint. A patch stops at the hole. A repair that disappears fades out several inches past it, then gets sealed so the paint dries at the same sheen as the wall around it. With a setting-type compound, one small patch can be filled, sanded, and painted in a few hours.
| Stage | Hands-on time | Wait before the next stage |
|---|---|---|
| 1. Clean the edges | 2 to 5 min | None |
| 2. Fill | 5 min | See stage 3 |
| 3. Dry or set | None | 15 to 30 min for thin spackle, up to 24 hours for thicker compound |
| 4. Sand and prime | 10 min | 30 to 60 min for primer to dry |
| 5. Paint touch-up and final check | 10 min | Judge it the next day in daylight |
Before you start: check the hole, gather the right materials, and confirm DIY is the right method
Simple filler is enough when the hole is smaller than about half an inch, the gypsum around it is firm, and nothing behind the wall is wet or live. Anything outside that description needs reinforcement, a different trade, or a specialist.
Size decides the method
| What you have | What it needs |
|---|---|
| Nail or screw hole, up to about 1/8 inch | Direct fill with lightweight spackle, no mesh |
| Quarter-sized hole with firm edges, up to about 1/2 inch | Direct fill, two thin coats, no mesh |
| Torn anchor hole or any opening from 1/2 inch to 2 inches | Self-adhesive mesh patch first, then compound feathered wide |
| Over 2 inches | Wood backing or a drywall plug, covered in “How to Repair a Big Hole in Drywall: 7 Steps That Hold Up” |
The cutoff is half an inch. Under it, with solid gypsum all the way around the opening, filler alone holds. Over it, the compound has nothing to bridge and needs mesh or wood backing behind it.
Materials checklist
- Flexible putty knife, 4 to 6 inches wide, or a combination tool
- Lightweight spackle for shallow dents and nail holes
- Premixed all-purpose joint compound or a setting-type compound (hot mud) for deeper holes
- Self-adhesive fiberglass mesh patch, only if the opening needs it
- Utility knife and a damp rag
- Fine sanding sponge or 120-grit abrasive
- Dust mask
- Drywall primer, PVA or stain-blocking
- Touch-up paint in the matching color and sheen
Checks that tell you to stop
- Press around the hole. Soft, spongy, or crumbling gypsum means the damage runs wider than the opening.
- Look for staining or dampness. A brown ring, a sag, or a cool damp feel means water is in play. Patching over it just hides the problem.
- Think about what made the hole. A drill bit, an anchor, or a mount near an outlet, a switch, or a bathroom wall may sit inches from wiring or a supply line. Never probe or cut deeper to “see what’s back there.”
- **the EPA reports that paid work that disturbs painted surfaces in homes, childcare facilities, and preschools built before 1978 has to be done by workers certified in lead-safe practices.
- Check the texture. Orange peel, knockdown, and popcorn all need a matching finish coat, which is a separate skill from filling.
Step 1: Clean out loose paper, dust, and weak edges
Trim the torn paper flush with a sharp utility knife, brush out the crushed gypsum, and wipe the area with a damp rag. This is also the answer for anyone who wants to skip mesh entirely. A hole with clean, solid edges and a firm core can take compound directly, no patch and no tape.
Cut away only what’s already loose. Where the paper face has peeled back and exposed the brown inner layer, trim the flap, then seal that spot with a light coat of primer before any filler goes on. Bare paper drinks moisture out of the compound and bubbles.
The mistake to avoid: burying loose paper or a crushed rim under filler. It looks fine wet, then telegraphs a ridge or lifts the whole patch weeks later.
Step 2: Fill the hole with the right compound for the hole type
Match the product to the hole, not to whatever tub is already open. Lightweight spackle is enough for shallow nail holes, screw holes, and dents no deeper than about a quarter inch. It sands with almost no pressure. Lightweight joint compound is the better pick once the opening is wider than a coin or you need to build a wide feathered edge, because it spreads thinner and shrinks less than heavy all-purpose mud. Setting-type compound (the quick-set powder pros call hot mud) is the speed choice. It hardens by chemical reaction, so you can recoat the same afternoon instead of waiting on a pre-mixed tub overnight. Pre-mixed wins when you want long working time and easy sanding. Quick-set wins when the wall has to be painted today.
One rule comes before the patch question. Filler can only bridge about half an inch of unsupported opening. If solid gypsum surrounds the hole on every side and the void is smaller than that, press compound straight in. If the filler would be spanning open air, it needs mesh or backing behind it first.
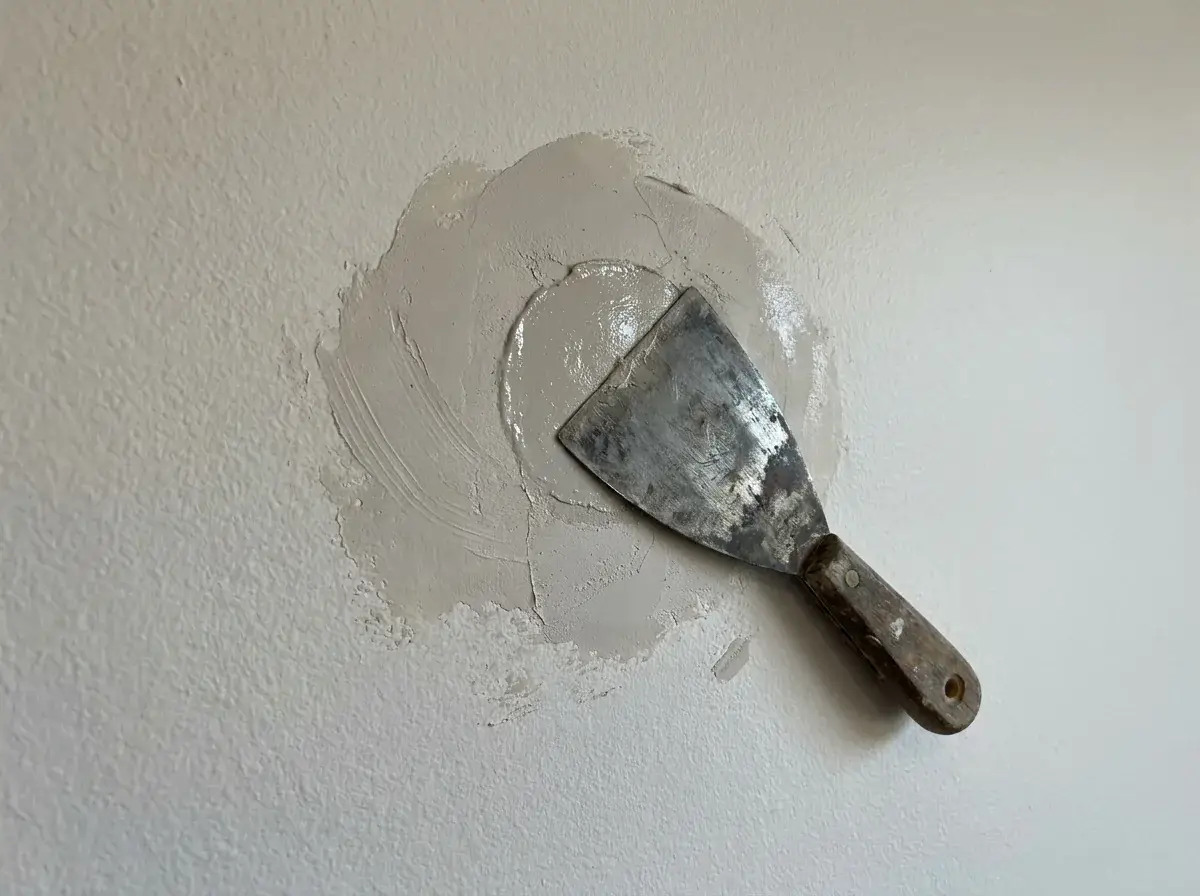
Load the knife, press the compound firmly into the cavity so it fills the void, then scrape the blade flat across the wall to leave the surface flush. As This Old House notes, apply a thin layer, let it dry, sand lightly, then apply a second thin coat. Two thin passes beat one thick one every time. A heavy mound shrinks in the middle as it dries and leaves a dimple or a hairline crack around the rim. Compound will not bond to bare brown paper either, so if any is still exposed at the rim, trim the loose flap and seal it before you fill.
The mistake to avoid: troweling on a thick blob to “get it in one go.” Thick fill shrinks, cracks, and crumbles at the edges under the sponge, so it costs more work than it saved.
Step 3: Let it dry or set fully before you touch it
Drying and setting are two different things. Premixed compound and spackle dry as water leaves the material, so thin lightweight spackle can be ready in 15 to 30 minutes while a deeper fill of all-purpose compound needs closer to a full day. Under about 70 degrees and 70 percent relative humidity, all-purpose joint compound dries in roughly 24 hours. Cold, humid, or closed-up rooms stretch that to two or three days.
Setting compound is sold by its working window. USG reports that a 90-minute formula hardens in roughly 85 to 130 minutes depending on thickness, mixing, and ventilation, and hardening is not the same as being fully dry through.
The mistake to avoid: judging readiness by feel. Pressing a thumb into a firm but damp patch leaves a dent and pulls moisture to the surface. Give it the stated time, then look for uniform color with no dark shadow in the center.
Step 4: Sand lightly, then prime before paint
Hard is not the same as ready. Compound is paintable only when it is dry all the way through, sanded flush, and sealed.
Sand with a fine sanding sponge or 120-grit using light pressure in a circular motion. Hold the sponge at a shallow angle, roughly 70 degrees to the wall, so the outer edge thins out instead of standing proud. Wear a dust mask. Sanded joint compound throws very fine dust. Work the outer ring wider than the center so the transition disappears.
Four separate things make a patch show after the paint dries:
- Absorption. Fresh compound is more porous than painted drywall, so an unprimed patch drinks more paint and dries a shade off. Primer settles this one.
- Sheen mismatch. The right color in the wrong sheen still reads as a bright or dull spot from across the room.
- Texture mismatch. A smooth patch on an orange peel or knockdown wall shows no matter how flat it is, so the texture goes back on before paint, sprayed or stippled and tested on cardboard first.
- Too little feathering. A two-inch smear leaves a hard edge that raking light finds every time.
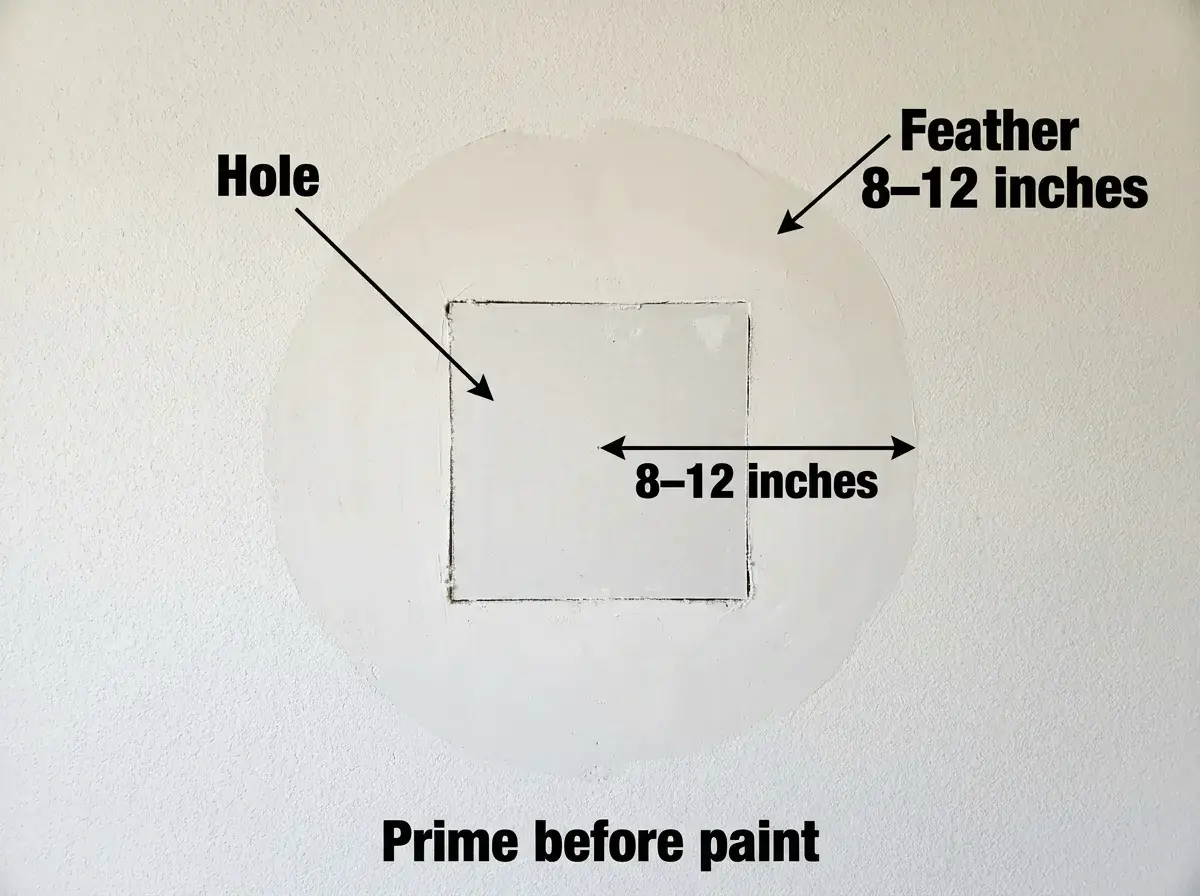
At Precision Patch Pros the finish is one sequence in one visit: patching, texture matching, then paint touch-ups, with the repair feathered 8 to 12 inches out, two to three coats with sanding between, then primed and blended. That width is why the repair disappears.
Match sheen, not just color. Flat paint forgives almost everything. On eggshell, satin, and semi-gloss, a spot touch-up can still flash even over primer, so plan on rolling out to a corner or another natural break.
Pro tip: stop sanding the second the repair feels flush under your palm. Over-sanding is the fastest way to make a small repair visible. It cuts through the compound, scuffs the paper around it, and turns a tidy fill into a shallow dip you now have to refill.
If the wall is textured or the paint has any sheen, that is the moment most people decide to hand it off. Our crews handle patching, texture matching and paint touch-up in one visit, so the repair is finished before the drop cloths come up.
How to tell it worked
Turn off the room lights, stand to one side, and look along the wall at a shallow angle with daylight raking across it. A finished repair shows no shadow, no shine change, and no outline where the compound ended. Run a flat palm over it with your eyes closed and you should feel wall, not a lump or a dip.
Pass or fail is simple. Flush and invisible from three feet in normal light is a good repair. Visible only under a raking flashlight at six inches is acceptable on a flat, low-sheen wall. A visible ring, a sheen halo, or a texture patch you can find from the doorway means it needs another thin coat and a wider blend.
When to call a pro instead
Call someone when the damage is a symptom instead of a dent. DIY filler is the wrong tool in these cases:
- Moisture, stains, or a sagging ceiling. The source has to be corrected first, and the affected board usually comes out rather than getting filled. In one recent job, our crew cut out the water-damaged section of a kitchen ceiling, hung fresh drywall, taped and floated the whole area, then repainted the kitchen so no sign of the leak remained.
- Cracks that keep coming back in the same spot, which point to movement rather than a surface flaw.
- Exposed wiring, cable, or pipe. Get the electrician or plumber in first, then patch the access cut.
- Ceilings and heavy texture. Overhead work, popcorn, and knockdown all punish guesswork. According to OSHA, in buildings constructed no later than 1980, sprayed or troweled surfacing materials can be treated as presumed asbestos-containing material, so sanding is the wrong first move.
- Glossy paint or strong side lighting, where a home repair’s small ridges show no matter how carefully it’s sanded.
The full comparison of doing it yourself versus hiring it out, with the numbers, is in “Hole in Drywall Repair Guide: Costs, DIY or Pro.”
Precision Patch Pros has been repairing walls and ceilings across Bakersfield, the Antelope Valley, Santa Clarita, and the San Fernando Valley since 2020, licensed and insured under CSLB License #830875, with a 5-year workmanship guarantee on the work. Send 2 or 3 pictures and get a quote within 10 minutes.
Frequently Asked Questions
How do you repair a drywall hole near an electrical outlet, plumbing line, or stud?
Assume something live is behind it and stop enlarging the opening. Fill it from the face only, using compound on a knife and never a tool that pushes deep into the cavity. If you can see wire insulation, a cable staple, or copper, have an electrician or plumber clear it before any patch goes on. Holes within a few inches of a box or a fixture wall are the ones that most often turn into a bigger repair.
Are drywall repair kits worth buying for one small hole?
For a single hole under half an inch, a kit is usually more than you need. A small tub of lightweight spackle, a putty knife, and a sanding sponge cover it. You still need primer and matching paint that no kit includes. Kits make more sense when you have several anchor holes or a 1 to 2 inch opening that needs the mesh patch they include.
How do I fix small holes in drywall before painting a room?
Do every hole in one pass: trim, fill flush, let them all dry together, then sand the whole set and spot-prime each one, following the sanding and priming detail in Step 4. The extra step people skip when repainting is sheen, since the new paint has to match the sheen of anything you are not recoating. Feather each fill 8 to 12 inches out so the roller never stops at a hard edge.
Why did sanding make the repair look bigger than the hole?
Too much pressure, or grit that’s too coarse, cuts through the compound and abrades the paper face around it. That widens the repair into a shallow dip. Use 120-grit or a fine sponge, sand in light circles, and check by hand every few passes. If you’ve already dished it out, skim one more thin coat 6 to 8 inches wide and sand that with barely any pressure.
How long should I wait between primer and the paint touch-up?
Most latex drywall primers are ready for topcoat in 30 to 60 minutes, longer in a cold or humid room. Wait for the primer to lose all sheen and feel dry, not tacky. Painting over damp primer is a classic cause of a patch that looks fine wet and flashes once the wall dries.
Can I use drywall repair putty or a putty stick instead of spackle?
Putty sticks and squeeze-tube putties work for pinholes and small nail holes where you want zero sanding. They’re handy for a fast move-out touch-up. They don’t have the body to fill a torn anchor crater or a hole through the gypsum core, and they can resist primer if applied too heavily. For anything larger than a pencil eraser, use spackle or joint compound.
How do I fix a small hole in a drywall ceiling?
The method is the same, but gravity is not on your side, so use a setting-type compound that stiffens in place instead of a loose premixed one, and keep each coat thin. Work from a stable ladder, protect the floor, and expect the texture match to be the hard part overhead. Ceiling holes with any staining around them belong to a pro, since the board above the stain is usually compromised too.