
A drywall repair patch works when you treat it like a finish job instead of a fill job. Most people get the sticky patch on the wall just fine, then rush the compound, sand too early, and end up with a raised outline that shows the moment sunlight hits the wall. The sequence below is the one a pro follows, including the two or three places where stopping and calling someone is the cheaper decision.
Quick answer: what a drywall repair patch takes and what makes it succeed
Yes, drywall repair patches work, as long as the drywall around the hole is dry and firm. The job runs in five moves: inspect the damage, pick the right patch for the size, apply joint compound in thin coats, let each coat dry or set fully, then sand and prime before paint. Plan on two or three short work sessions spread over one to two days with premixed compound, or a single long afternoon with setting-type compound.
One thing decides the result. Thin coats over sound drywall. Thick fills shrink, crack, and telegraph through paint no matter how carefully you sand them.
Before you start: tools, materials, and when this method fits
Drywall repair means restoring the gypsum panel and its finish so the wall reads as one continuous surface again, not just plugging a void. Here’s what that takes:
- Lightweight spackle for nail holes, anchor holes, and shallow dents
- Premixed all-purpose or lightweight joint compound for anything taped, meshed, or feathered wide
- Setting-type compound (the powder you mix, sold in 5, 20, 45, and 90 minute versions) when you need same-day coats
- Self-adhesive fiberglass mesh patch or paper joint tape
- Drywall scrap matching your existing board thickness, usually 1/2 inch on walls and 5/8 inch on many ceilings
- Furring strips or 1×3 wood backing plus 1-1/4 inch drywall screws
- Taping knives in 4 inch, 6 inch, and 10 or 12 inch widths
- Utility knife, drywall saw, stud finder, mud pan
- Sanding sponge and fine sandpaper, plus PVA primer-sealer or a stain-blocking primer
- Respirator, eye protection, drop cloth
Take the dust protection seriously. As CDC’s NIOSH Engineering Controls Database notes, NIOSH reported that one health hazard evaluation found drywall sanders exposed to as much as 10 times the OSHA permissible exposure limit of 15 mg/m3 for total dust.
When this method doesn’t fit: ripped paper face over soft, crumbling gypsum. You can spackle over a small scuffed tear, but once the paper is torn wide and the core underneath is powdery or spongy, filler has nothing to grip. Same answer for swollen or damp drywall. If the board is soft to thumb pressure, stained, or smells musty, that section comes out and gets replaced. Patching over moisture traps it and buys you the same repair again in six months.
Step 1: inspect the hole and choose the repair type
Measure the opening, then press the drywall an inch or two around it. Size tells you the material, and firmness tells you whether a patch is even legitimate. Holes roughly under 1/2 inch get filled with spackle and nothing else. According to Fine Homebuilding, small holes under 2 inches or so in diameter can be repaired with a self-repair patch or mesh tape. Once you’re at 4 inches or larger, you need real backing behind the opening, not adhesive.
| Damage | Repair type | Compound |
|---|---|---|
| Nail holes, anchor holes, dents under 1/2 in. | Fill only | Lightweight spackle |
| Cracks and popped seams | Paper tape over the line | Premixed all-purpose |
| 1/2 in. to 2 in. firm edges | Self-adhesive mesh patch | Setting-type first coat |
| 2 in. to 4 in. (doorknob range) | California patch or mesh plus tape | Setting-type, then premixed |
| Over 4 in. or any soft edge | Cut back, add backing, screw in a plug | Setting-type, 3 coats |
Don’t guess when the paper face is torn wide or the gypsum feels soft. That’s the moment DIY repairs turn into two repairs. Stop, and get an opinion on whether the section needs replacing.
Step 2: clean, square, and prep the opening
A rough, broken hole gets trimmed into a clean square or rectangle once it’s bigger than about 2 inches. Straight edges let a backed plug sit flush and give the compound a consistent edge to feather from. Cut with a utility knife, remove loose paper, crumbling gypsum, and paint flakes, then scuff the surrounding paint lightly so compound bonds to something sound. A glossy, dusty, or damp perimeter is the most common adhesion failure there is.
Obstructions change the approach:
- Near a stud: cut the opening so one edge lands on the stud face and screw directly into it. You only need backing on the free side.
- At a baseboard or corner: pull the trim rather than trying to knife compound into a 1/4 inch gap. Reinstalling trim is easier than fixing a smeared corner.
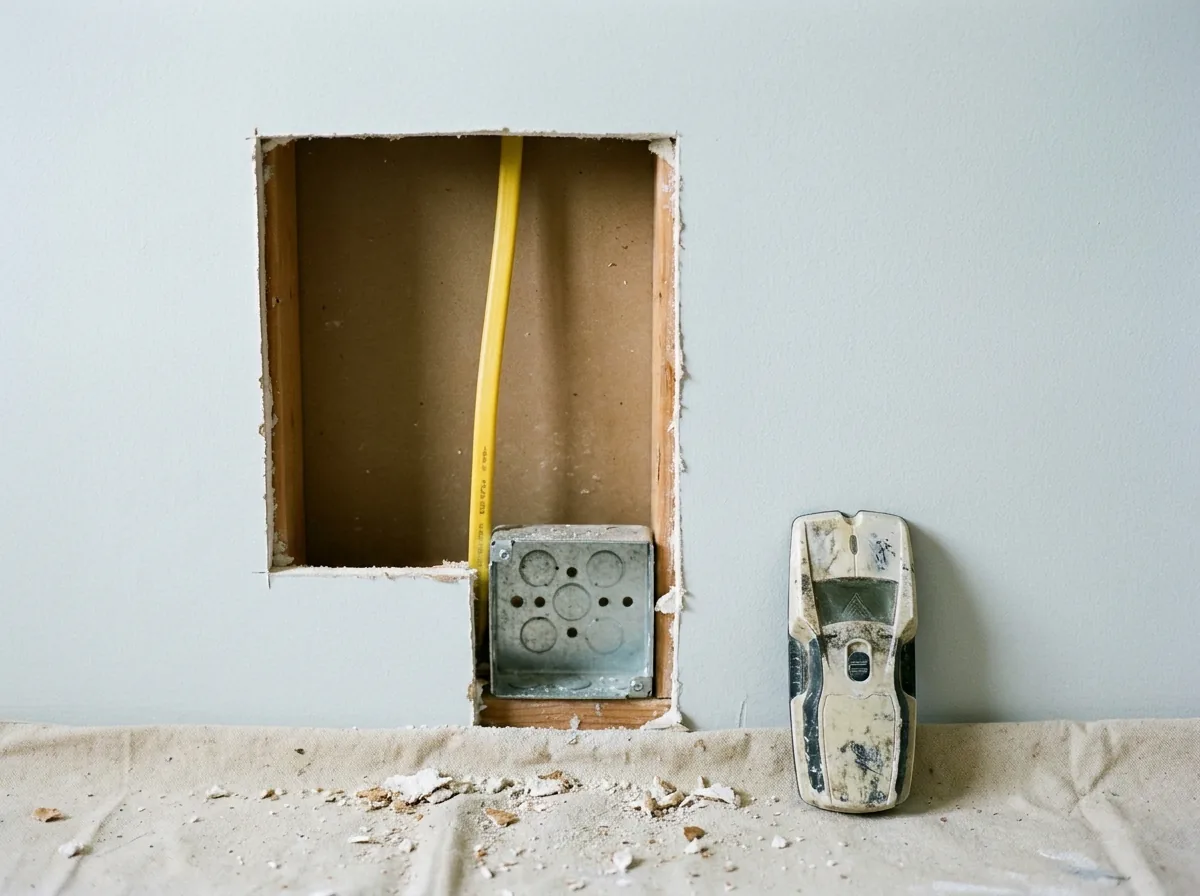
- Near an outlet or switch: kill the breaker first, then cut well clear of the box. Wires often run vertically up a stud bay, and horizontally from box to box.
If the damage came from trade access, like a cut-out left after a plumber or electrician worked in the bay, treat anything with visible wiring or pipes as a stop point. Blind cutting near concealed systems is where a small patch becomes an electrician’s service call. Precision Patch Pros patches and blends those access cut-outs across Kern County, the Antelope Valley, Santa Clarita, and the San Fernando Valley, and a photo quote takes about 10 minutes if you’d rather hand the opening to someone who does this daily.
Step 3: install the patch or backing the right way
Work up the ladder of support: adhesive mesh for small stable holes, a California patch for the middle range, and a screwed-in plug with wood backing for anything large. Mesh is strong enough only when the opening is small and the edges don’t flex. Press the patch flat and centered so it lands on sound drywall all the way around, with at least an inch of overlap.
For a doorknob-sized hole, the California patch (some people call it a butterfly patch) beats mesh. You cut a drywall scrap about 2 inches larger than the opening, score and snap the gypsum core off the back on all four sides, and leave the paper flanges intact. The plug fills the hole, the paper acts as the tape, and you get a rigid center instead of a flexible screen.
Larger openings need structure. Fine Homebuilding says larger holes need to be trimmed back to solid drywall, furred out, and patched. Slide furring strips behind the opening, screw them through the existing board, then fasten a matching plug to the strips. Set every screw head just below the surface.
The deciding factor is movement. If the patch can flex under a palm press, mesh alone will crack along the perimeter within a year. Edge stability and size, not brand of kit, determine which method holds.
Step 4: apply the compound in thin coats and let each coat set
Plan on two coats for a mesh patch and three for anything backed, each one wider than the last. The first coat gets pressed firmly through the mesh or over the paper flanges so no air stays behind it. Target roughly 1/8 inch or less at the center. That’s the number people miss, and it’s why so many repair-kit patches end up as raised islands.
Drying time vs. setting time
These are two different things and mixing them up ruins patches.
- Premixed compound dries. Water leaves the mud. Manufacturers commonly list about 24 hours between coats at roughly 70 to 75°F and 50 to 70% relative humidity. Cooler air or higher humidity stretches that out.
- Setting-type compound hardens chemically. The number on the bag is the approximate set window: a 90 minute product gives about 60 minutes of working time and sets somewhere around 85 to 130 minutes. Setting compound still holds water after it hardens, so let it dry before you paint.
- Never add extra water to speed or slow a setting compound. Dilution doesn’t change the hardening time, and it weakens the fill.
Coat two goes on after the first is genuinely dry, extending 3 to 4 inches past the first pass with a 6 inch knife. Coat three, when needed, comes off a 10 or 12 inch knife and exists only to erase the edges. Resist the urge to bury the patch in one heavy application. Thick compound shrinks as it dries, and shrinkage is what produces the hairline crack down the middle of an otherwise decent repair.
Step 5: sand, inspect with side light, and prime before paint
Your patch shows after painting because of flashing and profile, not because you sanded wrong. Flashing happens when fresh compound absorbs paint faster than the aged paint around it, leaving a dull or shiny ghost exactly the shape of the repair. Profile shows when the compound stops abruptly instead of blending, so low light catches a ridge.
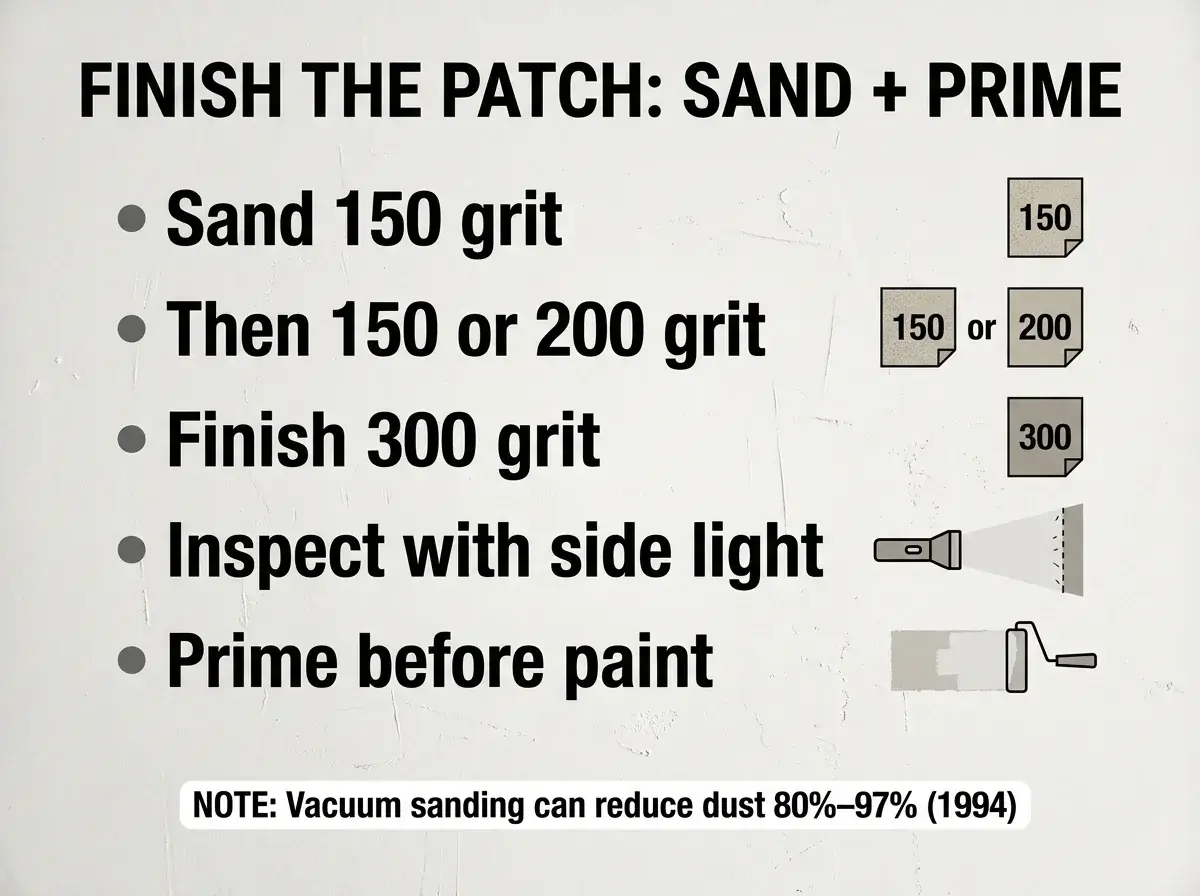
Sand only after the center is hard, not just skinned over. This Old House recommends sanding patched drywall with 150 grit first, then 150 or 200 grit, and finishing with 300 grit. Keep pressure light and stay off the mesh. If you hit fiberglass, you’ve gone too deep and need another thin coat. Use a vacuum sander or sanding sponge where you can. NIOSH said the five commercially available vacuum sanding controls it studied reduced dust exposures by 80% to 97% in 1994.
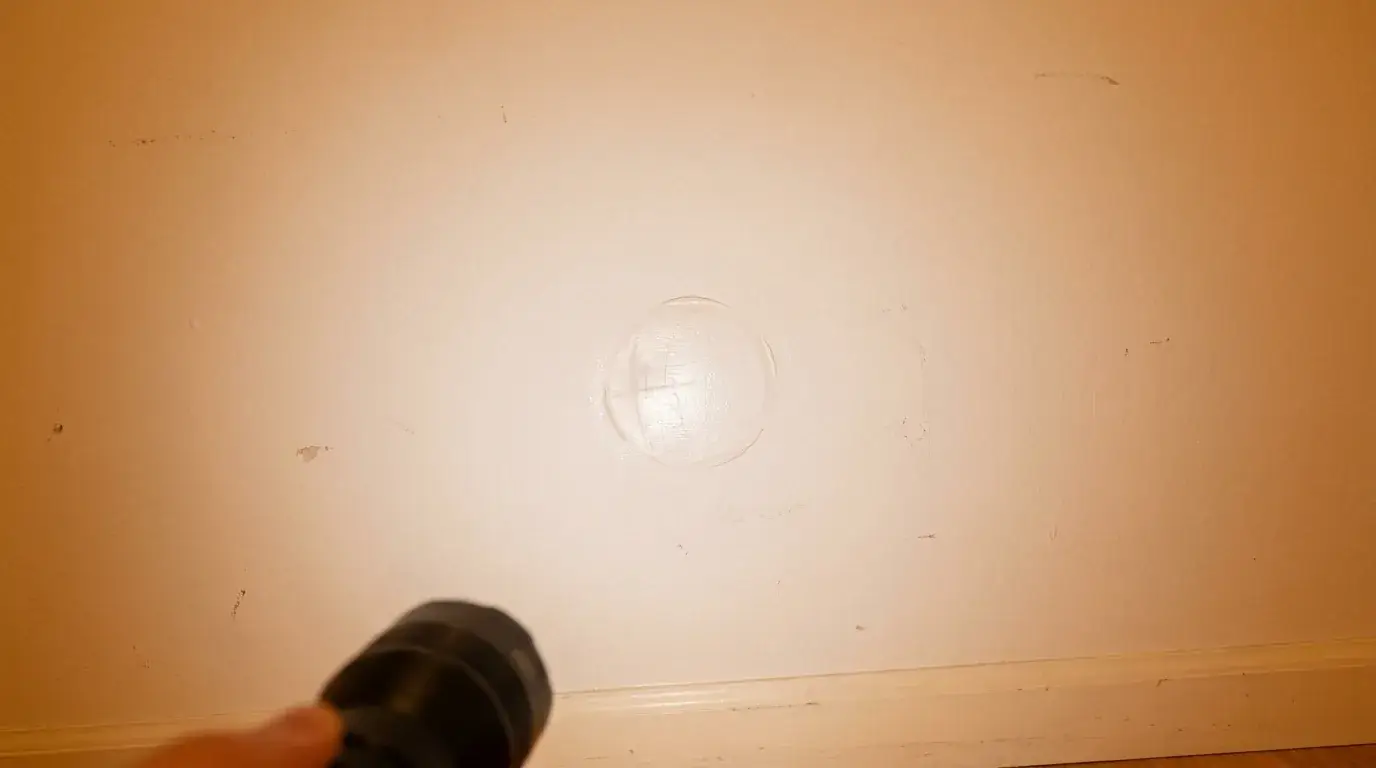
Now inspect. Hold a flashlight almost flat against the wall and sweep it across the repair. Every ridge, dip, and knife line jumps out at that angle even when the wall looks perfect straight on. Check again at night under room lighting, which reads differently than daylight.
Then blend and seal:
- Feather the compound 6 to 10 inches past the patch so the transition is gradual enough that light can’t find an edge.
- Prime every repair. Primer is mandatory, not optional. A PVA primer-sealer evens out porosity. Use a stain-blocking primer over any discoloration.
- Texture before paint if the wall has orange peel or knockdown. Test your spray pattern on cardboard first and feather the texture past the compound line.
- Expect to repaint corner to corner when the existing paint is aged, the sheen is eggshell or higher, or the color has been custom-mixed. Spot painting works best on flat paint under three or four years old.
Painting scope has its own answer in “Hole in Drywall Repair Guide: Costs, DIY or Pro,” which is also where the cost breakdown for patching lives.
How to tell the drywall repair patch worked
A finished repair disappears. Run your palm across it with your eyes closed and you shouldn’t be able to find where the hole was. No bump at the center, no valley at the perimeter, no gritty ridge where the knife lifted off.
Visually, the checks are simple:
- No halo or outline in low-angle light from either direction
- No sheen difference between the repair and the wall in daylight and at night
- Matching texture depth, so the pattern runs through the patch instead of stopping at it
- Solid feel at the edges, with no crackle or give under thumb pressure
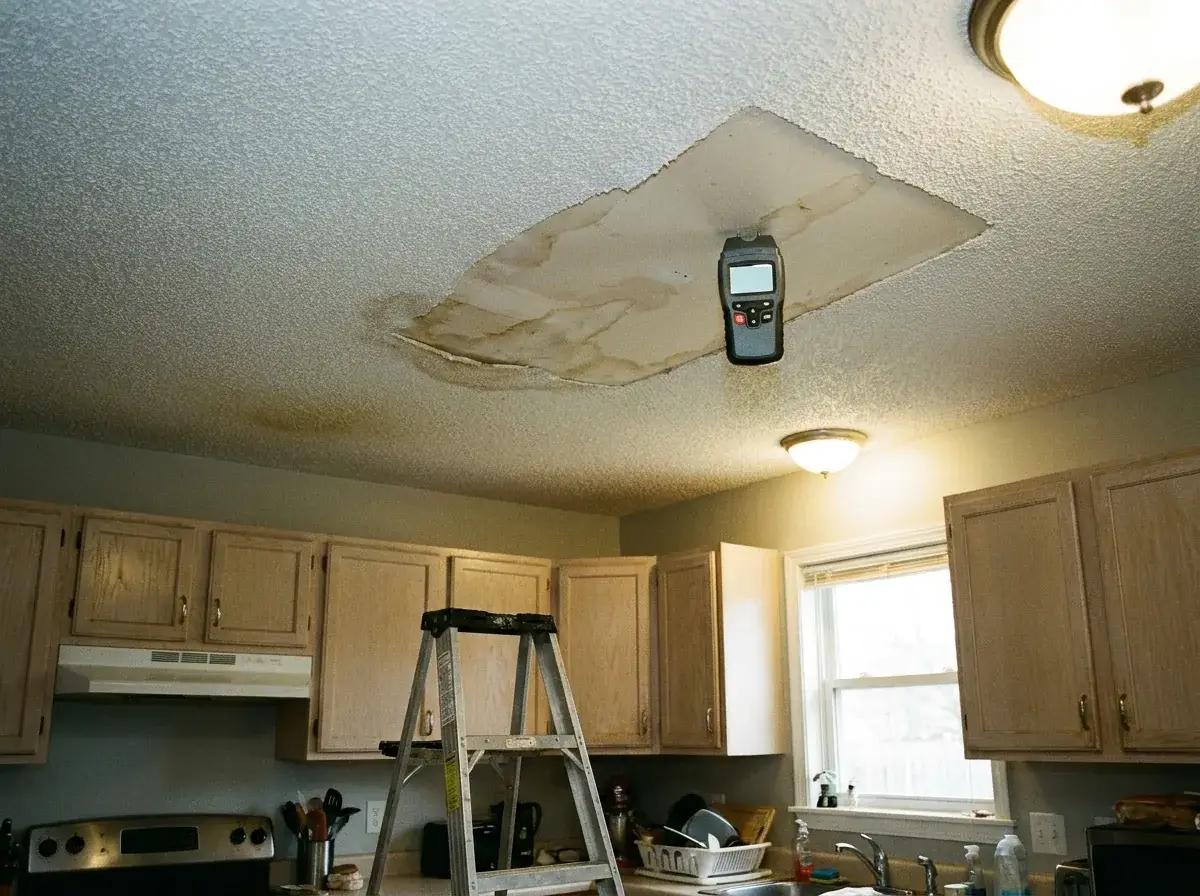
Water-damaged repairs get one more test. Moisture has to be gone before anything closes up. At Precision Patch Pros, a moisture meter confirms the area is dry and an antimicrobial solution is applied before new drywall goes in. Skip that verification and the stain returns through fresh paint.
When to call a pro instead
Call someone when the damage stops being cosmetic. Water-stained or sagging ceilings, recurring cracks that reopen after every repair, soft or swollen gypsum, musty odors, and anything in a fire-rated or soundproof assembly all fall outside patch-and-paint territory. So do textured walls you can’t match, since reproducing orange peel or knockdown across a repair is the skill most DIY attempts fail on even after the drywall work goes well.
Ceilings deserve extra caution. Gravity, framing movement, and an unknown water source make a surface patch unreliable, and an overhead patch that lets go takes paint and texture with it. Like one recent job where a kitchen ceiling leak meant cutting out the water-damaged section, hanging fresh drywall, taping and floating the whole area, and repainting the kitchen so no sign of the leak remained.
The math is also worth being honest about. A DIY patch that flashes, cracks, or shows a raised outline gets redone, and the second attempt starts with sanding the first one off. If you’re on a move-out deadline or the wall is in a room people actually look at, hiring the repair is usually the cheaper path.
Precision Patch Pros handles patching, texture matching, and paint touch-ups in one visit, licensed and insured under CSLB License #830875, with a 5-year workmanship guarantee and service since 2020. Send 2 or 3 pictures and get your quote within 10 minutes.
Frequently Asked Questions
Do drywall repair patches work?
They work well within their limits. A self-adhesive mesh patch holds reliably on stable openings up to about 2 inches, and a California patch or backed plug handles larger holes indefinitely. What fails is a mesh patch stretched over a hole too big for it, or any patch applied over soft drywall.
What is the best thing to patch drywall with?
Match the material to the damage. Lightweight spackle for holes under 1/2 inch, premixed all-purpose joint compound for taped and feathered repairs, and setting-type compound when you need the first coat hard in under two hours. Spackle shrinks less on tiny fills, but it won’t embed tape, so it’s the wrong choice for anything reinforced.
Can I spackle over ripped drywall?
Only if the tear is shallow and the gypsum underneath is firm. Trim the loose paper with a razor, seal the exposed core with a shellac or oil-based primer so it won’t bubble, then spackle in thin coats. Where the paper is torn open and the core is crumbling, cut out the area and set in a patch instead.
What does drywall repair mean?
It covers restoring both the panel and its finish: closing the opening, reinforcing the joint, rebuilding the surface plane with compound, reproducing the texture, and blending paint so the area matches. A repair that only fills the void is half the job, which is why so many patches are visible under side light.
How large can a drywall hole be before it needs backing?
Around 4 inches. Below that, a California patch or mesh reinforcement spans the gap without support. Above it, the unsupported center flexes, and flex cracks compound. Slide furring strips behind the opening and screw a matching plug to them.
Why does my drywall patch crack after it dries?
Almost always one heavy coat instead of several thin ones. Compound shrinks as it loses water, and thick fills shrink unevenly, so the surface splits. The other cause is movement, meaning a patch with no rigid backing behind it.
When should I call a professional for a drywall ceiling or textured-wall repair?
Call for any ceiling with staining, sagging, or an unknown moisture source, and for textured walls where the pattern has to be reproduced. Ceiling patches carry their own weight against gravity, and orange peel or knockdown matching takes spray practice most homeowners don’t have. Both are common redo jobs when handled DIY.
How do I choose between mesh, paper, and metal patches?
Mesh for small stable holes with setting compound as the first coat, since mesh needs a harder fill to stay rigid. Paper tape for cracks, seams, and the flanges of a California patch, because paper resists cracking better along a joint line. Metal-backed patches bridge medium holes where you can’t get wood behind the wall, though they leave a thicker profile that demands wider feathering.