
You’re staring at a fist-sized hole in your hallway, a spreading crack near your bedroom door, or a dinged-up ceiling, and the same question cycles through your mind: Can I fix this myself, or do I need to call someone?
The short answer is yes, you probably can. The better answer is: it depends on the damage type, how large the affected area is, and whether you want it to truly disappear or just look “good enough.” Small repairs are genuinely DIY-friendly. Larger ones demand precision, the right materials, and a tolerance for multi-coat processes that take longer than you think. This guide walks through the honest reality of DIY drywall repair, what tools and materials actually deliver invisible results, and where professional standards become worth the investment.
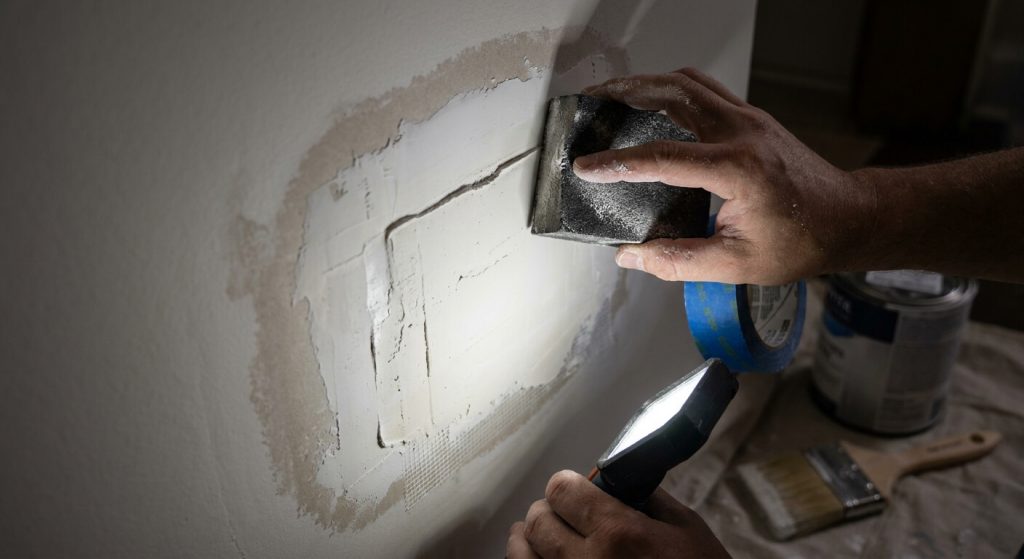
The Bottomline Answer: It Depends on the Damage
Most homeowners have the instinct to grab a putty knife and spackle when they spot wall damage. That impulse isn’t wrong. It just needs calibration. Three factors determine whether your repair will look invisible or scream “I tried”: the type of damage, the size of the affected area, and how durable you need the fix to be.
Type matters because holes, cracks, and water-damaged areas each require different materials and techniques. A nail pop isn’t the same as a doorknob-sized hole or a jagged ceiling crack. Size determines tool complexity and time investment. Repairing anything under an inch is straightforward. Beyond six inches, you’re cutting new drywall, adding backing strips, and juggling multiple drying cycles. Durability shows up later. A fast cosmetic patch might hold for a year before cracking again. An invisible repair done to professional standards lasts five years or more without movement.
Here’s the underlying truth: DIY is genuinely possible for many repairs. Getting invisible results requires precision standards most homeowners underestimate until the spackle dries and the patch is still visible under afternoon light.
Repair Types and Their DIY Feasibility
Not all drywall damage is created equal. Some repairs suit weekend warriors. Others test experienced hands. The difference isn’t skill alone. It’s understanding which category the damage falls into and whether you’re willing to invest the time and materials to meet the invisibility threshold.
Let’s break repairs into six categories, ordered by difficulty and realism for DIY completion.
Small Holes (Under 1 Inch): Your Best DIY Bet
Nail holes, picture-hanging accidents, and minor dents fall into the easiest repair category. These are genuinely forgiving. You’ll need lightweight spackle (brands like DAP or Red Devil), a small putty knife (two to three inches), fine-grit sandpaper (150 or 220), primer, and matching paint. The process is simple: fill the hole in one pass, let it dry (usually 30 minutes), sand smooth, prime, and touch up paint.
The key to invisibility, even at this scale, is feathering. Don’t leave a visible mound. Spread the spackle thin at the edges so the patch blends into the surrounding surface. If you can feel a ridge with your finger after it dries, you’ll see it under light. Sand gently until the transition is imperceptible.
Small-hole repairs take 15 to 30 minutes of active work (plus drying time). If you mess up, you can scrape it out and start over without structural consequences. This is the sweet spot for DIY.
Medium Damage (1 to 6 Inches): Where DIY Gets Tricky
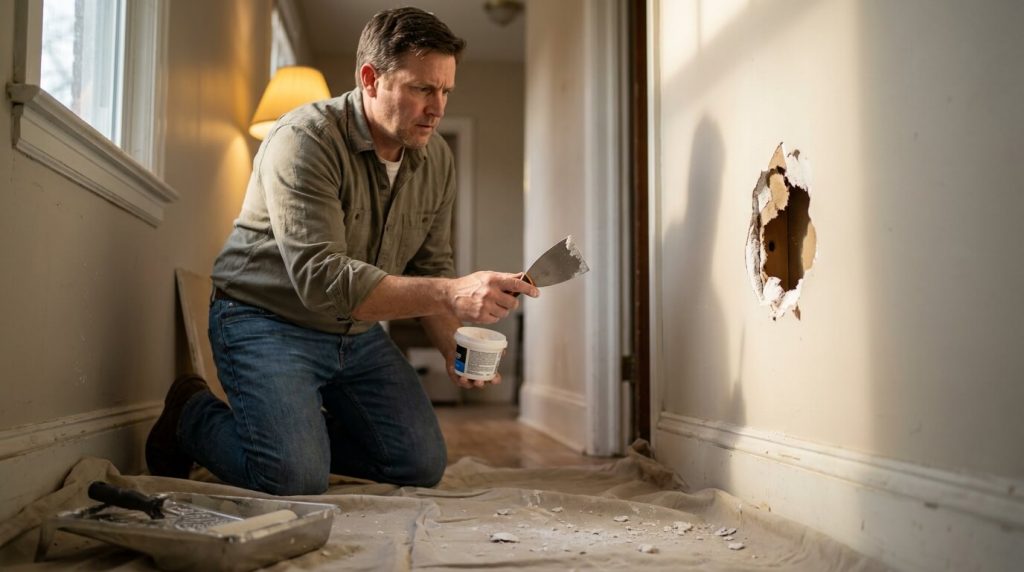
Doorknob impacts, accidental furniture hits, and fist-sized holes land in the middle zone. DIY is still possible, but shortcuts create visible failures. Most homeowners reach for self-adhesive mesh patches or pre-made drywall repair kits here. These work, but only if you follow multiple-coat discipline.
The professional standard for medium repairs is at least three thin coats of joint compound, feathered eight to twelve inches beyond the patch edges on all sides. Each coat needs full drying time (often 24 hours in humid climates). Sanding between coats is non-negotiable. Primer must go on before paint, or the patched area will flash dull or shiny under certain angles.
Where DIYers fail: they apply joint compound too thick in one coat, trying to save time. Thick applications crack as they dry and create visible ridges. Skipping primer leaves a dull spot that screams “patch” even if the surface feels smooth. Insufficient feathering means the edges of the repair remain visible under raking light, particularly in hallways and near windows where sunlight hits at low angles.
If you’re willing to do multiple coats, let each dry fully, and sand with patience, medium repairs are achievable. If you want it done in one evening, you’ll get a visible patch.
Large Holes and Cut-and-Patch Repairs (Over 6 Inches)
Anything larger than six inches typically requires cutting out the damaged section and installing a new piece of drywall. This involves measuring and cutting a patch to size, installing backing strips or furring behind the opening for screw anchoring, securing the patch with drywall screws, taping the seams with mesh or paper tape, and applying multiple coats of setting-type or all-purpose joint compound.
A skilled DIYer can attempt this, but hidden costs accumulate. You’ll need a drywall saw or utility knife, a drill, drywall screws (1-1/4 to 1-5/8 inches), backing material (wood strips or metal clips), joint compound, tape, taping knives in multiple widths (six-inch and ten-inch minimum), sandpaper, primer, and paint. Many homeowners also underestimate the learning curve: cutting a clean square, getting the patch flush with the surrounding surface, embedding tape without bubbles, and feathering wide enough to hide seams.
Equipment rental might be necessary if you don’t own a cordless drill or a sanding pole. Multiple trips to the hardware store are common when you realize mid-project that you bought the wrong compound type or ran out of sandpaper. Time investment often stretches across a full weekend, sometimes longer if you’re working around drying cycles.
Professional standards for large repairs involve invisible tape seaming, texture matching if the wall isn’t smooth, and multi-stage sanding that leaves zero ridges. Most DIYers underestimate these final steps and end up with a patch that’s structurally sound but cosmetically obvious.
Cracks and Water-Damaged Surfaces
Cracks require diagnosing the root cause before you patch. Seasonal settling, foundation movement, and impact stress all produce cracks, but the repair approach differs. Hairline cracks can be widened slightly with a utility knife (creating a V-groove for better compound adhesion), filled with setting-type compound, taped with mesh, and feathered. Wider cracks or those that reappear after previous repairs signal structural movement. Patching without addressing the cause means the crack returns within months.
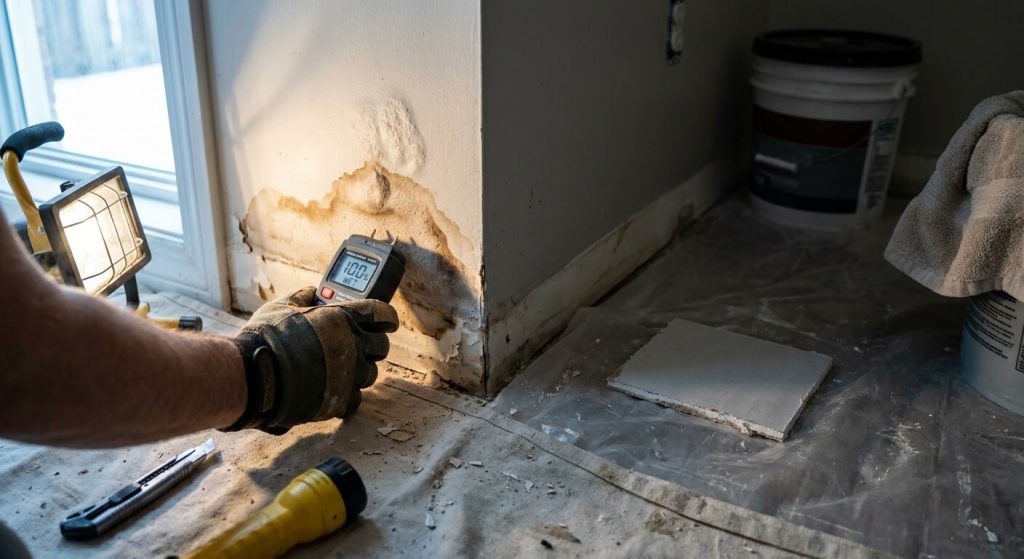
Water damage is trickier. If drywall has been wet, it often loses structural integrity. The paper facing may separate from the gypsum core, creating soft spots or bubbling. Cosmetic patching over compromised material fails quickly. Moisture assessment is critical. If the source (roof leak, plumbing issue, condensation) isn’t fixed first, any repair will fail.
For water-damaged areas, professional inspection becomes the smart threshold. Mold growth behind drywall is invisible until you cut into it. If the damage extends beyond surface discoloration, replacement is often safer and more cost-effective than patching.
Essential Tools and Materials for DIY Repair
DIY drywall repair scales with ambition. A tiny nail hole needs almost nothing. A six-inch hole demands a small toolbox. Knowing what you actually need versus what’s optional saves money and frustration. Here’s a practical breakdown organized by repair size, with cost ranges so you can compare against professional pricing later.
Small-Hole Kit (Under $30)
For holes under one inch, you need lightweight spackle (one pint, around $5 to $8), a small putty knife (two to three inches wide, $3 to $6), fine-grit sandpaper or a sanding sponge (150 or 220 grit, $3 to $5), primer ($8 to $12 for a small can), and touch-up paint (you likely already have this, or $10 to $15 for a sample).
Total investment: $20 to $30. This kit handles dozens of small repairs. Spackle dries fast, usually within 30 minutes, and sands easily. The putty knife is forgiving. If you already own sandpaper and primer, your cost drops to under $10.
Medium-Repair Kit ($40 to $80)
For holes one to six inches, add self-adhesive mesh tape ($4 to $7 per roll), all-purpose joint compound or setting-type compound ($8 to $15 for a pre-mixed tub or powder bag), taping knives in multiple widths (four-inch and six-inch, $6 to $12 each), a mud pan ($5 to $8), and texture spray if needed ($6 to $10 per can).
Total investment: $40 to $80. This kit requires more skill interpretation. Joint compound has a longer learning curve than spackle. Taping knives need proper angle and pressure to feather edges invisibly. Mesh tape must be embedded fully, or it telegraphs through the finish coats. Setting-type compound dries harder and resists cracking better than pre-mixed, but it also sets on a timer (20, 45, or 90 minutes depending on the formula), leaving no room for slow work.
The cost starts approaching the lower end of professional repair pricing for a single medium hole. That said, if you have multiple repairs across your home, the kit pays for itself.
Large-Repair or Professional-Grade Kit ($100 to $200+)
For holes over six inches or multiple large repairs, you’ll need a drywall patch kit or scrap drywall pieces ($10 to $20), backing strips or drywall clips ($8 to $15), drywall screws ($5 to $8 per box), a drywall saw or jab saw ($8 to $15), a cordless drill if you don’t own one ($50 to $100), wider finishing knives (eight-inch and ten-inch, $10 to $20 each), corner bead if repairing edges ($6 to $10), texture spray or hopper gun for matching texture ($10 to $50+), and primer and paint.
Total investment: $100 to $200+, assuming you already own a drill. If not, add another $50 to $100. This is the moment to pause. The investment approaches or exceeds the cost of hiring a professional for one or two large repairs. The complexity grows significantly: cutting clean edges, installing backing without creating bulges, embedding tape without bubbles, and feathering ten to twelve inches on all sides to hide seams.
Texture matching alone can be a deal-breaker. If your walls have orange-peel, knockdown, or popcorn texture, you’ll need spray equipment and practice to match it invisibly. Most DIYers skip this step and leave a smooth patch on a textured wall, which is immediately obvious.
Step-by-Step Process: Professional Standards Explained
Invisible repairs follow a sequence. Skipping steps or rushing drying times creates visible failures. This isn’t about perfection for perfection’s sake. It’s about understanding why professionals do what they do and what happens when you shortcut the process.
Here’s the core sequence for a medium-to-large repair, using professional benchmarks:
- Prepare the surface: Remove loose debris, cut away any damaged or soft drywall, and clean edges with a utility knife.
- Install backing (if needed): For holes larger than four inches, install wood strips or drywall clips behind the opening to anchor screws.
- Cut and fit the patch: Measure and cut a new drywall piece to fit snugly, leaving minimal gaps (1/8 inch or less).
- Secure the patch: Drive drywall screws through the patch into the backing, countersinking slightly below the surface without breaking the paper.
- Apply tape: Embed mesh or paper tape over seams using a thin layer of joint compound. Press firmly to remove air bubbles.
- First coat: Apply a thin layer of joint compound over the tape and patch, feathering at least eight inches beyond the edges. Let it dry for 24 hours.
- Second coat: Apply a wider, thinner coat, feathering ten to twelve inches. Sand lightly with 150-grit once dry.
- Third coat (if needed): Apply a final skim coat to eliminate any remaining ridges. Feather as wide as necessary for invisibility.
- Sand: Use 220-grit sandpaper or a fine sanding sponge. Check with your hand and under raking light for ridges.
- Prime: Apply drywall primer to seal the patch and equalize absorption.
- Paint: Touch up or repaint the entire wall, matching sheen and color.
Each step has a reason. Skipping tape causes cracks. Thick coats shrink and ridge. Insufficient feathering leaves visible edges. No primer creates flashing.
Preparation: The Step Most DIYers Rush
Surface prep determines whether the repair adheres and lasts. Remove all loose paper, dust, and crumbled gypsum. If the hole has ragged edges, cut them clean with a utility knife. Edges should be firm and stable, not frayed or soft.
For cracks, widen them slightly with a utility knife, creating a shallow V-groove. This increases surface area for compound adhesion and reduces the chance of the crack reopening. If you patch over loose or damaged material, the repair will fail within months as the substrate continues to degrade.
Many DIYers skip this step, eager to start filling. Bad prep undoes all future work. Compound won’t bond to dust or loose paper. Moisture in damaged drywall will cause the patch to bubble or crack as it dries.
Professional diligence here means cutting away anything compromised and treating the repair like new construction from that point forward.
Applying Joint Compound: Thin Coats vs. Thick Coats
The professional standard is multiple thin coats, not one thick application. Thick joint compound shrinks dramatically as it dries, causing cracks and visible depressions. Thin coats dry flatter and build up gradually, allowing you to control the final surface.
For a medium repair, plan on at least three coats. The first embeds the tape and fills the deepest part of the hole. The second widens the feathered area and begins to level the surface. The third is a skim coat that eliminates any remaining ridges and prepares for primer.
Each coat should feather at least eight to twelve inches beyond the patch edges. You want a gradual, imperceptible transition from patch to wall. If you stop feathering too close to the repair, you’ll see a raised bump or a ridge under light.
Drying time between coats is non-negotiable. Pre-mixed joint compound needs 24 hours in most climates. Humid conditions extend that. Setting-type compound dries faster (two to four hours depending on formula) but demands faster work. If you apply a second coat before the first is fully dry, the moisture reactivates the lower layer and causes shrinkage, cracking, or bubbling.
Impatience is where most DIY repairs fail. Professionals know this and schedule multi-day timelines for even small jobs. Homeowners often try to finish in one evening and end up with a visible patch.
Feathering and Blending: The Precision Threshold
Feathering is the art of making the repair disappear. It means spreading joint compound progressively thinner as you move away from the center of the patch, creating a gradual ramp rather than a cliff edge.
The technique requires knife angle and pressure control. Hold the taping knife at a low angle (15 to 20 degrees) and apply firm, even pressure as you drag outward. The edges of the compound should become so thin they’re nearly invisible. If you can feel a ridge with your fingers after the compound dries, it will show under light.
Wider feathering is better. For a four-inch hole, feather at least eight inches in all directions. For a six-inch hole, go ten to twelve inches. This sounds excessive until you see the result under raking light. Narrow feathering creates a visible halo around the patch. Wide feathering blends seamlessly.
This is where most DIYers’ patches become visible. It requires feel and practice that professionals develop over years. A confident first-timer can achieve decent results with patience and multiple coats. A rushed homeowner will leave ridges.
Texture Matching and Paint Touch-Up
Even a perfect smooth patch looks wrong if the surrounding wall is textured. Texture matching is a hidden complexity that catches most DIYers off guard.
Common wall textures include orange-peel (fine spray pattern), knockdown (orange-peel flattened with a trowel), and popcorn (thick bumpy ceiling texture). Matching requires the right equipment: spray cans for small areas, hopper guns or HVLP sprayers for larger sections. It also requires practice. Spray distance, material consistency, and drying time all affect the final appearance.
Many DIYers skip texture matching because the equipment costs more than the repair itself or because they don’t realize their wall is textured (light textures like orange-peel are subtle but still visible after a smooth patch). The result is a band-aid: structurally sound but cosmetically obvious.
Paint touch-up adds another layer. Even if you match the color perfectly, differences in sheen (flat vs. eggshell vs. satin) create visible patches. Primer is mandatory. Unprimed drywall compound absorbs paint differently than the surrounding wall, causing dull spots or flashing. Primer seals the patch and equalizes absorption, allowing the topcoat to blend invisibly.
Professional standards here mean matching texture, priming, and often repainting the entire wall from corner to corner to avoid sheen differences. DIYers who skip these steps end up with a repair that’s “close enough” but not invisible.
Common DIY Mistakes That Cause Visible Patches
Even confident homeowners make predictable errors. Recognizing these before you start saves the cost and frustration of redoing work. Here are the top mistakes that kill invisibility:
- Thick single coats: Applying joint compound in one heavy layer causes shrinkage, cracking, and visible ridges. Thin coats build up gradually and dry flatter.
- Insufficient feathering: Stopping feathering too close to the patch leaves visible edges under raking light. Wider is better.
- Skipping primer: Unprimed patches flash dull or shiny under paint, even if the color matches. Primer seals the compound and equalizes absorption.
- Wrong joint compound type: Using lightweight spackle for medium or large holes causes cracking. All-purpose or setting-type compound is stronger and more crack-resistant.
- Sanding too aggressively: Over-sanding creates depressions and exposes tape or mesh. Sand just enough to remove ridges, checking frequently with your hand and under light.
- Ignoring texture: Leaving a smooth patch on a textured wall is immediately obvious. Texture matching requires extra materials and practice.
- Rushing drying time: Applying a second coat before the first is fully dry reactivates moisture and causes shrinkage or cracking.
Each mistake has a visible consequence. Recognizing them upfront helps you decide whether you’re willing to invest the time and materials to avoid them.
When Professional Standards Are Worth the Investment
DIY saves money on small repairs. For larger or more visible damage, the cost-benefit equation shifts. Here’s a transparent comparison to help you decide where the threshold lies.
Damage Size Thresholds
Holes under one inch favor DIY. Material cost is under $30, time investment is under an hour, and the risk of visible failure is low if you follow basic feathering discipline.
Holes one to three inches are borderline. DIY is possible if you’re patient and willing to do multiple coats. Material cost rises to $40 to $80 if you don’t already own tools. Time stretches to a weekend when you account for drying cycles. Professional repair for a single medium hole typically costs $75 to $150. If you have multiple repairs, DIY makes sense. For one hole, the convenience of professional invisibility may justify the cost.
Holes over six inches often favor professional repair in terms of time-to-invisibility and durability. Material and tool cost approaches $100 to $200 if you don’t own a drill and wider knives. Time stretches to multiple days. Professional repair ranges from $150 to $400 depending on size and complexity. For one or two large holes, hiring a pro is often faster and delivers better results. For multiple large repairs, DIY with the right tools can save significant money, but expect a learning curve.
Need a patch that truly disappears? Precision Patch Pros specializes in invisible drywall repairs across Southern California, backed by a 5-year guarantee. Get a quote in 10 minutes.
Visible-Location Damage
Damage in high-traffic areas, above mantels, or on focal walls demands invisibility. These are the first surfaces guests and buyers notice. A visible patch detracts from the home’s appearance and can affect resale value.
Professional repair in visible locations costs money, but the investment protects perceived home value. Front-and-center damage justifies professional work. Closet damage, garage walls, or utility areas are DIY territory. The visibility threshold matters more than the size of the repair.
Durability and the 5-Year Horizon
DIY patches using lightweight spackle or insufficient feathering typically last one to three years before cracking or becoming visible again. Professional-grade repairs using setting-type compound, proper tape embedding, and multi-coat feathering are guaranteed for five years or more.
If you’re staying in the home long-term, calculate the cost of a second repair. A DIY patch that fails in two years costs you materials and time twice. A professional repair done once lasts through a home sale or beyond.
For rental properties or homes being prepared for sale, durability matters less than immediate appearance. A cosmetic DIY patch that looks good for six months may suffice. For owner-occupied homes, long-term invisibility justifies the extra effort or cost.
The Reality of Texture and Paint Matching
Texture and paint matching is the final barrier to true invisibility. Many DIYers don’t realize their smooth patch on a textured wall screams “band-aid” until the repair is finished and the light hits it wrong.
Identifying Your Wall’s Texture Type
Most homes built after 1980 have some form of wall texture. Common types include:
- Smooth: Flat finish with no texture. Easiest to patch invisibly.
- Orange-peel: Fine spray pattern resembling citrus skin. Common in tract homes.
- Knockdown: Orange-peel texture flattened with a trowel, creating irregular flat spots.
- Popcorn: Thick, bumpy texture applied to ceilings (less common on walls). Often contains asbestos in homes built before 1980.
To identify your texture, run your hand over an undamaged section. Smooth feels flat. Orange-peel has a fine, even grit. Knockdown has raised bumps with flat tops. Popcorn has large, irregular bumps.
Matching texture requires applying the same material and technique. A smooth patch on an orange-peel wall is immediately visible, no matter how well you feather the joint compound.
Equipment and Material Costs for Texture Matching
Texture matching requires additional tools beyond basic patching supplies:
- Spray cans: Pre-mixed texture in aerosol cans ($6 to $10 per can). Works for small patches on orange-peel or knockdown. Requires practice to match spray distance and pattern.
- Hopper gun: Hand-pump sprayer ($30 to $60) for larger areas or popcorn texture. Requires mixing texture compound to the right consistency.
- HVLP sprayer: Electric or air-powered sprayer ($80 to $300) for professional-grade texture application. Steep learning curve.
Many DIYers skip texture matching because the equipment cost exceeds the repair cost or because they underestimate the visibility difference. The result is a structurally sound patch that’s cosmetically obvious.
If your walls are textured and the damage is in a visible location, texture matching becomes non-negotiable for invisibility. That often tips the scales toward professional repair.
DIY Repair Durability: What Actually Holds Up
Not all patches age the same. Durability depends on material choice, technique, and the root cause of the damage. Here’s what actually holds up and what fails within months.
Failure modes to watch for:
- Thin first coats that crack under settling: Lightweight spackle and single-coat joint compound shrink and crack as the house settles or temperature fluctuates. Setting-type compound resists cracking better.
- Improper tape seaming that separates: Mesh tape not fully embedded in compound or paper tape applied without sufficient coverage will separate over time, creating visible ridges or cracks.
- Paint that peels due to poor primer: Skipping primer allows the joint compound to absorb moisture from the paint, causing peeling or flashing.
- Texture that flakes from incorrect application: Spray texture applied too thick or with the wrong material consistency will flake or crack as it dries.
Professional standards address these failure modes through proper sequencing, materials, and technique. Multiple thin coats resist cracking. Tape fully embedded in compound won’t separate. Primer ensures paint adhesion. Texture matched to the existing surface won’t flake.
DIY repairs fail when shortcuts are taken. The patch might look acceptable for weeks or months, but movement, moisture, or temperature changes expose the weaknesses.
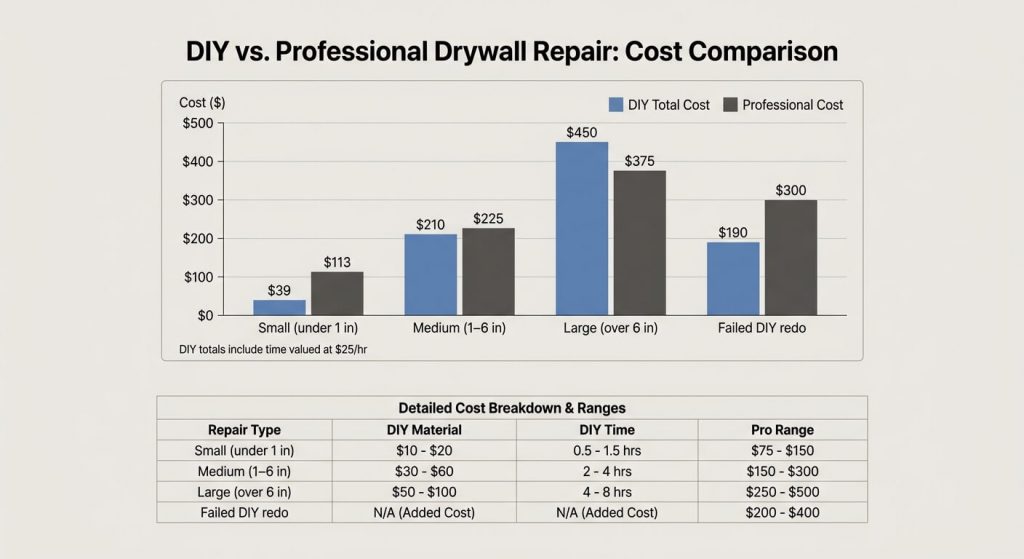
Cost-Benefit Analysis: DIY vs. Professional Repair
Here’s a transparent comparison to guide your decision. Costs include materials, time investment (valued at $25/hour to reflect opportunity cost), and the potential cost to fix a failed DIY repair.
| Repair Type | DIY Material Cost | DIY Time (hours) | Total DIY Cost | Professional Cost |
|---|---|---|---|---|
| Small patch (under 1 inch) | $10 to $30 | 0.5 to 1 | $22 to $55 | $75 to $150 |
| Medium hole (1 to 6 inches) | $40 to $80 | 4 to 8 | $140 to $280 | $150 to $300 |
| Large hole (over 6 inches) | $100 to $200 | 8 to 16 | $300 to $600 | $250 to $500 |
| Failed DIY repair (redo) | +$30 to $50 | +4 to 8 | +$130 to $250 | $200 to $400 |
Observations:
- Small patches strongly favor DIY. Even accounting for time, the cost is under $60 vs. $75 to $150 professional.
- Medium repairs are breakeven. DIY saves money if you have multiple repairs or already own tools. For one hole, professional convenience and guaranteed invisibility may justify the cost.
- Large repairs favor professional work unless you’re confident in cut-and-patch technique and texture matching. The time investment alone often exceeds the professional cost when valued at opportunity cost.
- Failed DIY repairs double the cost. A botched patch requires removal and professional redo, typically adding $200 to $400 to the original DIY investment.
The decision guide: DIY for small holes and multiple repairs. Professional for large holes, textured surfaces, visible locations, or when invisibility is non-negotiable.
The Bottom Line: When to Call a Professional
Small holes are genuinely DIY-friendly. If you’re patient, follow multi-coat discipline, and match texture where needed, medium repairs are achievable. Large holes, textured finishes, ceiling damage, and anything requiring invisibility for a deposit, sale, or peace of mind benefit from professional standards.
The honest threshold isn’t skill alone. It’s whether the time, materials, and risk of visible failure justify the DIY investment. A $30 patch that saves $100 makes sense. A $150 DIY attempt that fails and costs $400 to fix doesn’t.
If the damage is in your living room, above your fireplace, or anywhere guests will notice, professional invisibility is worth the cost. If it’s in your garage, behind furniture, or in a closet, DIY saves money without consequence.
For larger jobs or textured walls, the equipment and technique required often tip the scales. Precision Patch Pros delivers invisible repairs with texture matching and a 5-year guarantee across Southern California. Most jobs are completed in a single visit, minimizing disruption and delivering results that truly disappear.
Ready to skip the guesswork? Text two or three photos and get a quote in 10 minutes. Request your fast quote here.
Frequently Asked Questions
What tools are needed for a small drywall patch?
For holes under one inch, you need lightweight spackle, a small putty knife (two to three inches), fine-grit sandpaper (150 or 220), primer, and touch-up paint. Total cost is under $30 if you don’t already own primer and paint.
How do I repair a large hole in drywall step by step?
Cut out the damaged section, install backing strips behind the opening, cut and fit a new drywall patch, secure with screws, apply mesh or paper tape over seams, apply three thin coats of joint compound feathered wide, sand smooth, prime, and paint. Expect a multi-day timeline for drying cycles.
At what hole size should I stop using a mesh patch and start cutting out and replacing drywall?
Holes over four to six inches typically require cut-and-patch repair. Mesh patches work for smaller holes but lose strength and invisibility at larger sizes. Structural backing and full drywall replacement deliver better durability and appearance for large damage.
How many coats of drywall mud are needed for an invisible patch?
At least three thin coats, feathered eight to twelve inches beyond the patch edges. The first embeds tape and fills the hole. The second widens the feathered area. The third is a skim coat to eliminate ridges. Each coat needs 24 hours to dry before sanding and recoating.
How do I choose between spackle and joint compound for drywall repairs?
Spackle is best for small holes under one inch. It dries fast (30 minutes) and sands easily. Joint compound is stronger and better for medium to large repairs, cracks, and seam taping. Setting-type joint compound resists cracking better than pre-mixed but sets on a timer, requiring faster work.
Can I repair a hole in a textured drywall wall myself?
Yes, but texture matching requires spray equipment and practice. Spray cans work for small areas. Hopper guns or HVLP sprayers are needed for larger sections. If your wall has orange-peel, knockdown, or popcorn texture, a smooth patch will be immediately visible without matching.
How much does a professional drywall patch cost compared to DIY?
Small patches cost $75 to $150 professionally vs. $10 to $30 DIY. Medium holes cost $150 to $300 professionally vs. $40 to $80 in materials but require 4 to 8 hours of work. Large holes cost $250 to $500 professionally vs. $100 to $200+ in materials and tools, plus 8 to 16 hours of time.
What grit sandpaper should I use between coats of drywall compound?
Use 120 to 150 grit for general smoothing between coats. Use 220 grit for final finishing before priming. Avoid heavy grits like 80 or 100, which create deep scratches that show through paint. Sand gently to remove ridges, checking with your hand and under light frequently.